Safety Eyes and Ami Manila
  • Home
  • Blog
  • My Supplies
  • Yarn Travels
  • Gallery
    • Amigurumi
    • Baby Booties
    • Christmas Decor
    • Star Wars Series
    • Zodiac Kitty Series
  • Safety Eyes
  • Contact Us

My Version of Hobbes!

9/10/2013

6 Comments

 
Crochet Hobbes
After months of scribbling and counting stitches on my notebook, I finally decided to "formalize" one of my patterns and share it here as a free pdf download. Sometime in July, I received an inquiry / order for a Hobbes doll.  The email said "Would love to have one made for the baby I'm about to have."  How could I say no?  But I had never made one before so I searched for photos online and decided to take on the challenge!

It took about 5 re-dos before I got the proportions about right.   At the request of the client, I sewed a smile on instead of Hobbes’ naturally sad mouth.
Download Hobbes Pattern
Bill Watterson, creator of Calvin and Hobbes refused to merchandise his creations by displaying images of Calvin and Hobbes on commercially sold items.  As such, I am sharing my pattern freely.   Please feel free to share this pattern with others but please don't forget to link back to this site.  
Please do not copy and sell this pattern.  Thank you.
A FEW TIPS BEFORE YOU START:
Because this doll is striped and I needed the color changes to line up, I joined the rounds as opposed to crocheting in continuous rounds.  

For all R1s:  Join the end of the 1st round with a sl st into the 1st st and then ch 1
R2 onwards: Skip last st and joined the with a sl st in the ch 1 of the previous round.

You can refer to myMinion Tutorial for more details on this technique.
Picture
CHANGING COLORS:
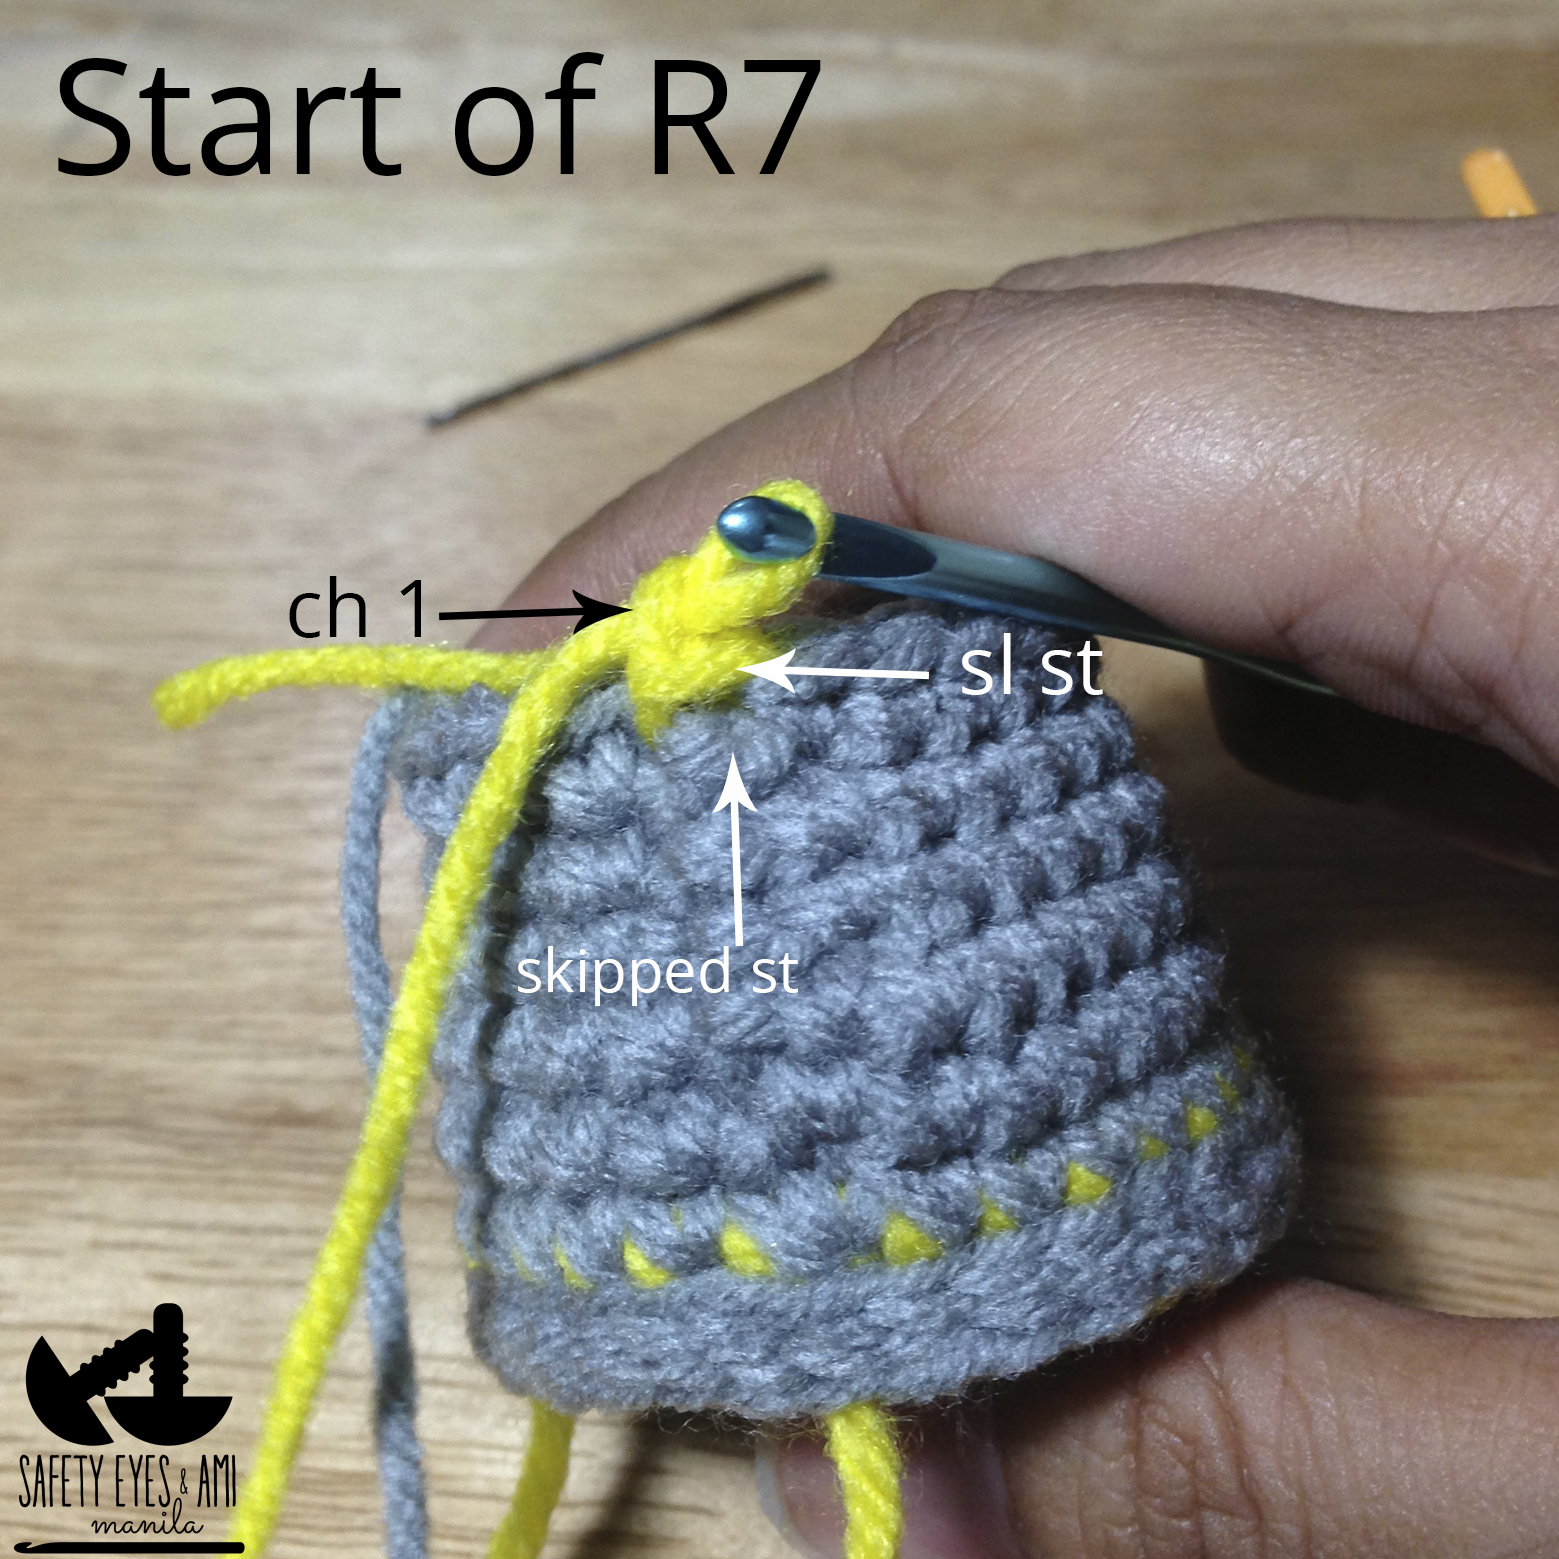
If changing colors within a round, switch your yarn color before you complete the last sc.
If changing color at the end of the round, switch yarns before you sl st in the ch 1 of the previous round and then ch 1 with the new color.
Picture
Switch colors before completing the last sc
Picture
Ch 1 and mark
Picture
Skip the last st and sl st in ch 1 of previous round
Picture
At the end of the row, skip last st and sl st in ch 1 of the previous round
Picture
And sl st with new color

Picture
Ch 1 and mark
6 Comments

My 2-Eyed Minion Step by Step Tutorial

8/5/2013

50 Comments

 
Despicable Me Crochet Minion
I made this Minion based on a pattern designed by Stephanie Lau which appears on her blog AllAboutAmi.  She also has step by step instructions and photos but I made a few variations in the:
Despicable Me Crochet Minion
BIB
Despicable Me Crochet Minion
BUM SEAM
Despicable Me Crochet Minion
BOOTS & LEGS
Despicable Me Crochet Minion
and TROUSERS
As Stephanie has generously shared her pattern, I would also like to share my tutorial here:)
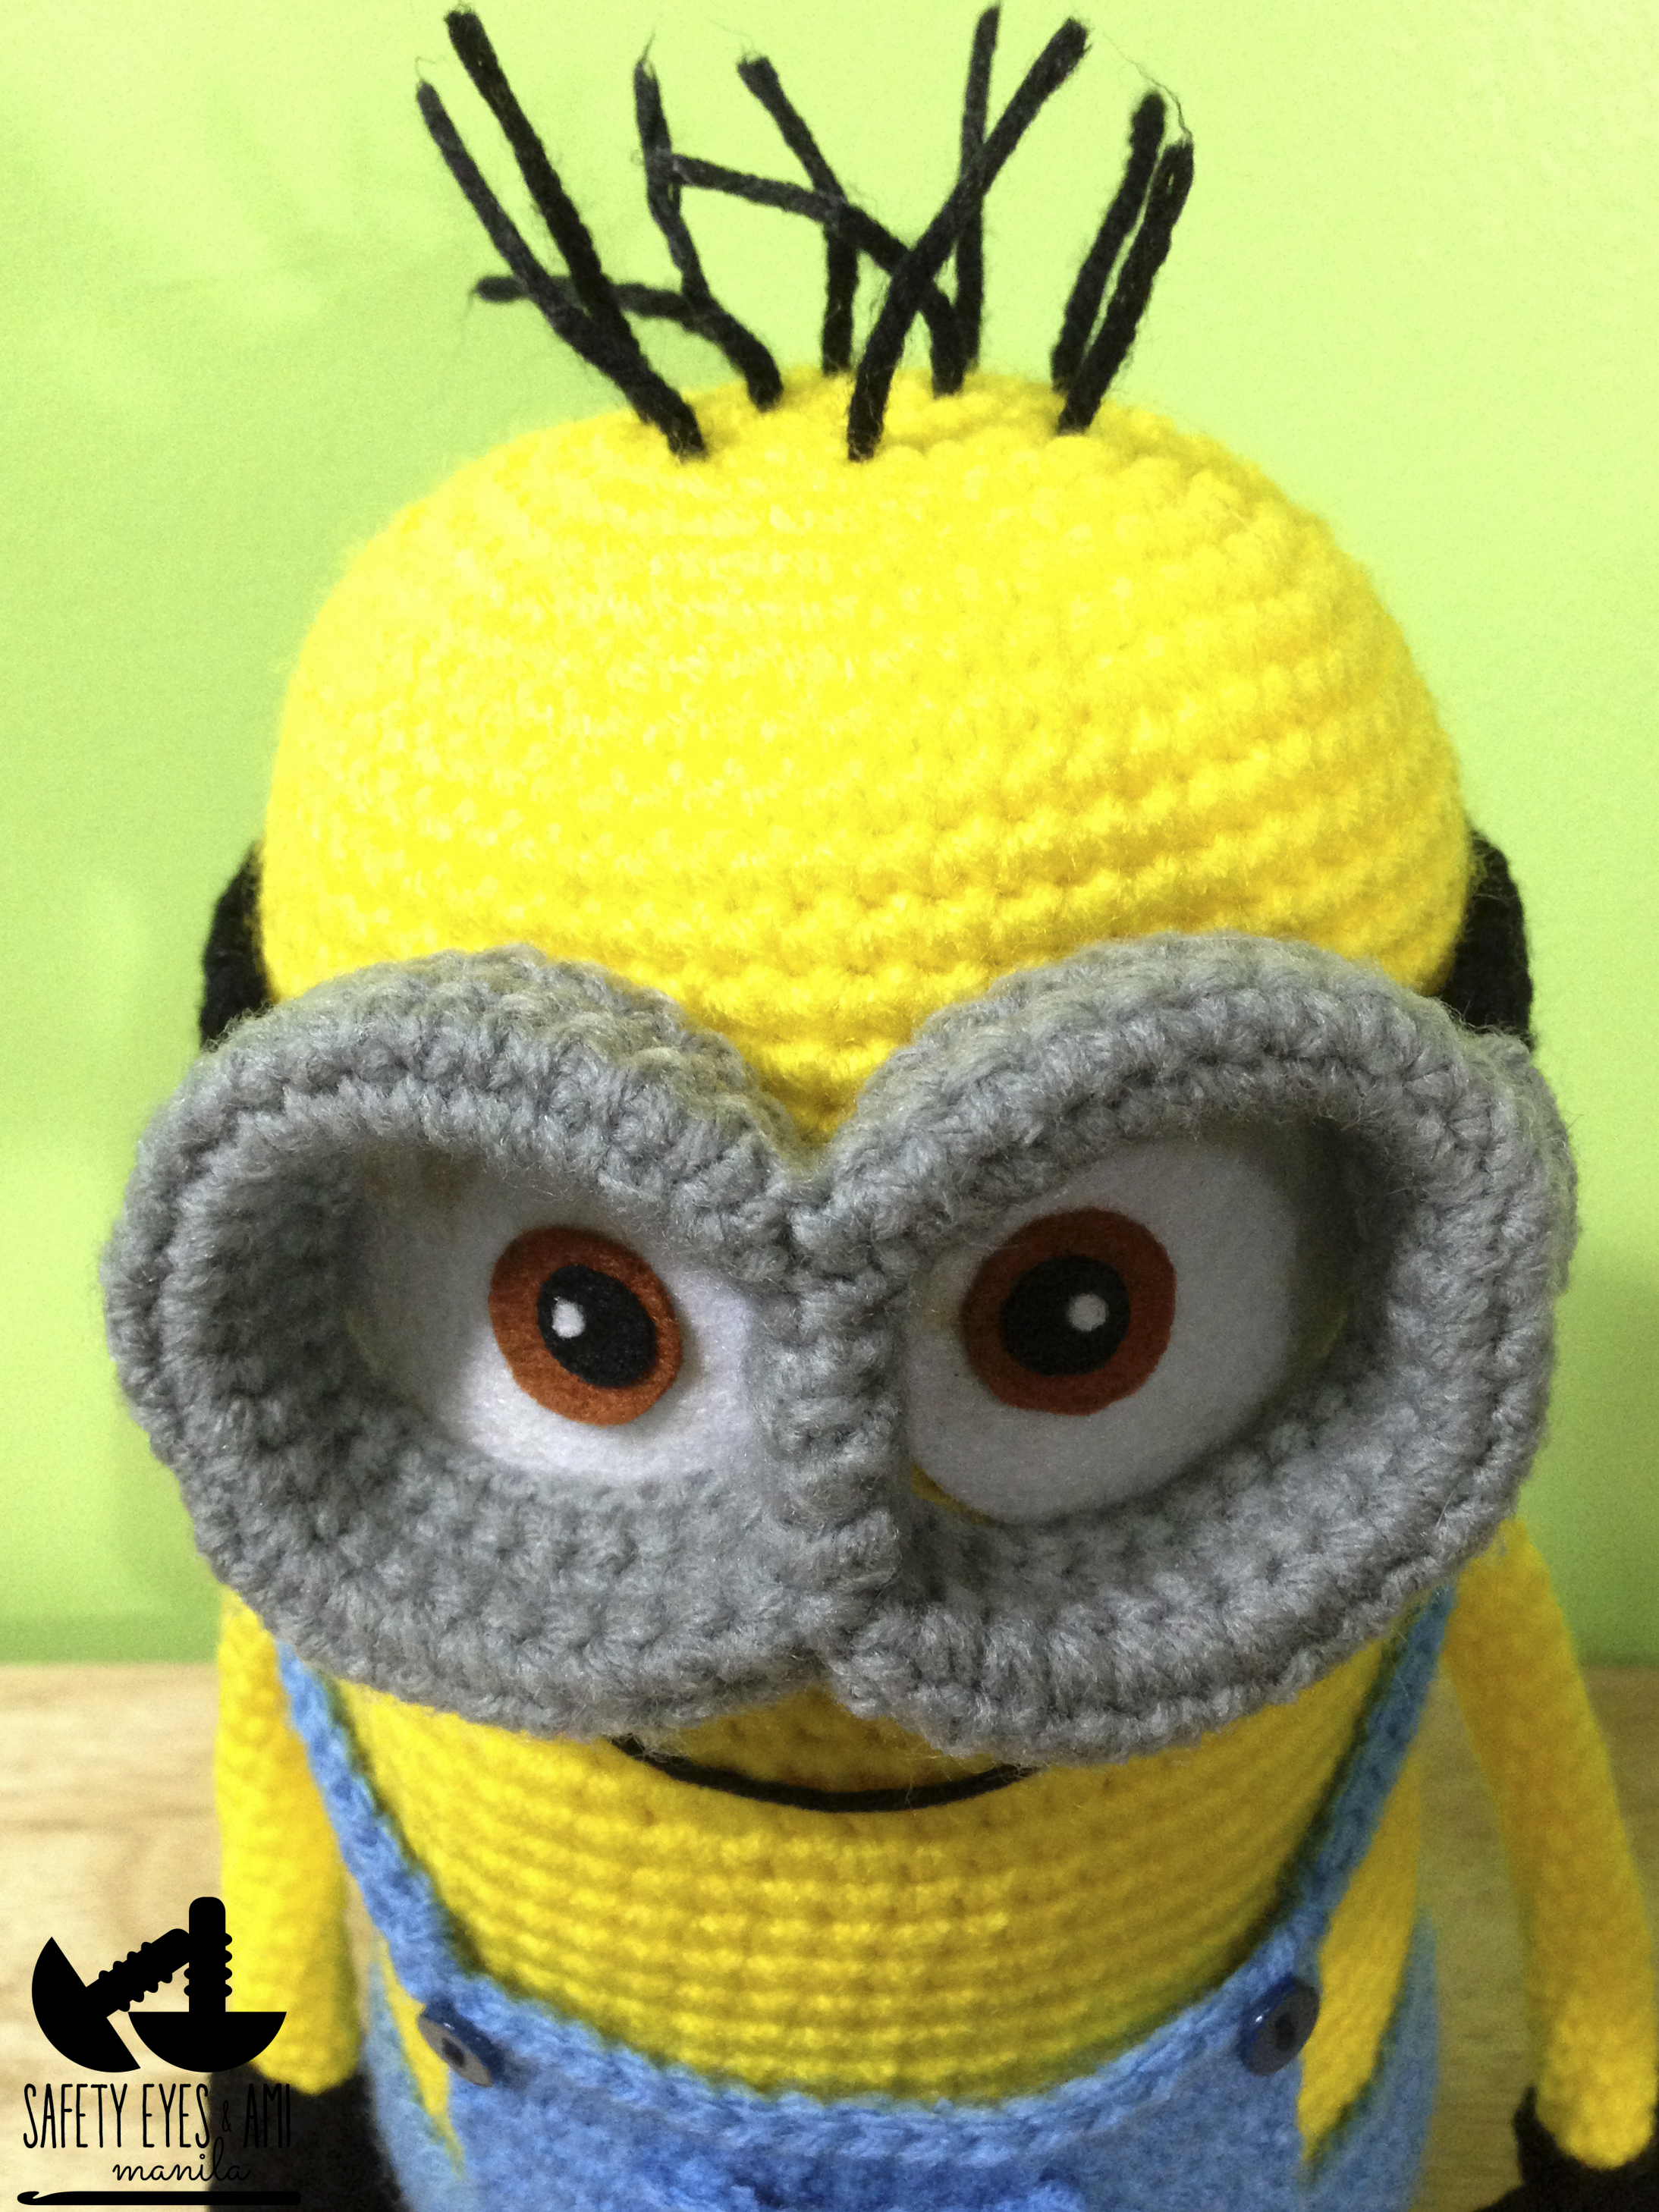
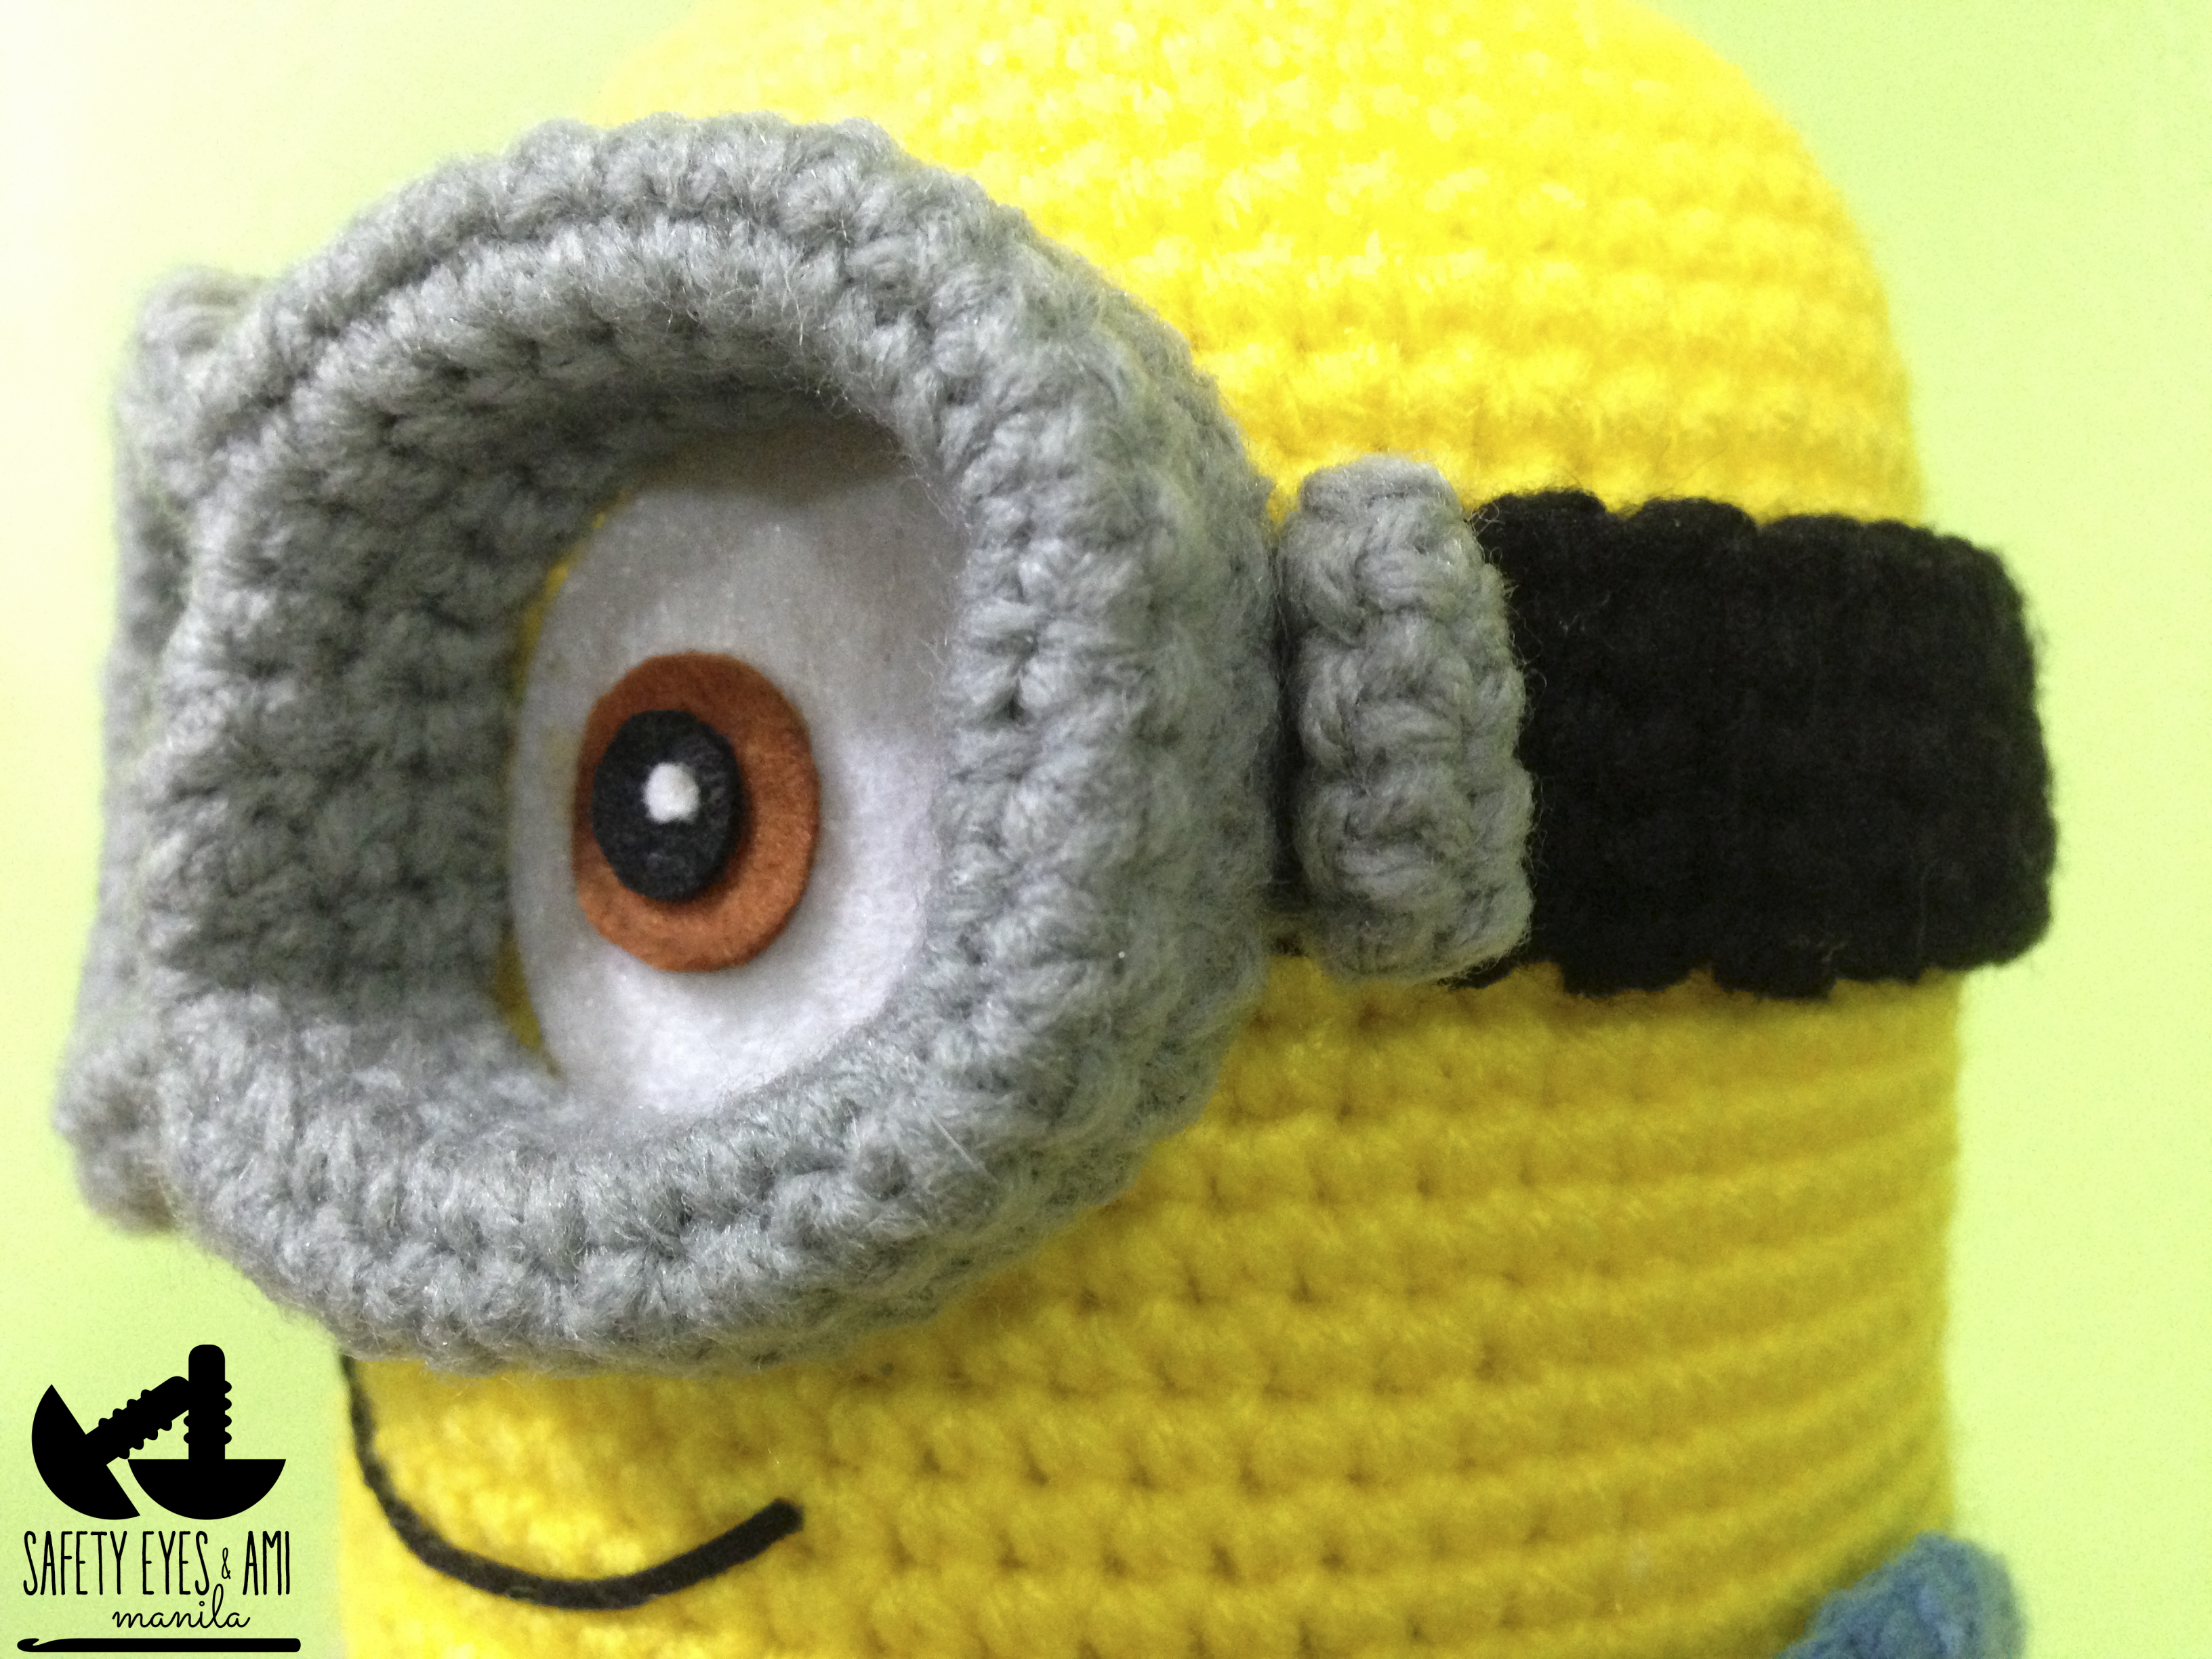
HEAD, BODY & GOGGLES
I followed Stephanie's pattern from R1 to R9 to increase to 63 st.  Because I wanted a shorter Minion, I sc'd around only 'til row 50 and started to decrease from there.  You can keep crocheting 'til you reach your desired height knowing it takes 7 rows to decrease and close.  Don't forget to put the hair in before you stuff and close.
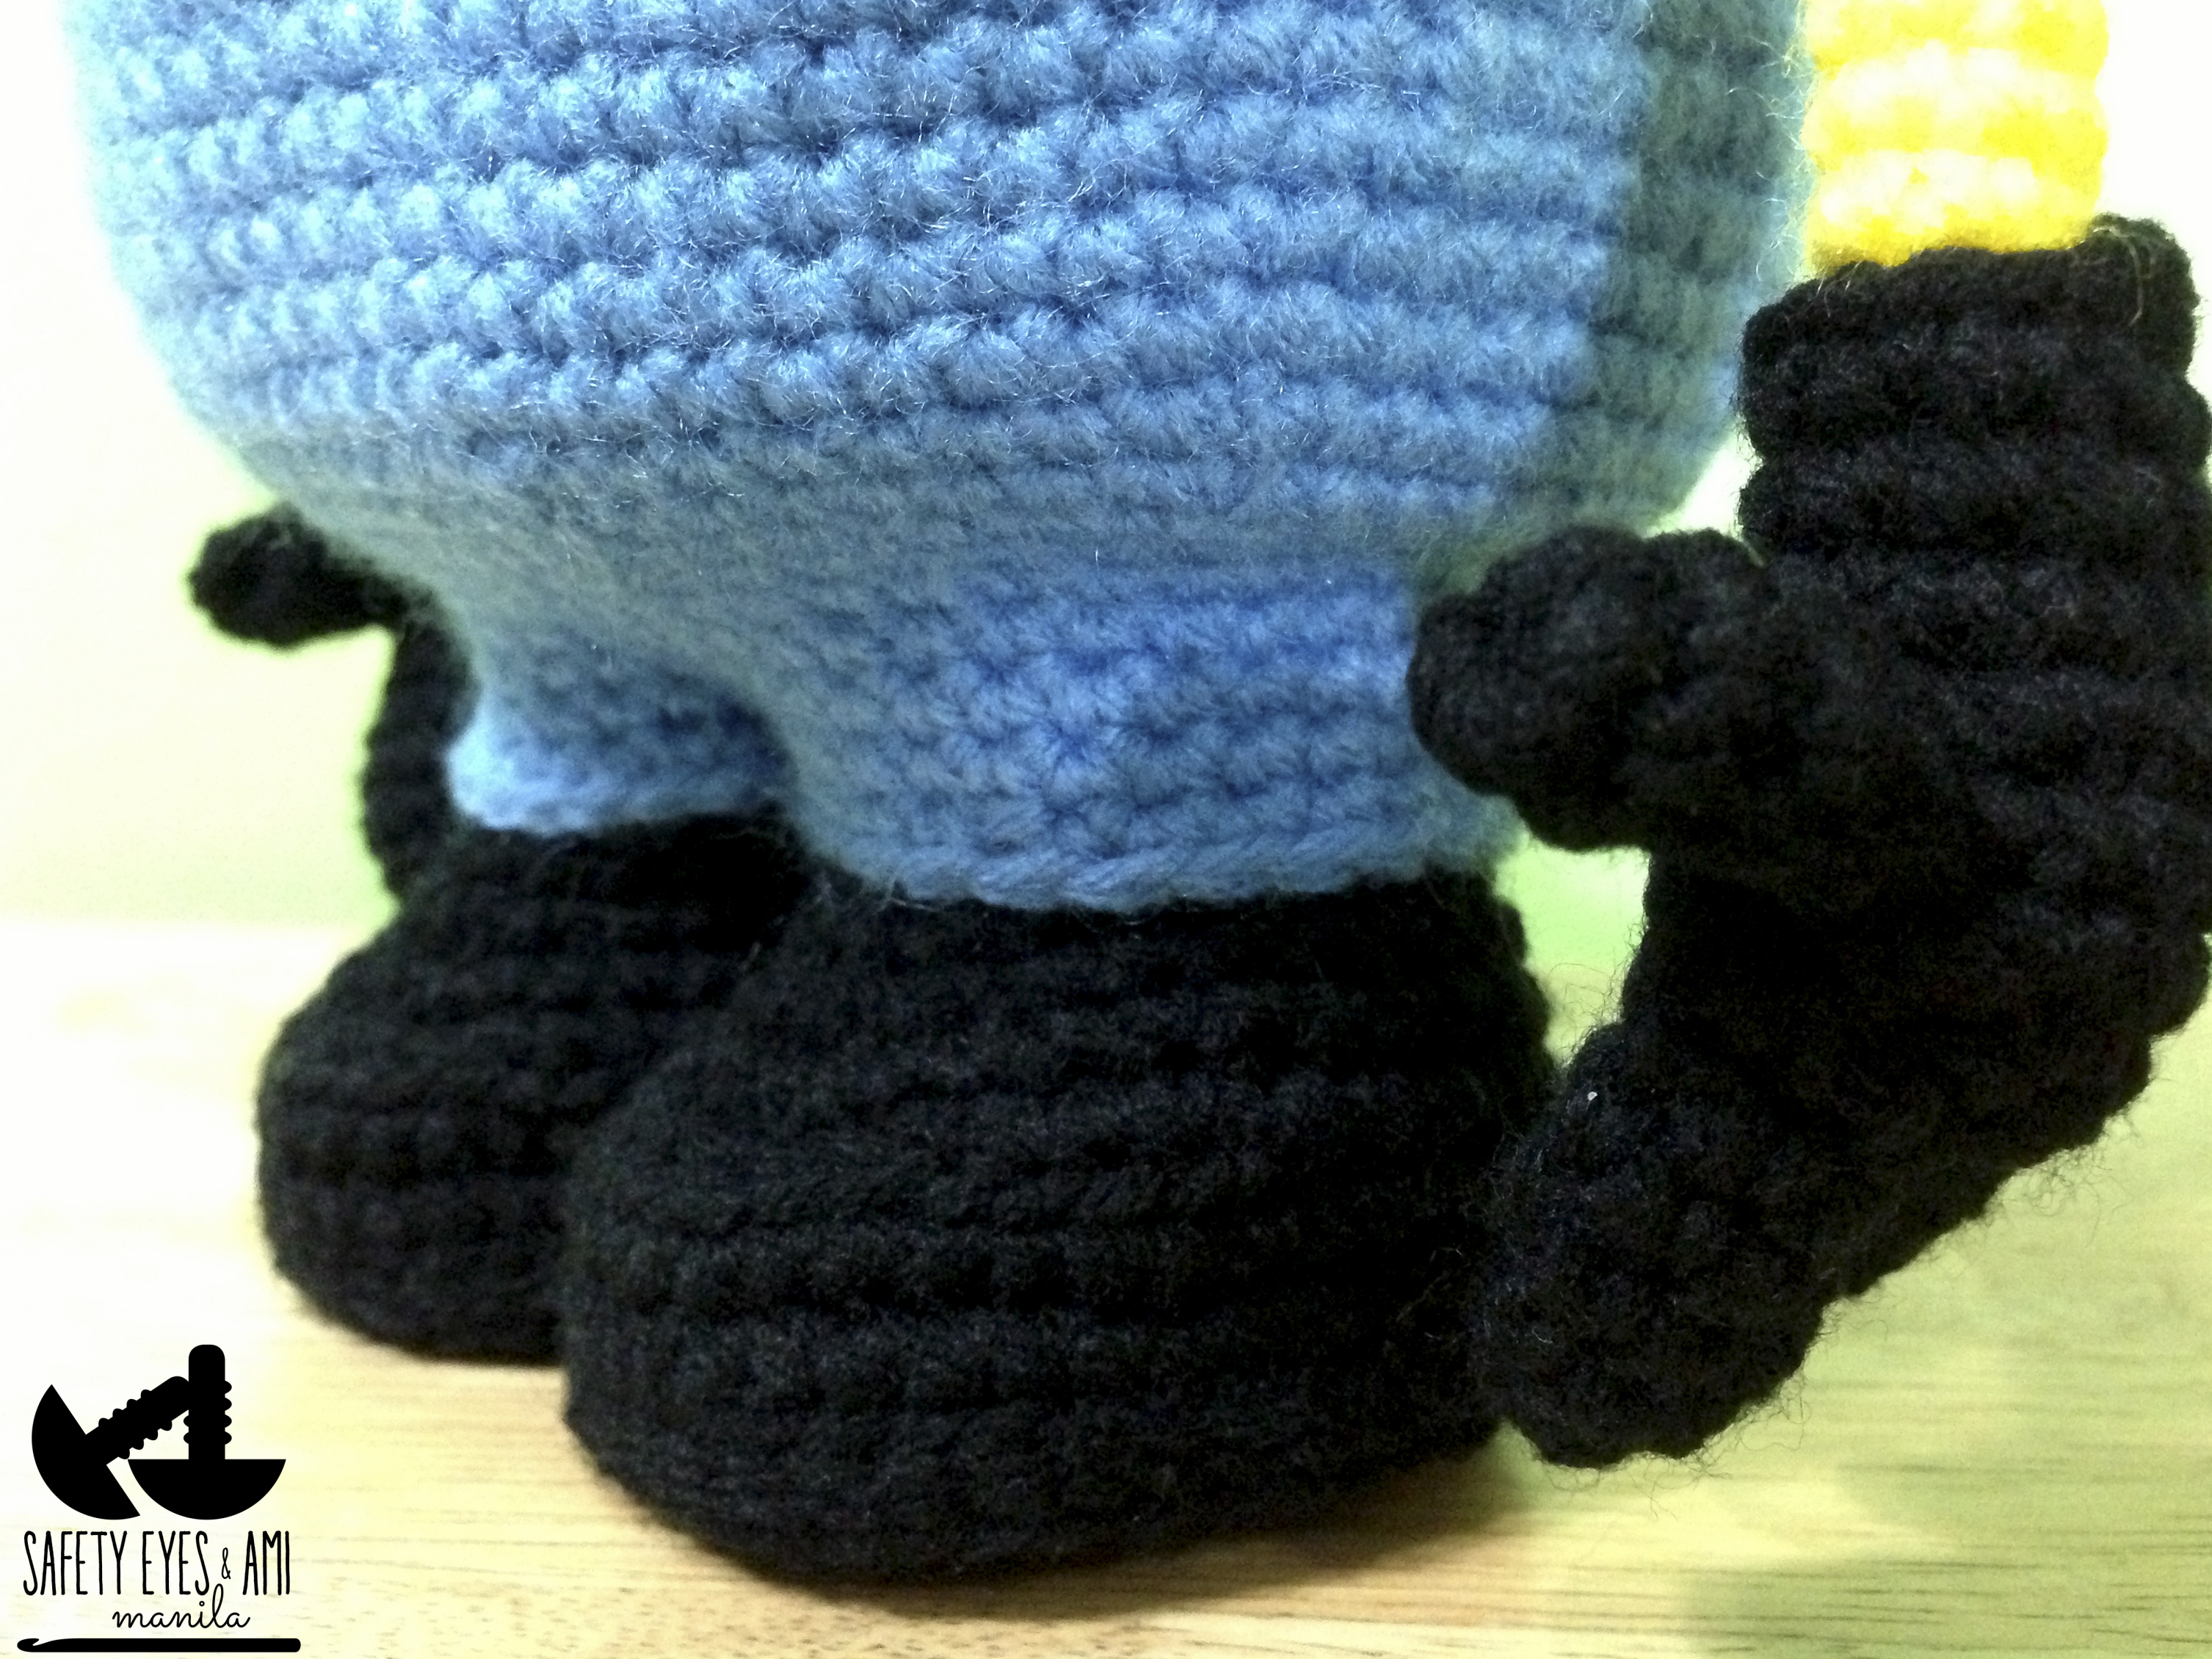
Despicable Me Crochet Minion
I put glue on the tips of the Minion's hair to stop the yarn fraying.  Before finishing the body, I made the goggles so I could put them on to gauge how tall I wanted the Minion to be, where to put his smile and where his arms and trousers should start.  I followed the original pattern for the goggles but added 1 row to the side details to make them easier to fold and sew on.  I also inserted some craft wire in the goggles so they would keep their shape, making sure I stuffed the body just enough for a snug fit so I don't stretch the goggles out of shape.  Stephanie's pattern for the goggles is brilliant!
Despicable Me Crochet Minion
BOOTS & LEGS
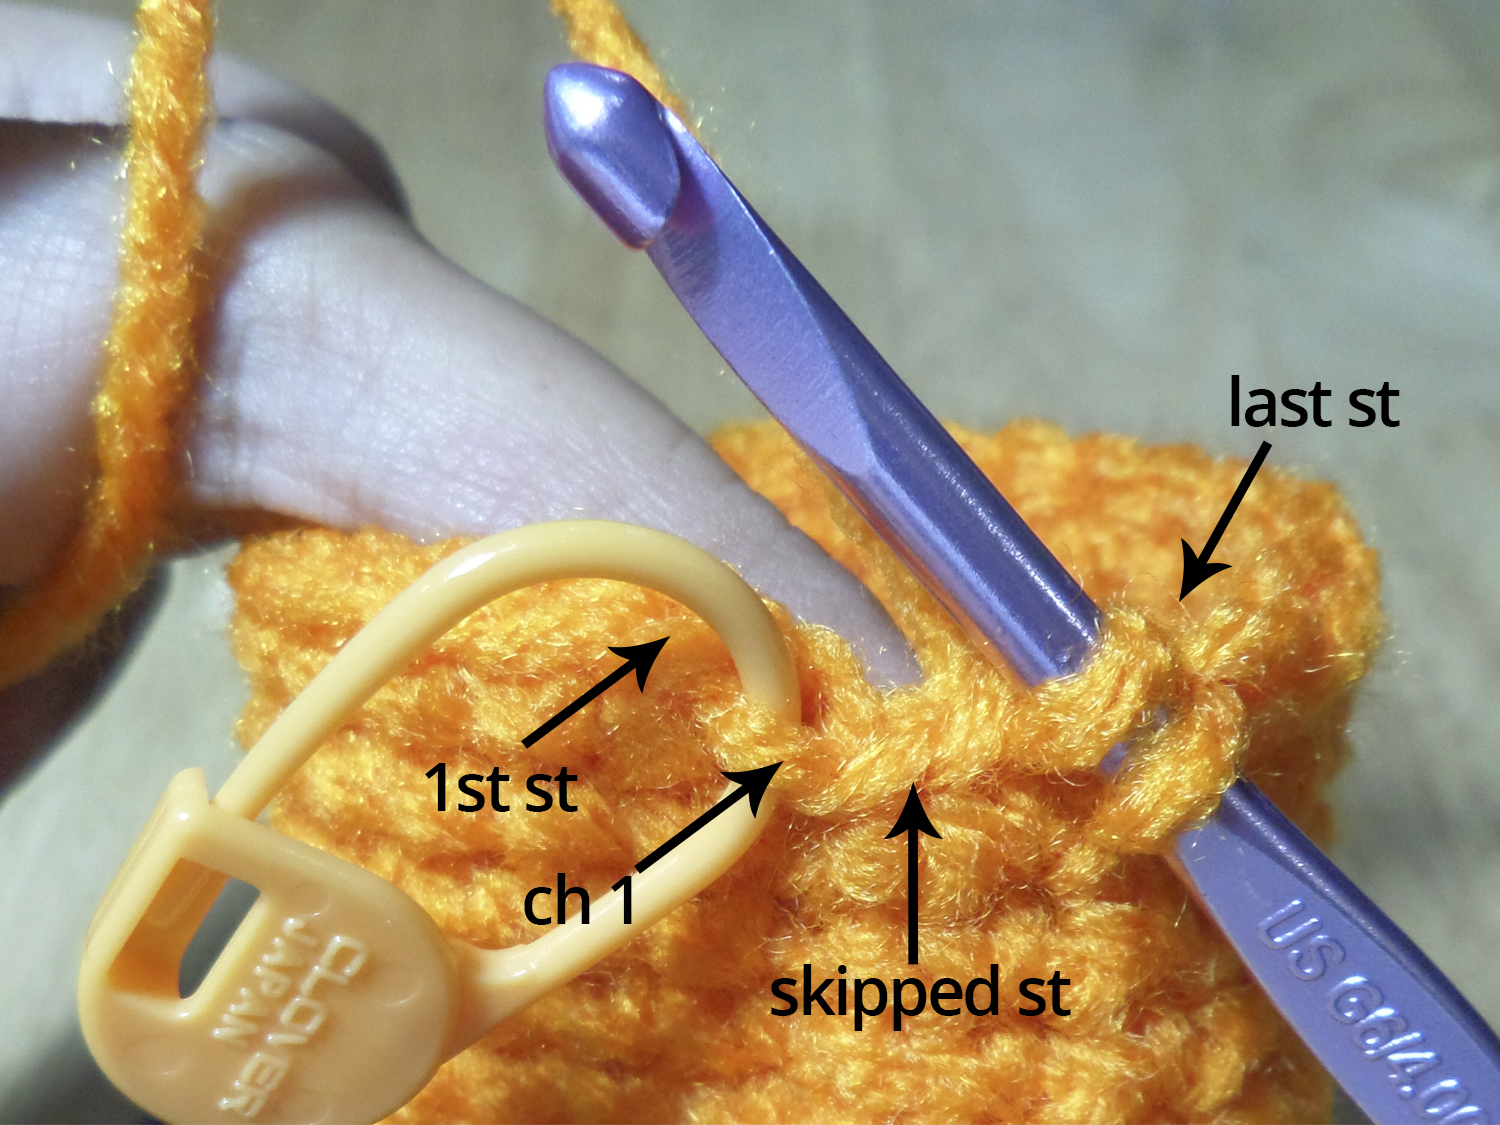
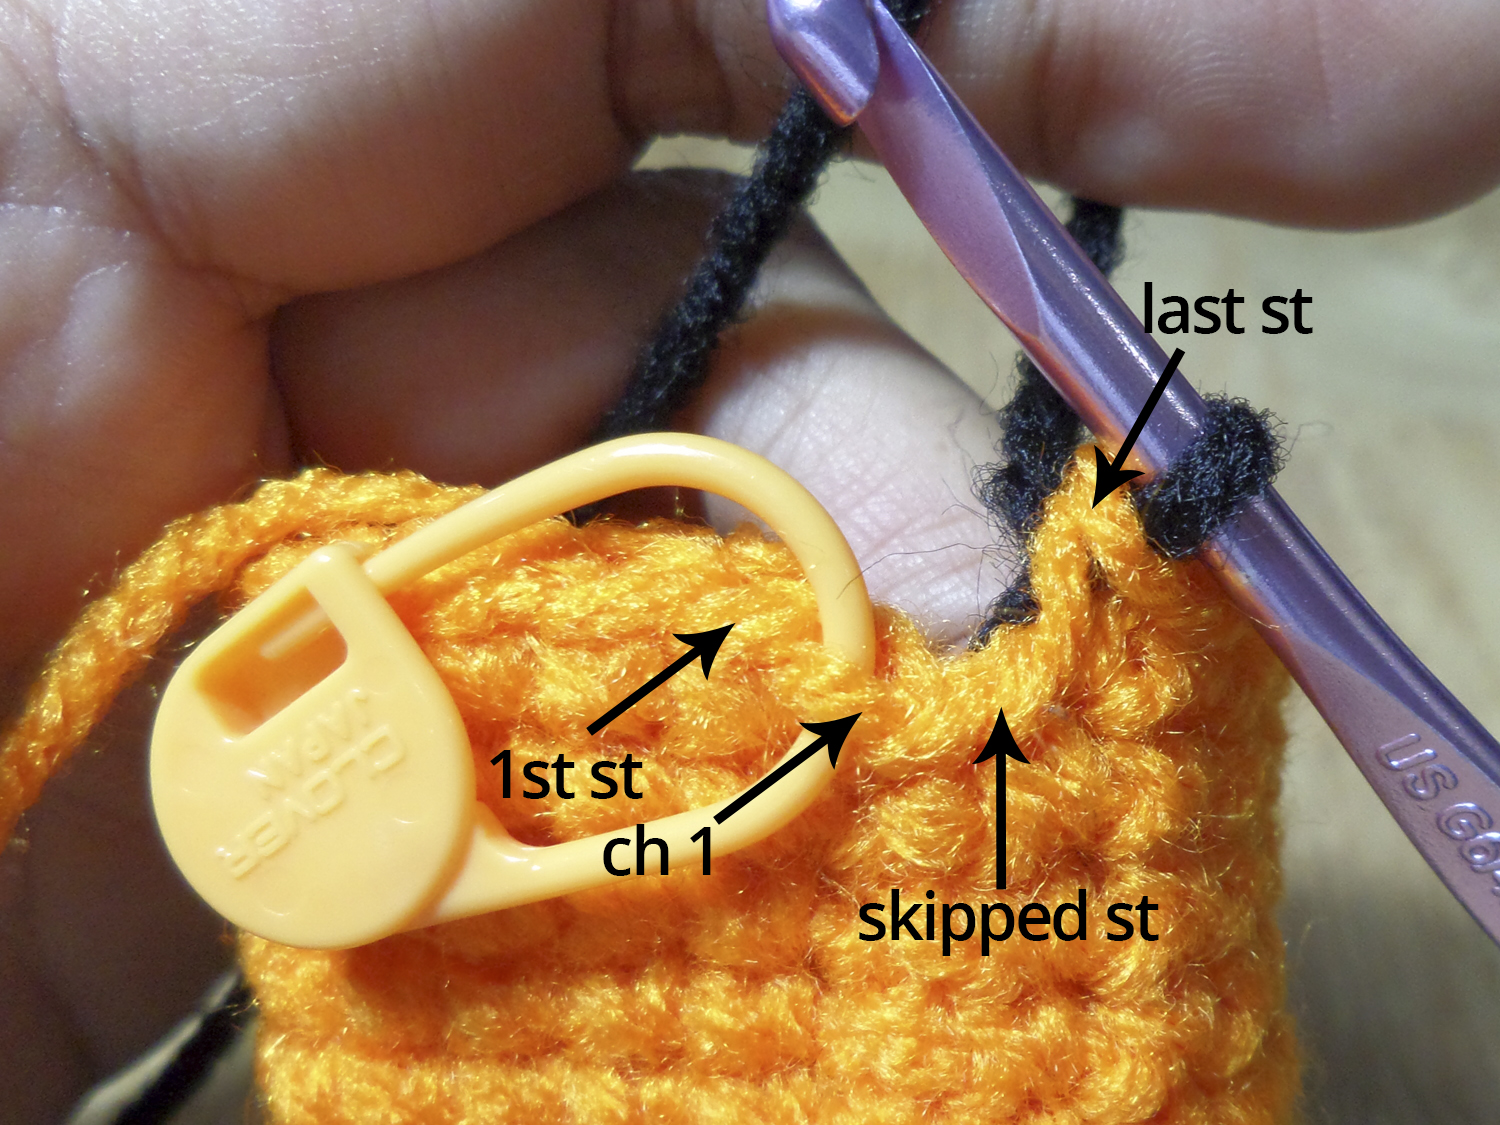
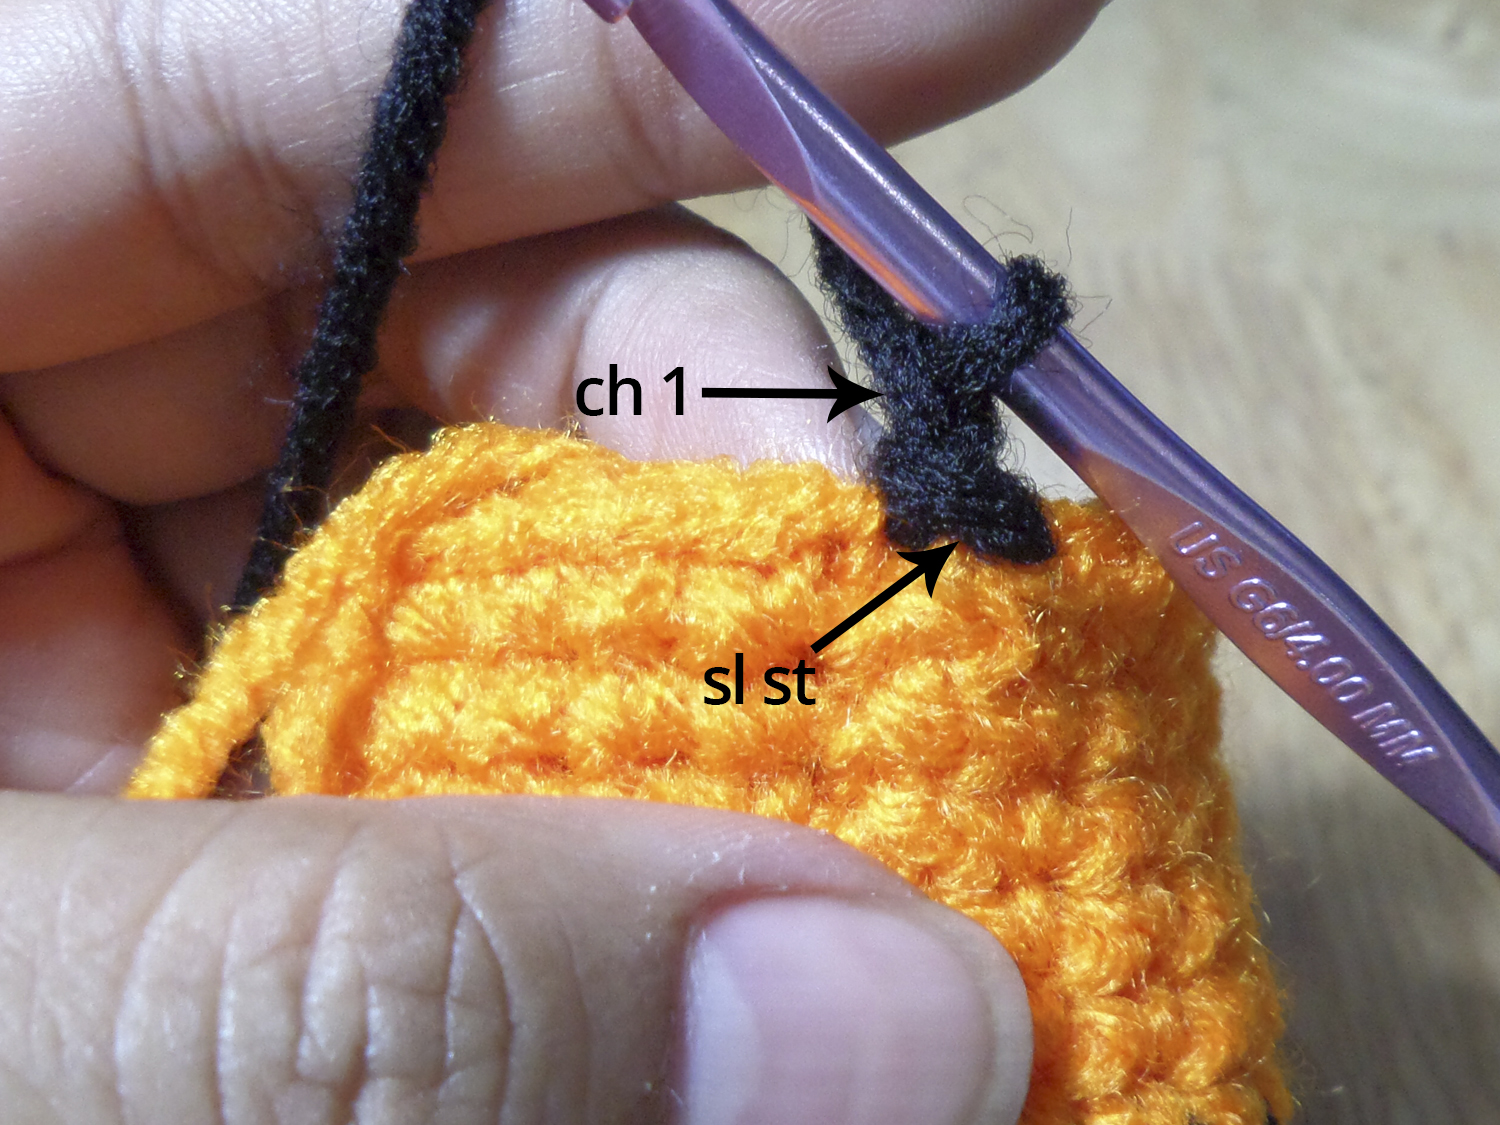
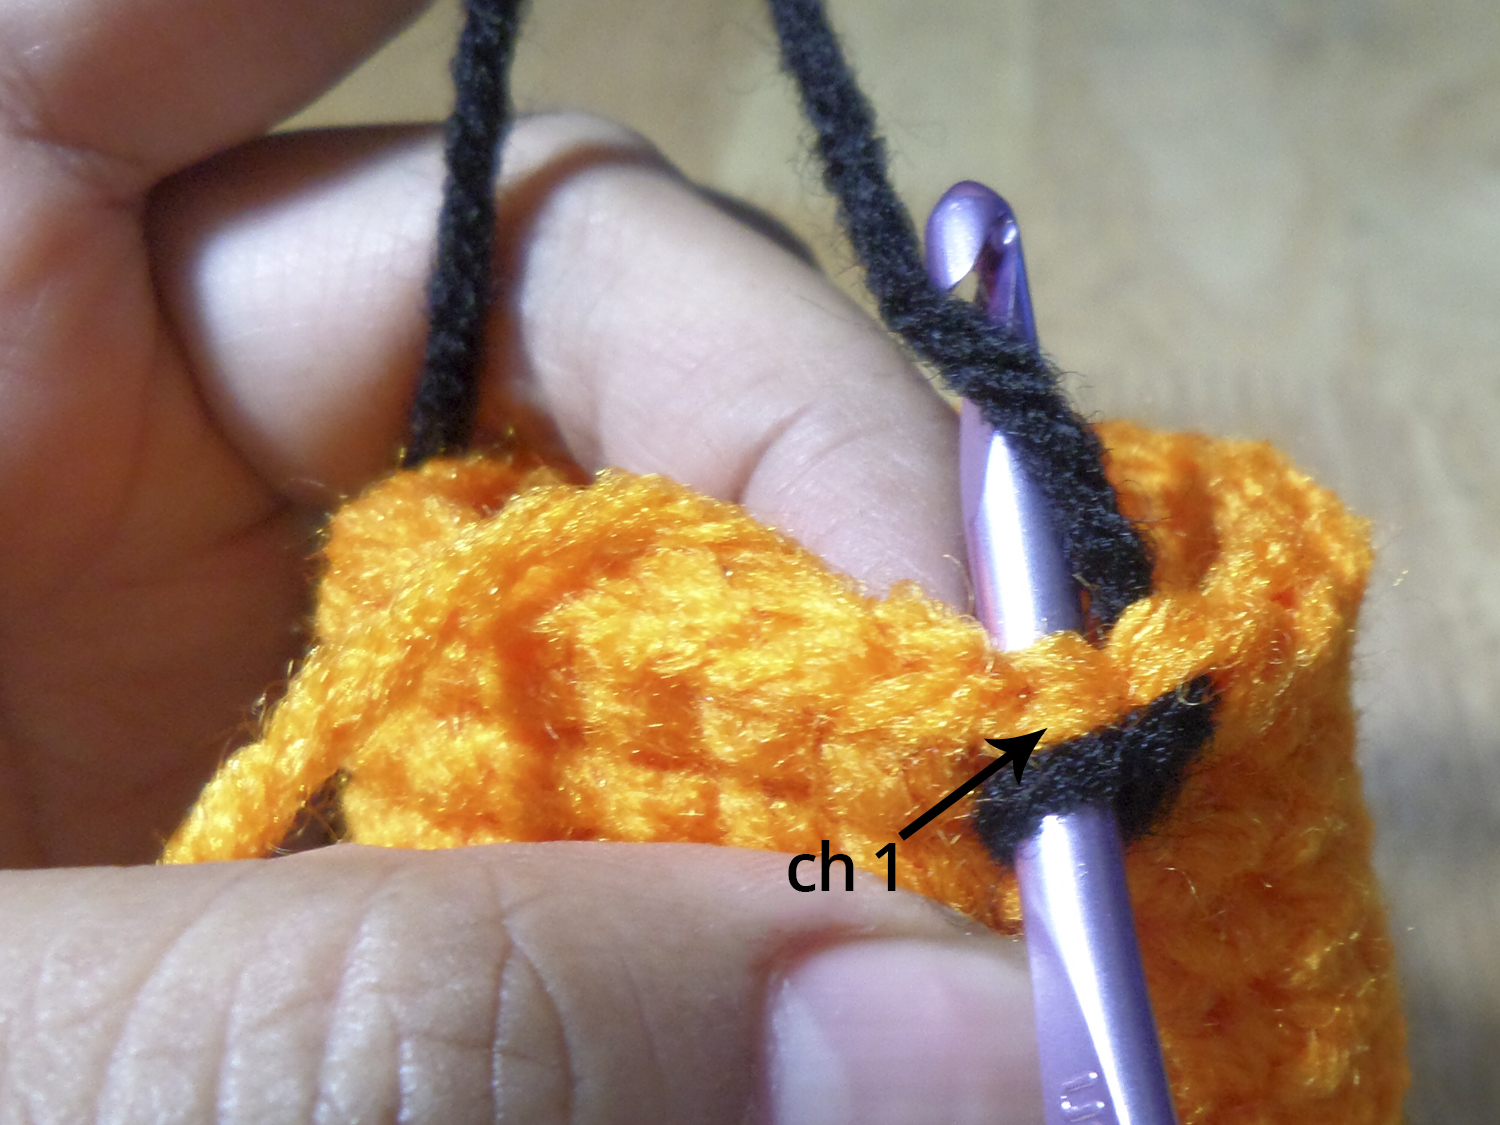
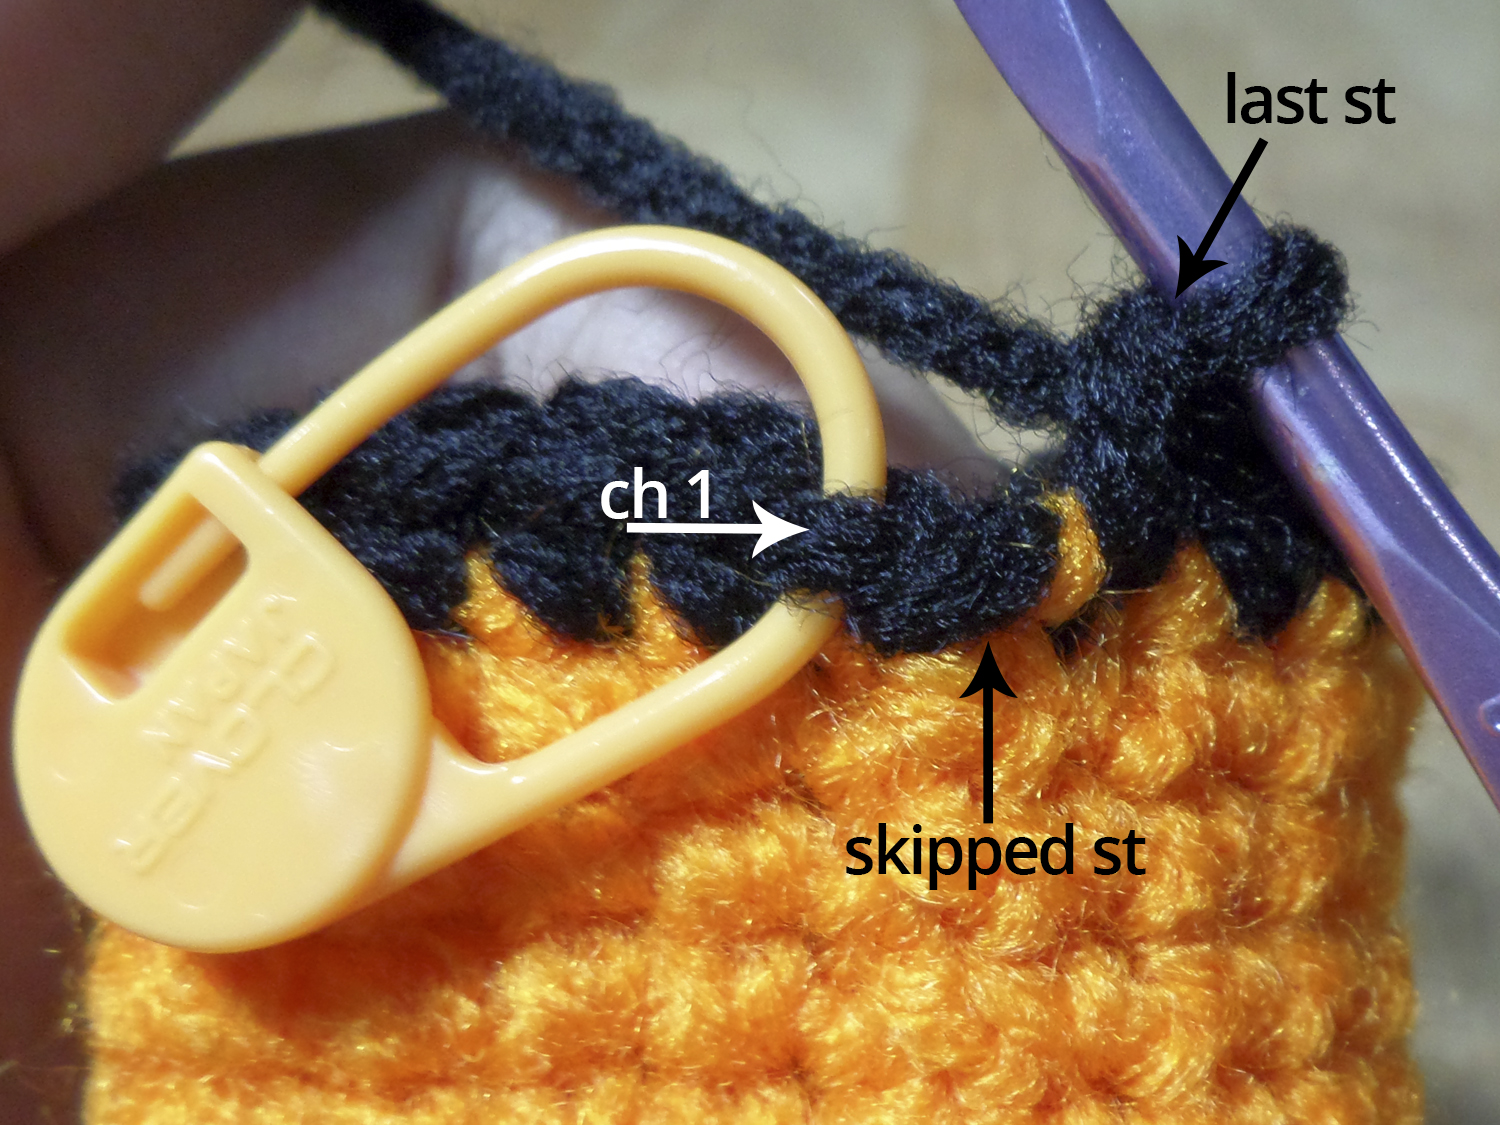
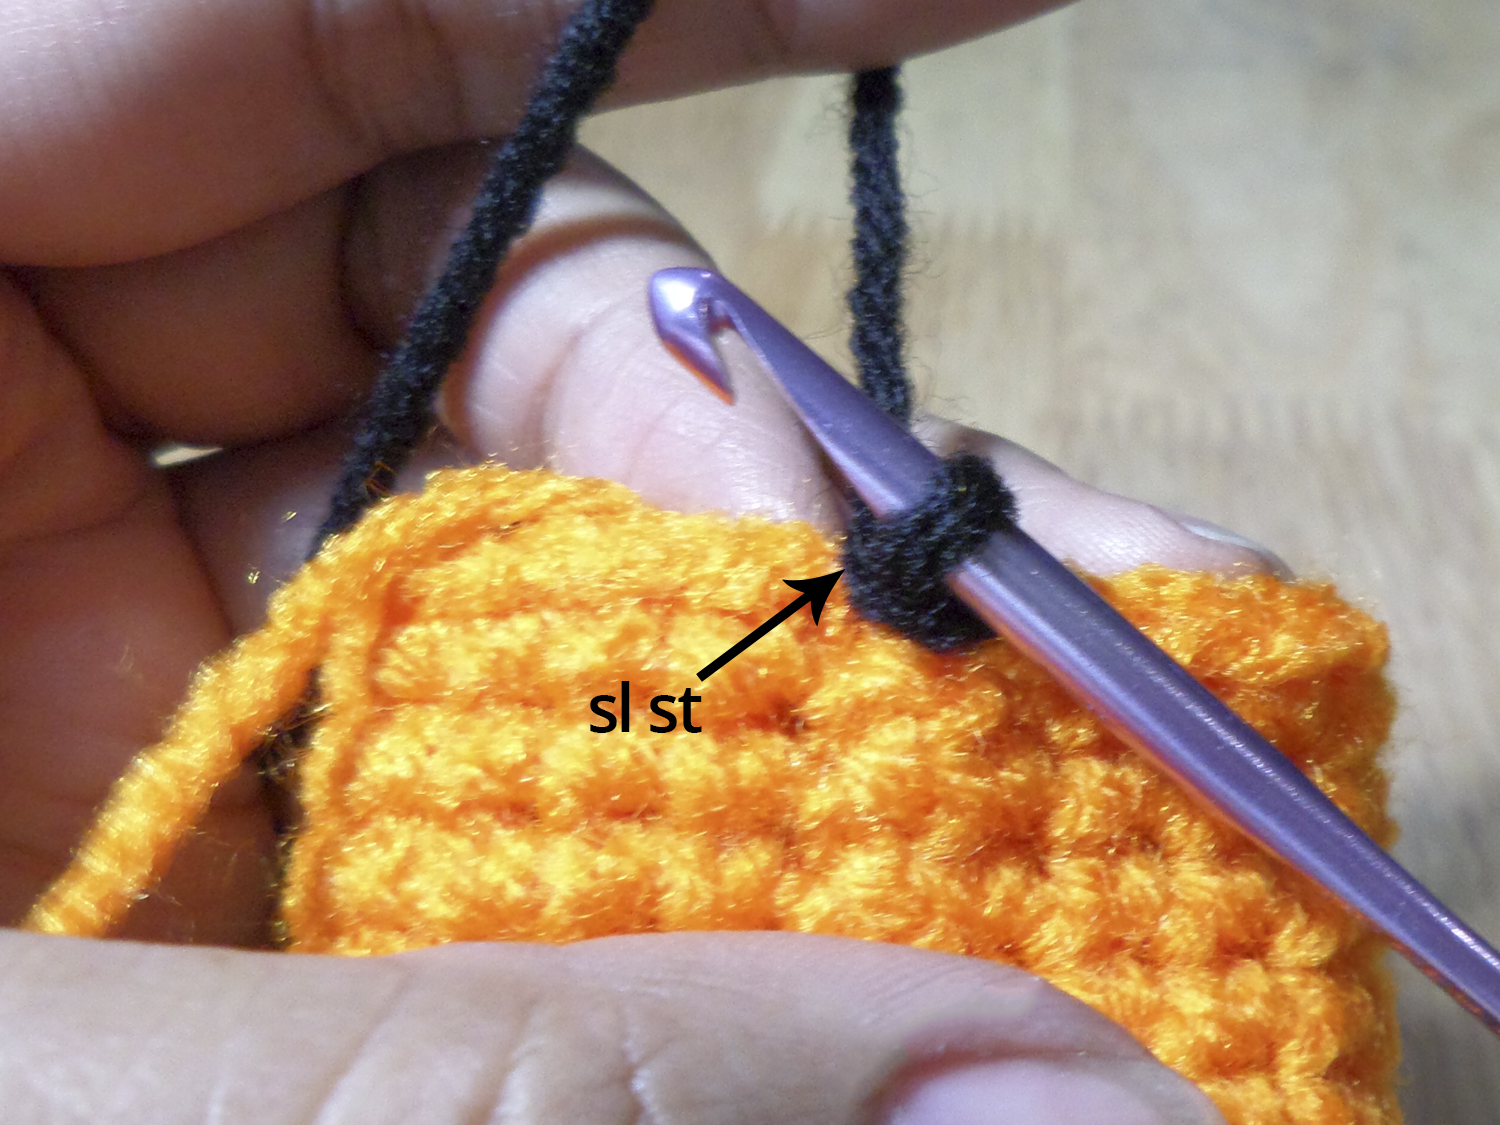
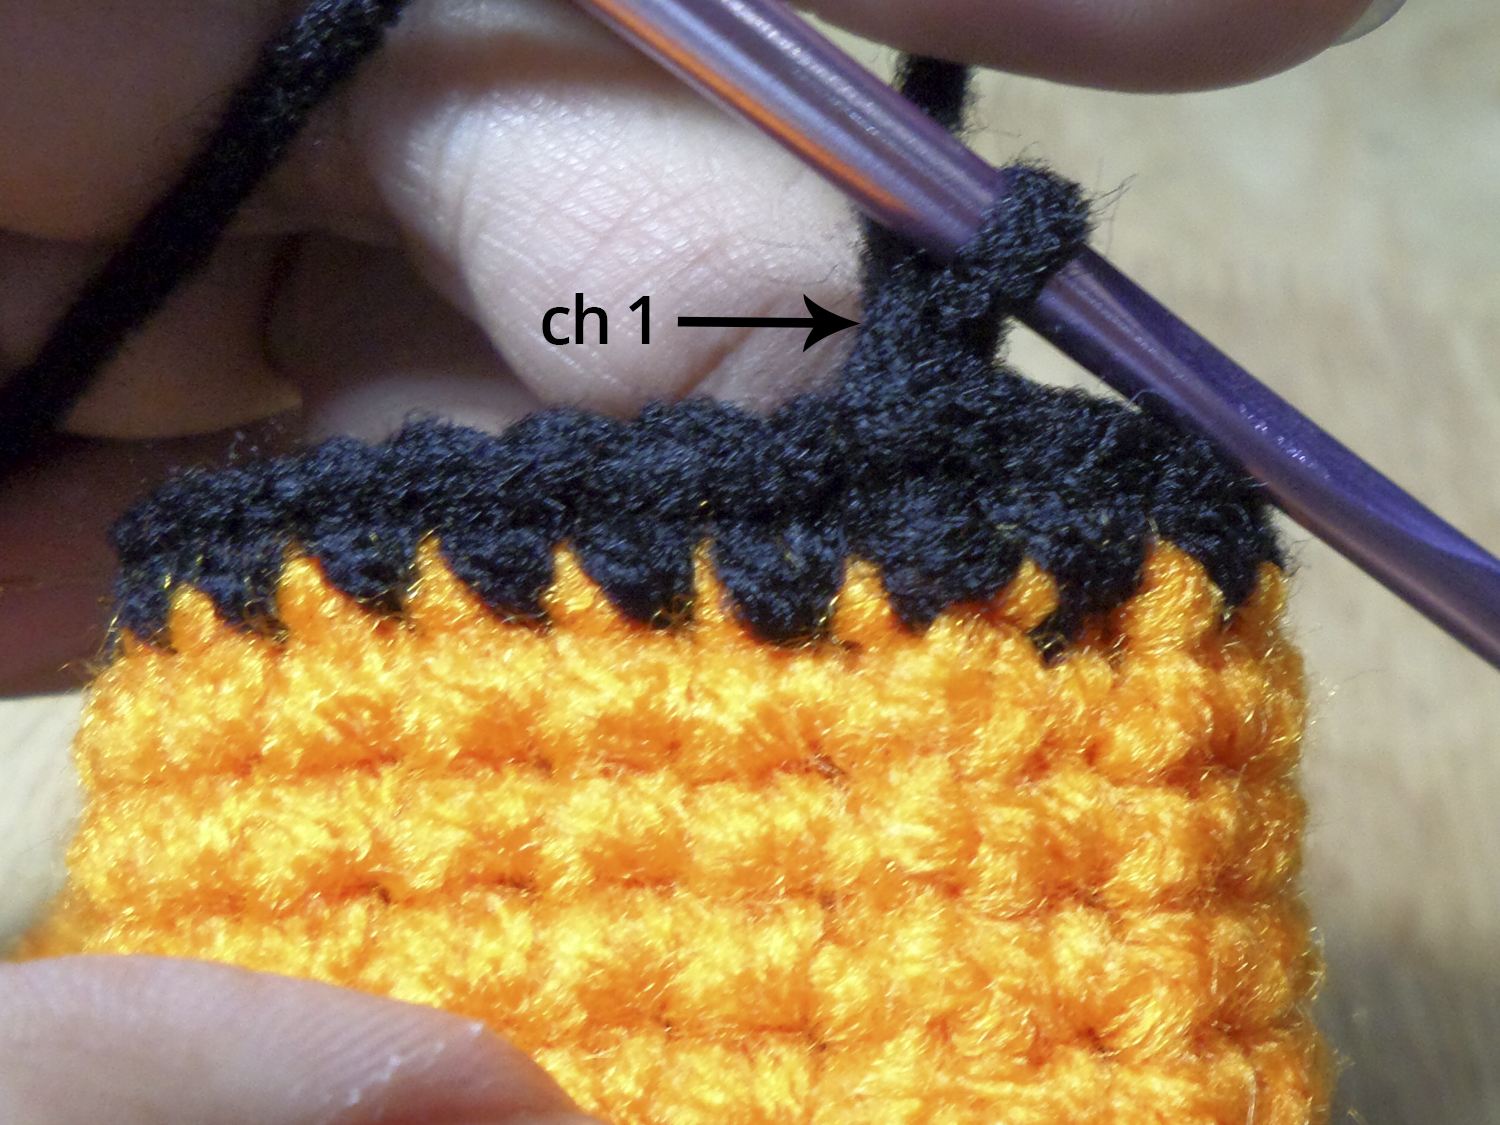
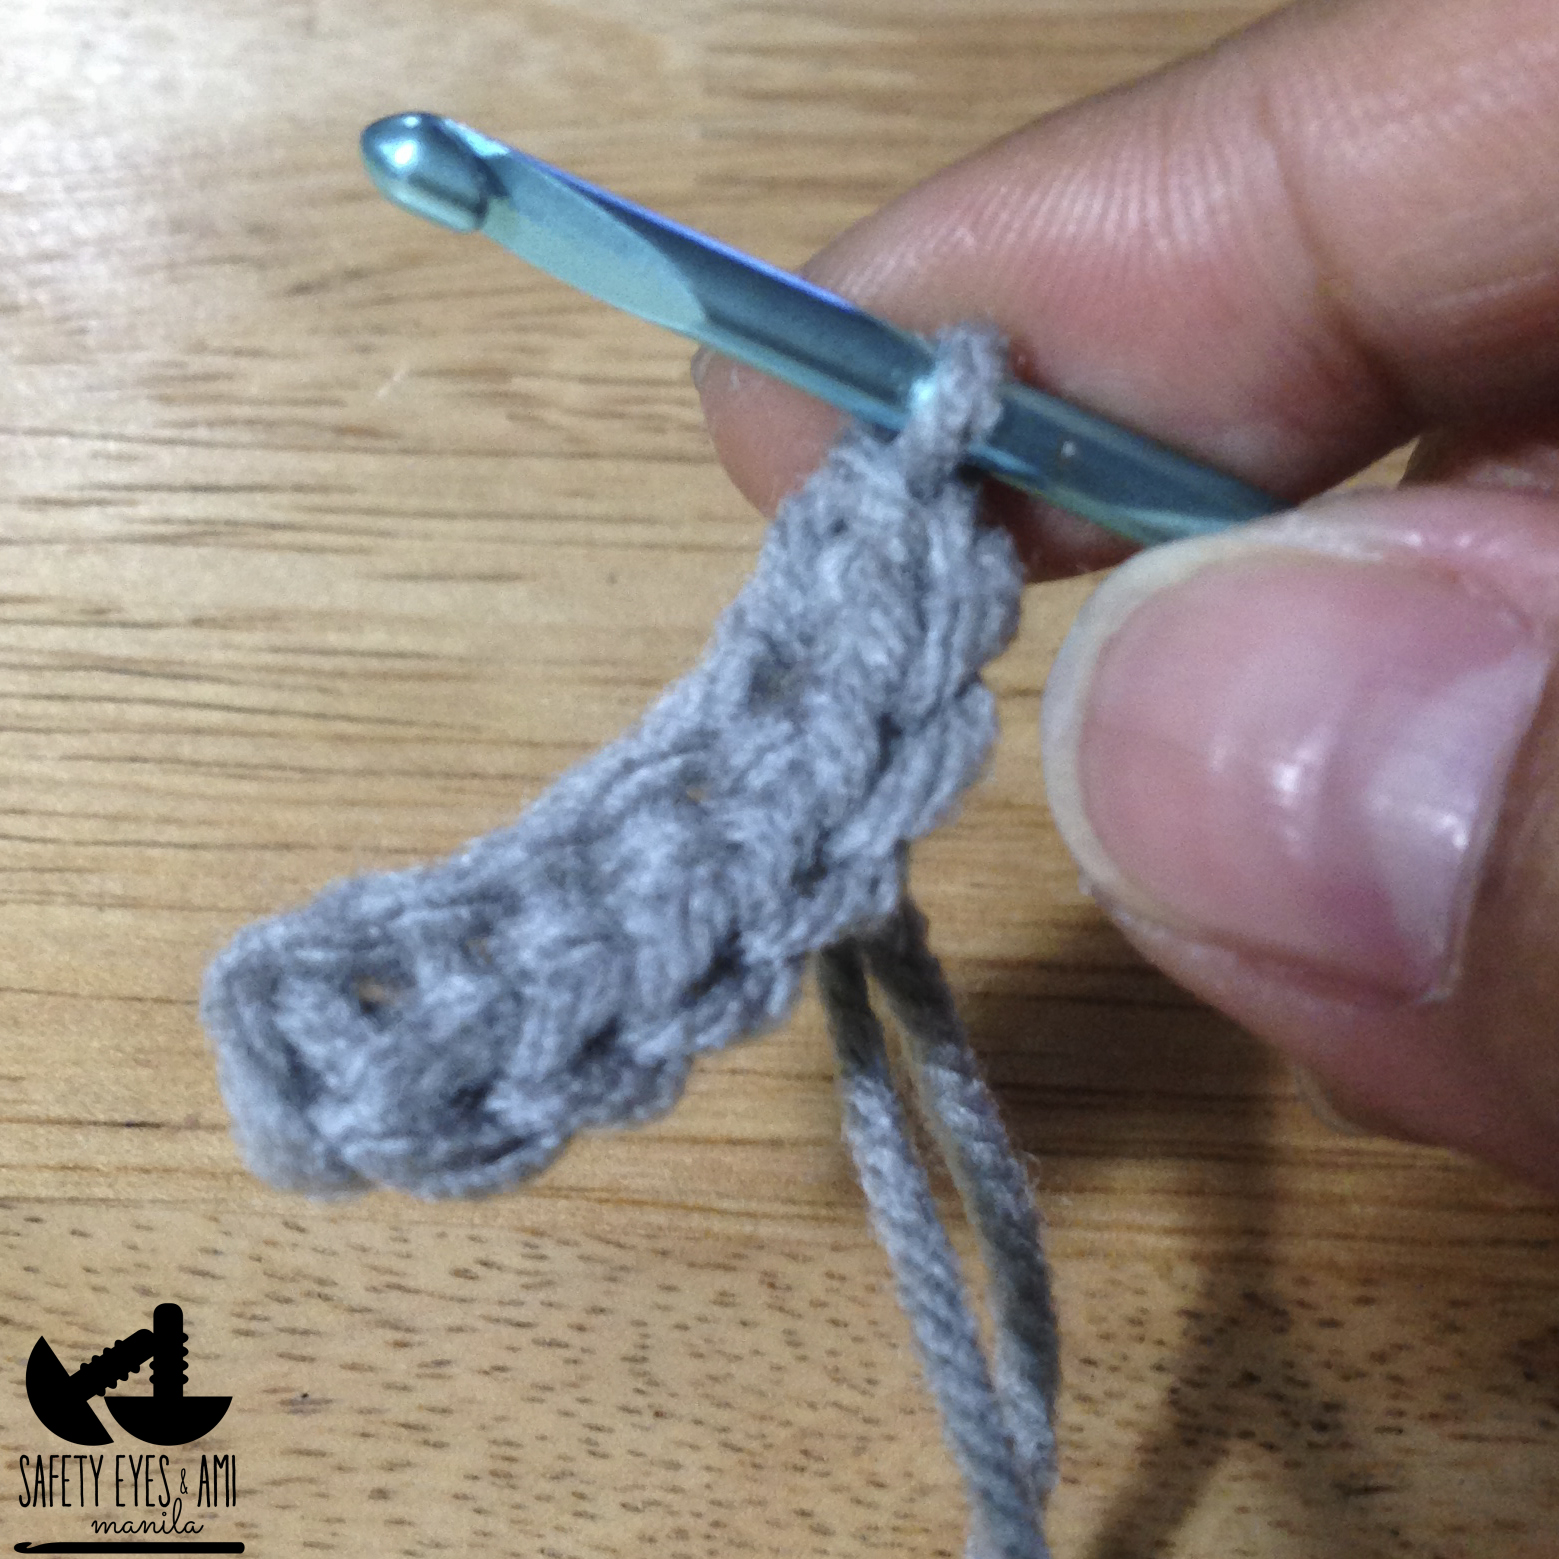
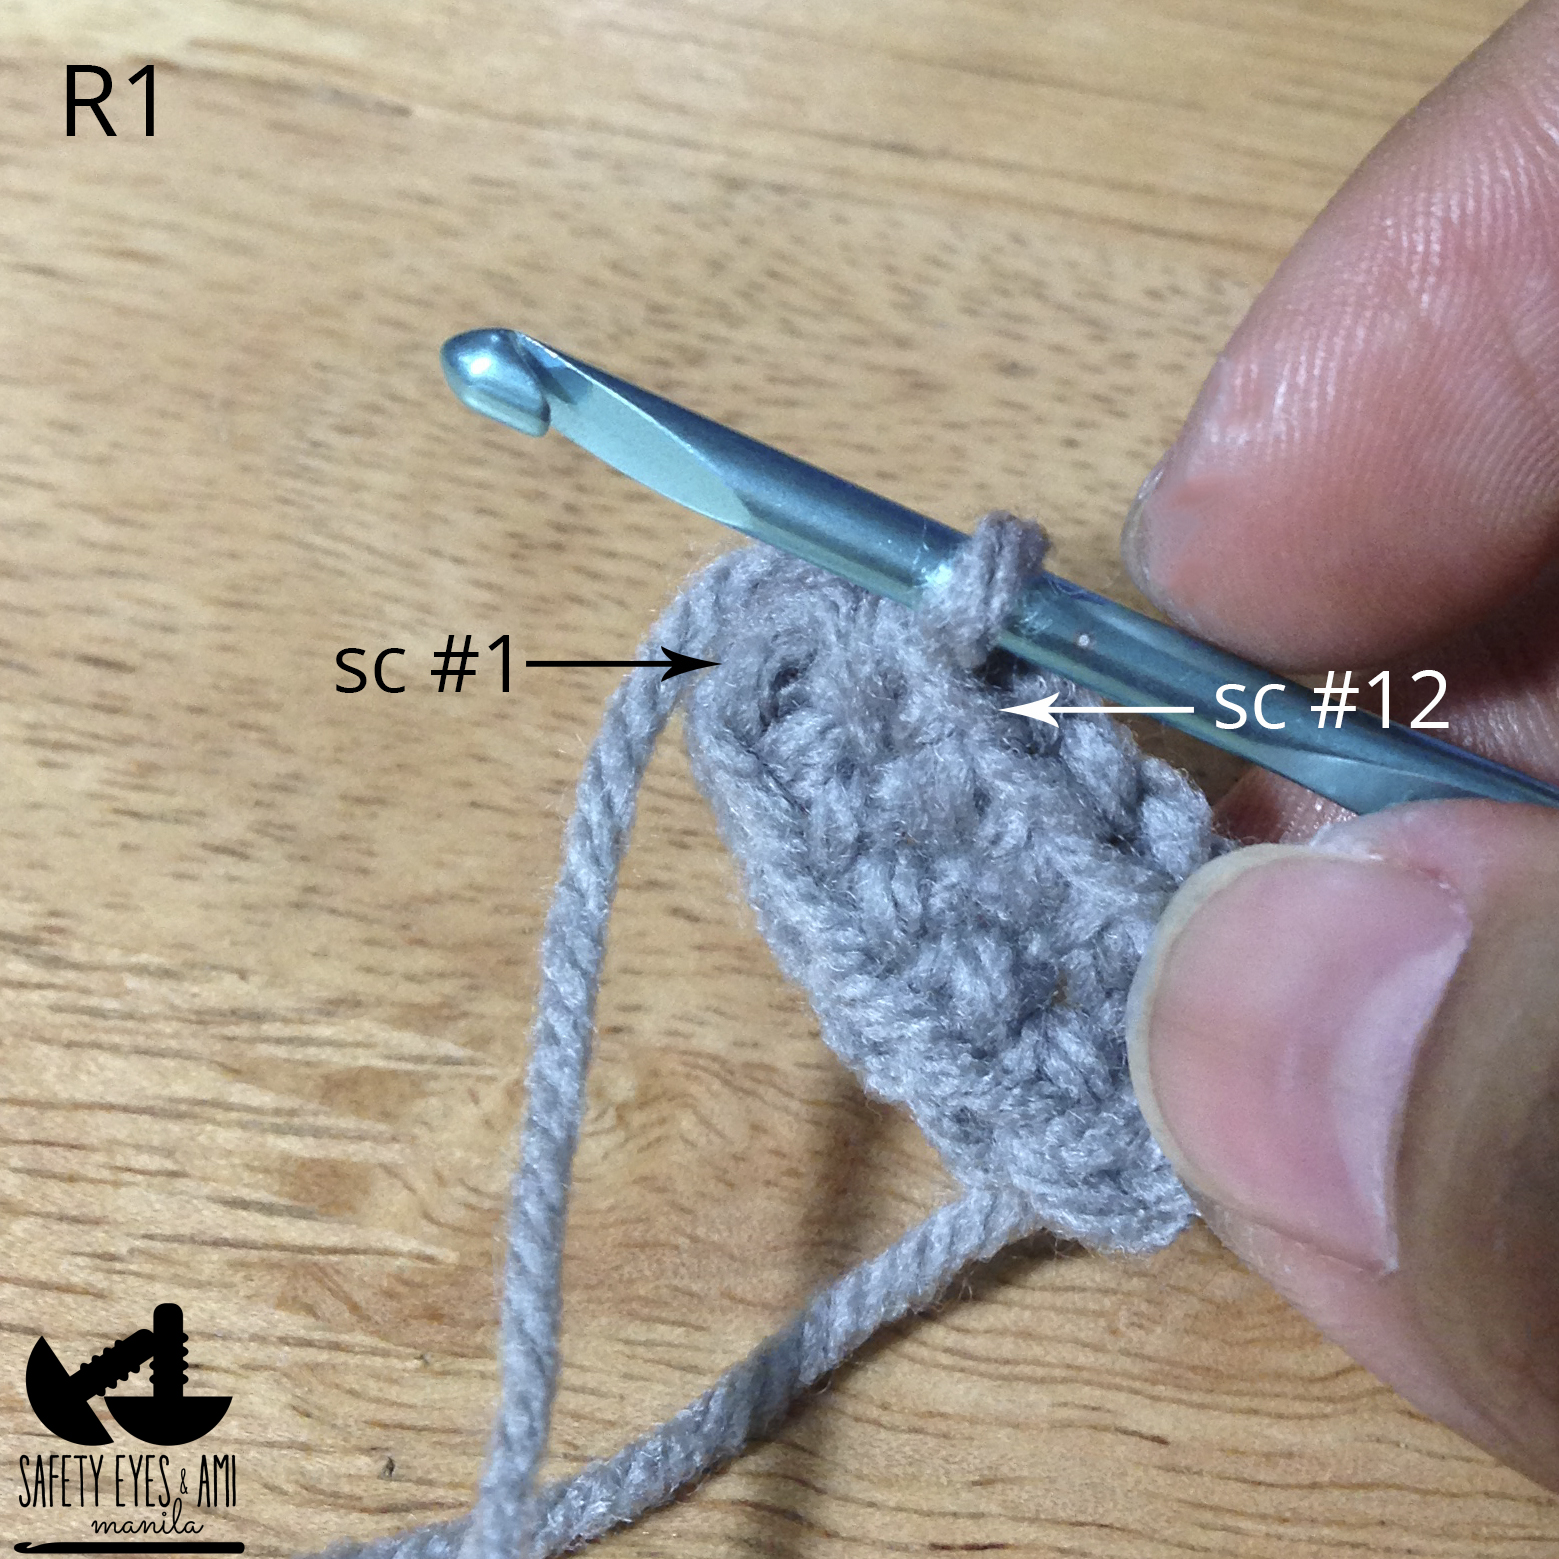
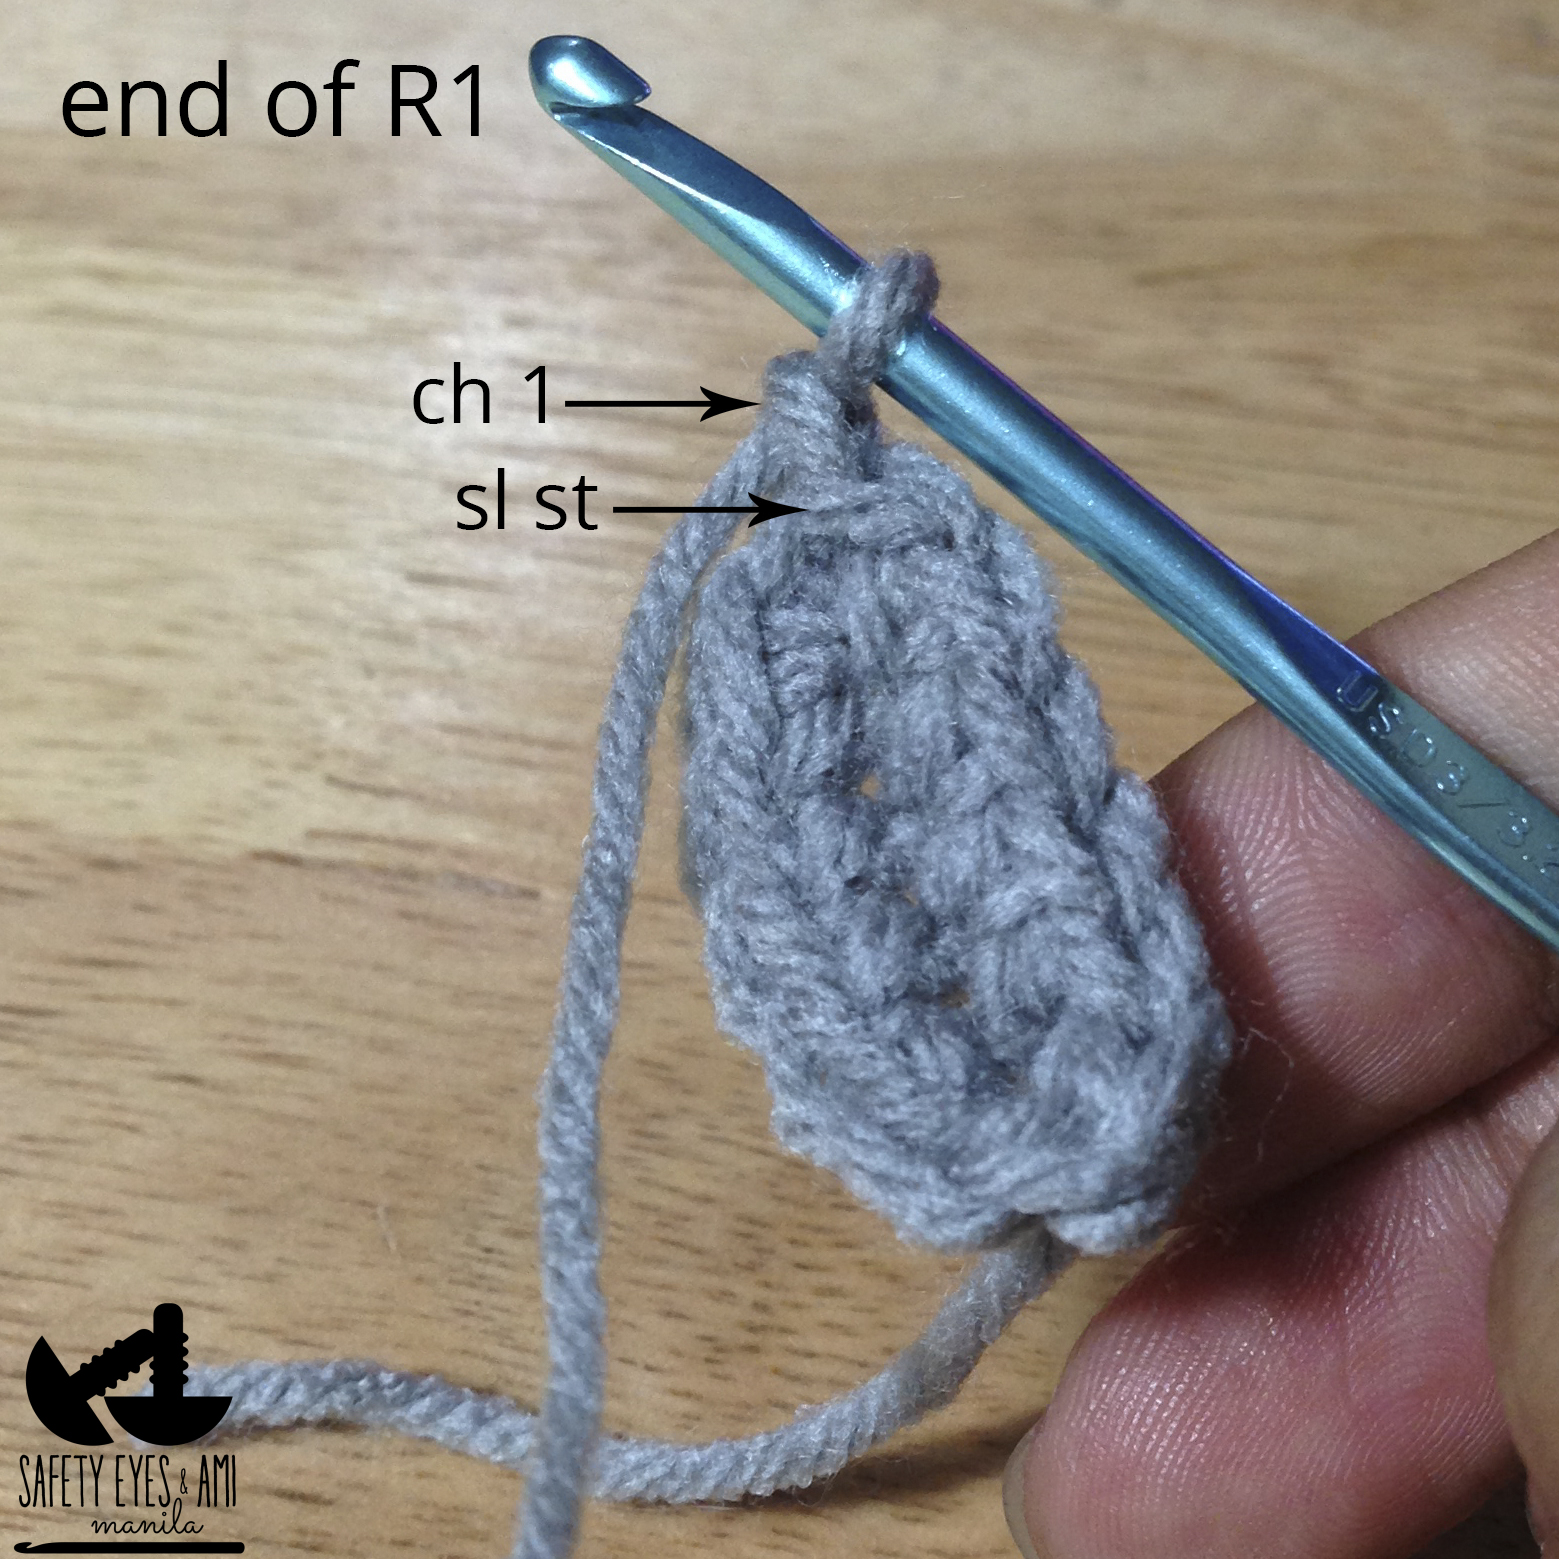
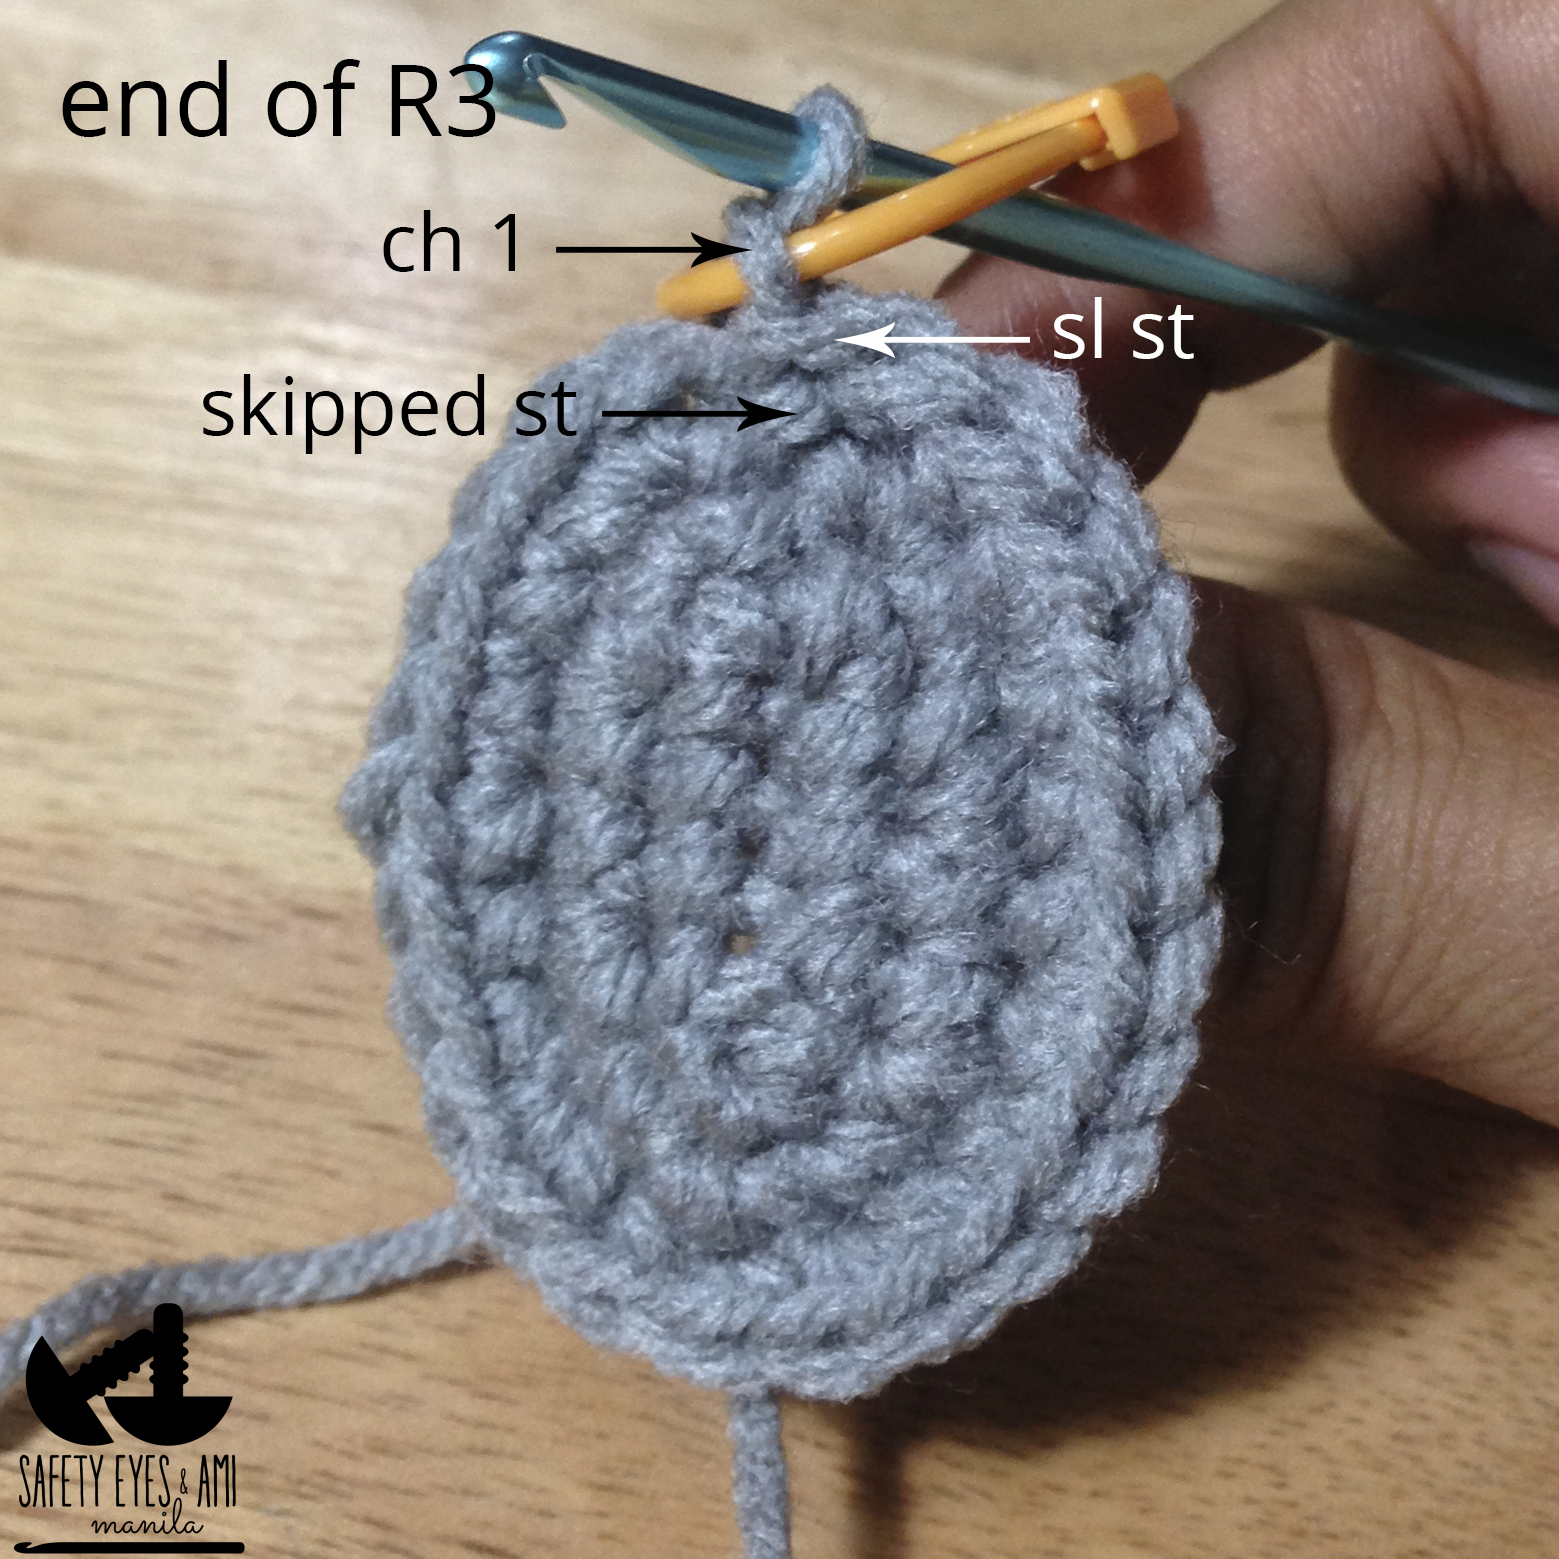
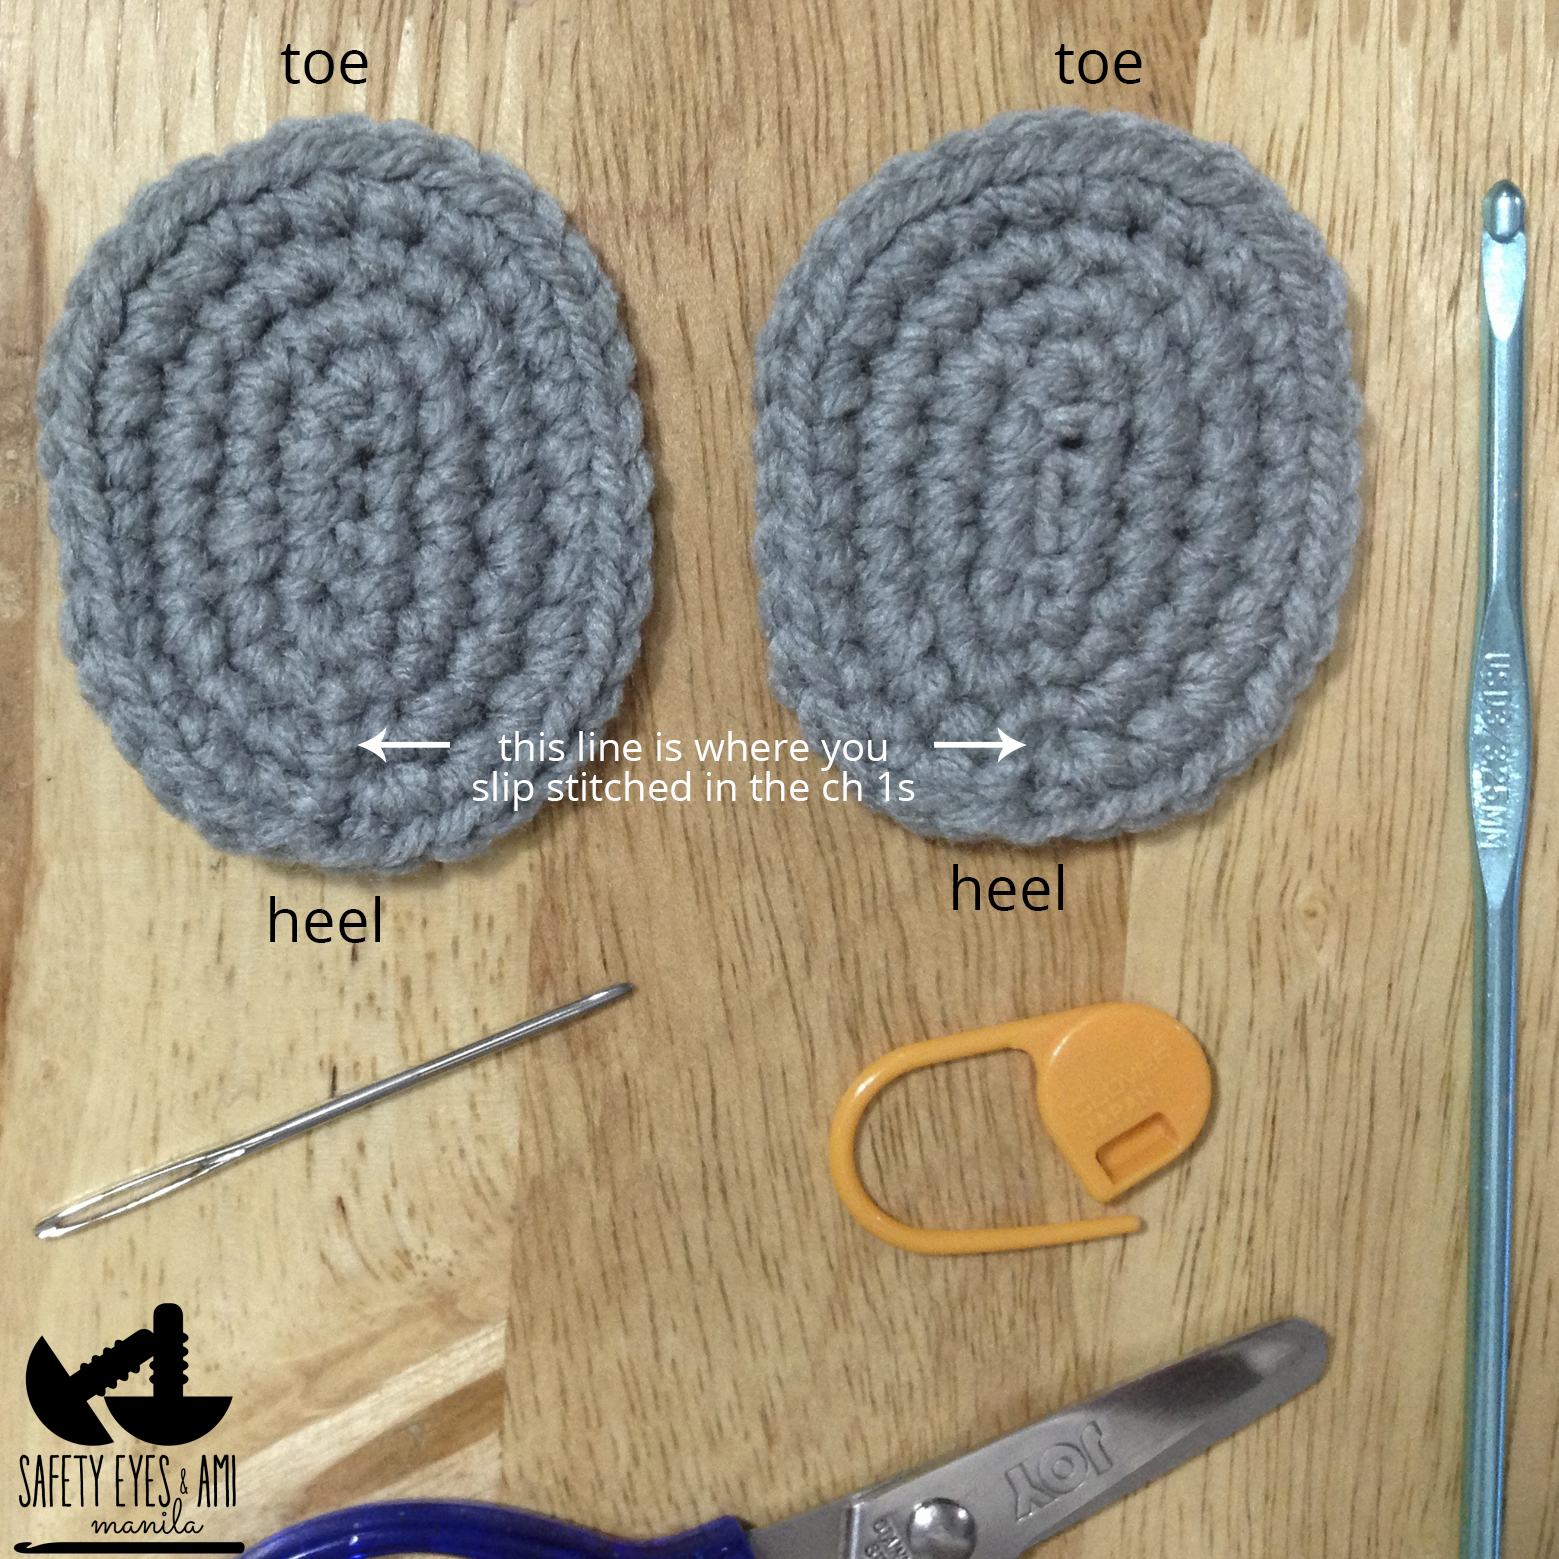
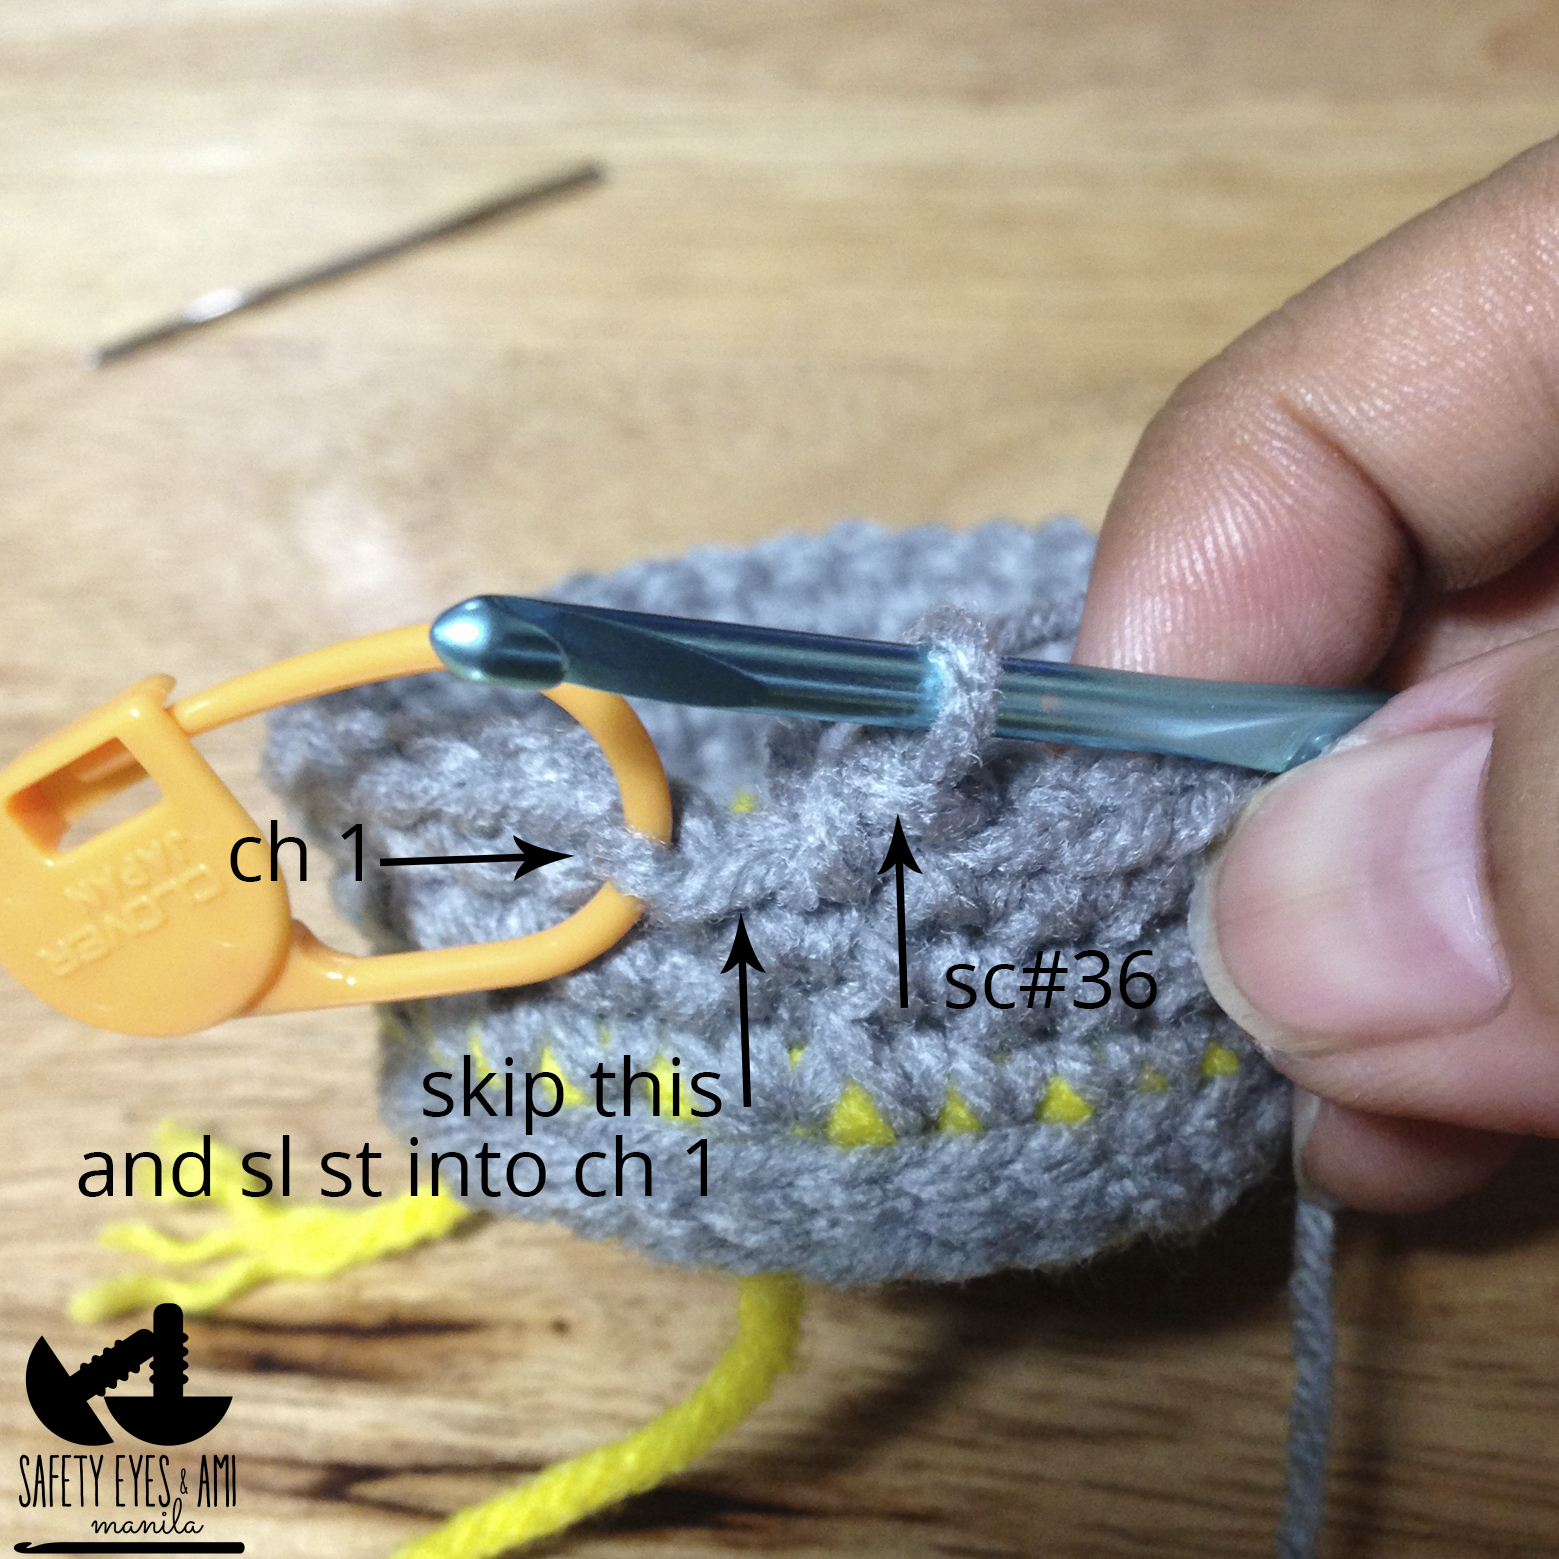
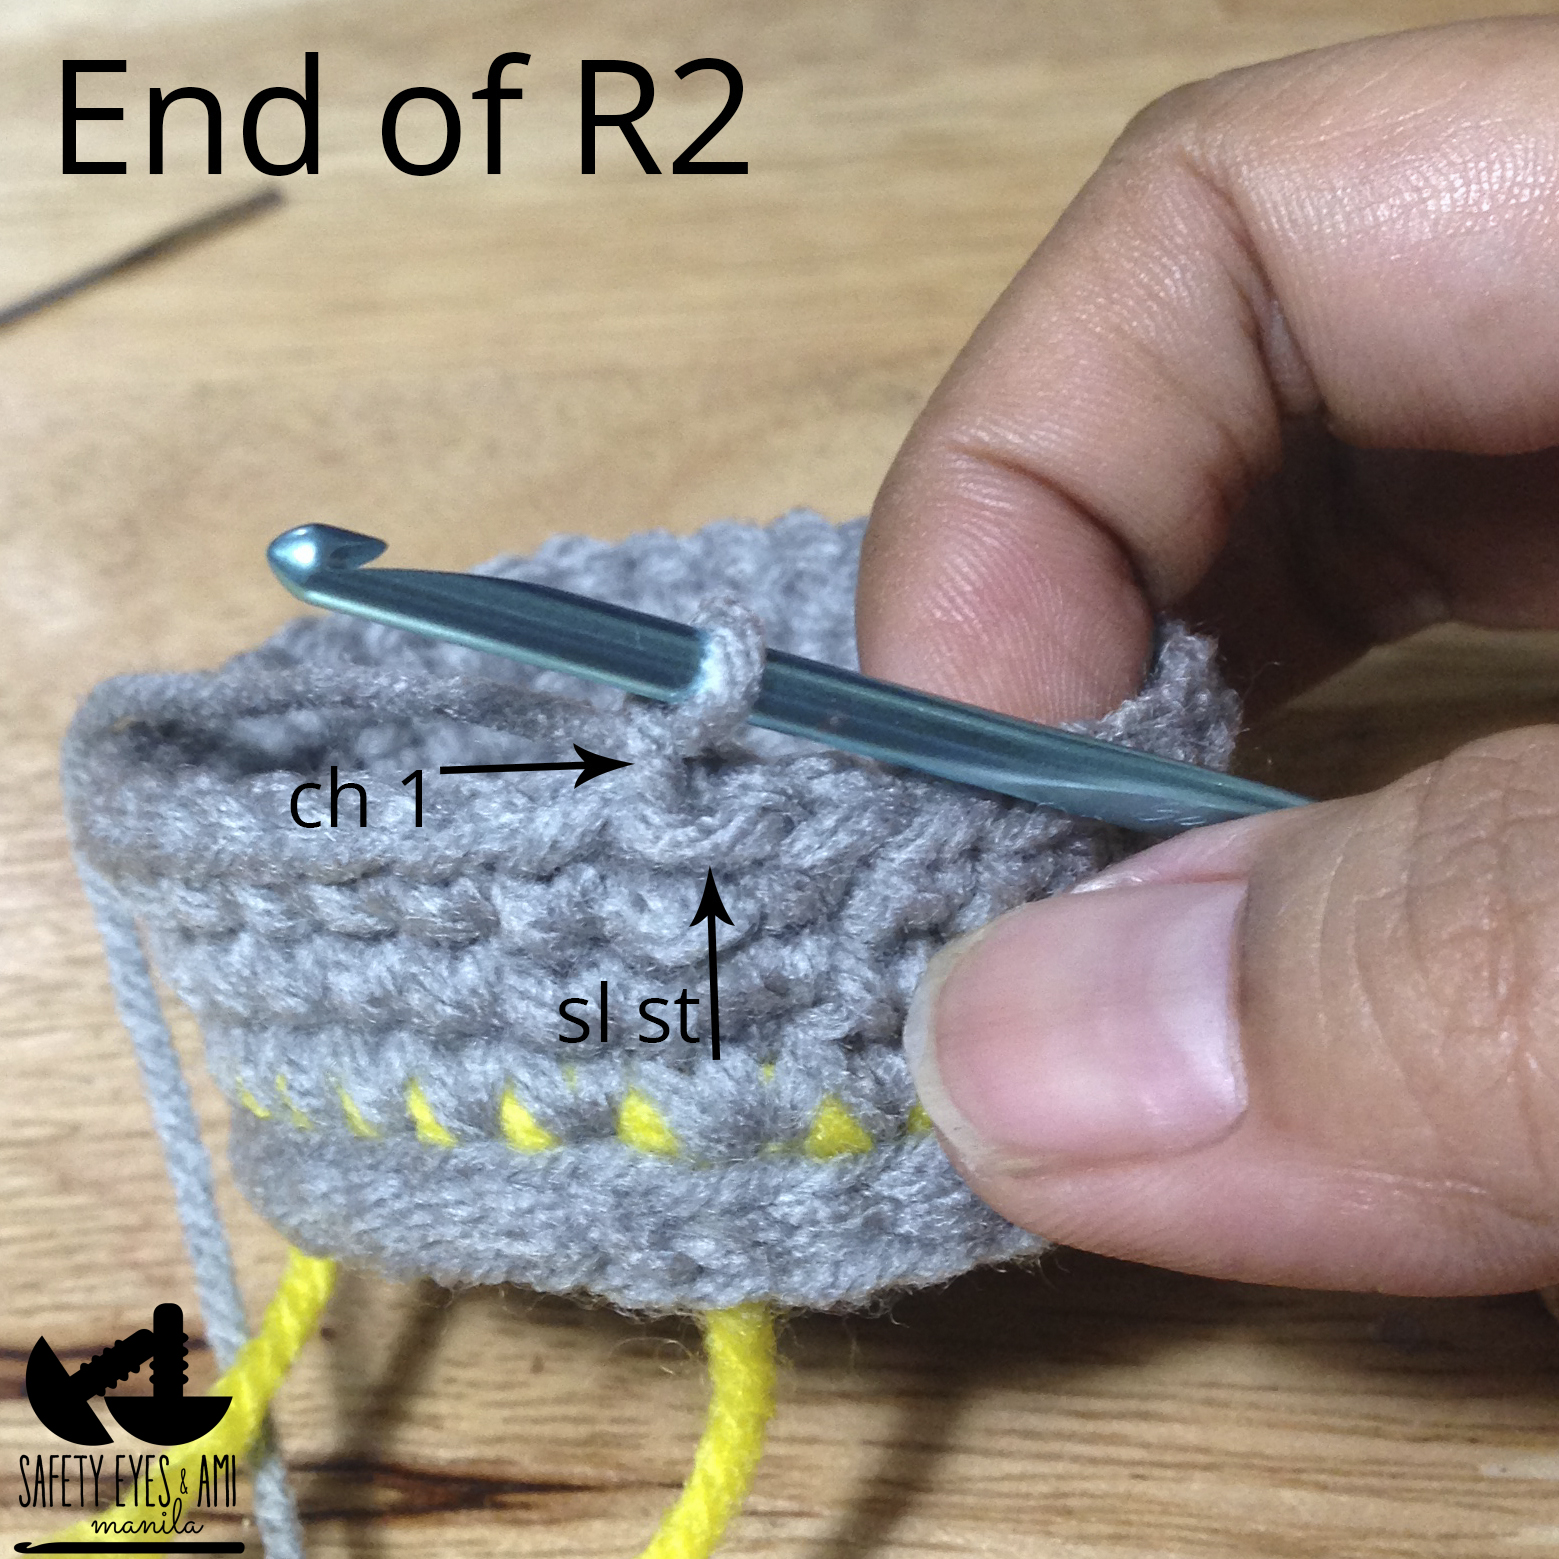
To make sure my Minion could stand on his own, I made his boots like baby booties with a double sole. I also changed color from black to yellow instead of blue to go from boots to "Minion skin".  Just for the purposes of this tutorial, I used grey for the boots instead of black just so the stitches may be easily seen.  But Minion's shoes are made in black.

SOLES (make 4) I sl st (slip stitch) into the ch1 from R2-4.  Watch your tension. If your stitches are too tight, your soles won't stay flat and may start to curl in.
Ch 6
R1 (start in 2nd ch fr hook) inc, sc 3, make 3 sc in the last chain, (working on the other side of chain now) sc 4. (12) sl st into 1st sc, ch 1 and mark the ch 1 
R2 [sc 1, inc ] 6x (18) sl st into the ch 1 of the previous row and ch 1 
R3 [inc, sc 2] 6x (24) skip the last (extra) stitch, sl st into ch 1 of the previous row and ch 1 
R4 inc 4, sc 5, inc 4, sc 1, inc 3, sc 6, inc (36) skip the last (extra) stitch, sl st into ch 1 of the previous row and ch 1 
Picture
Picture
Picture
Picture
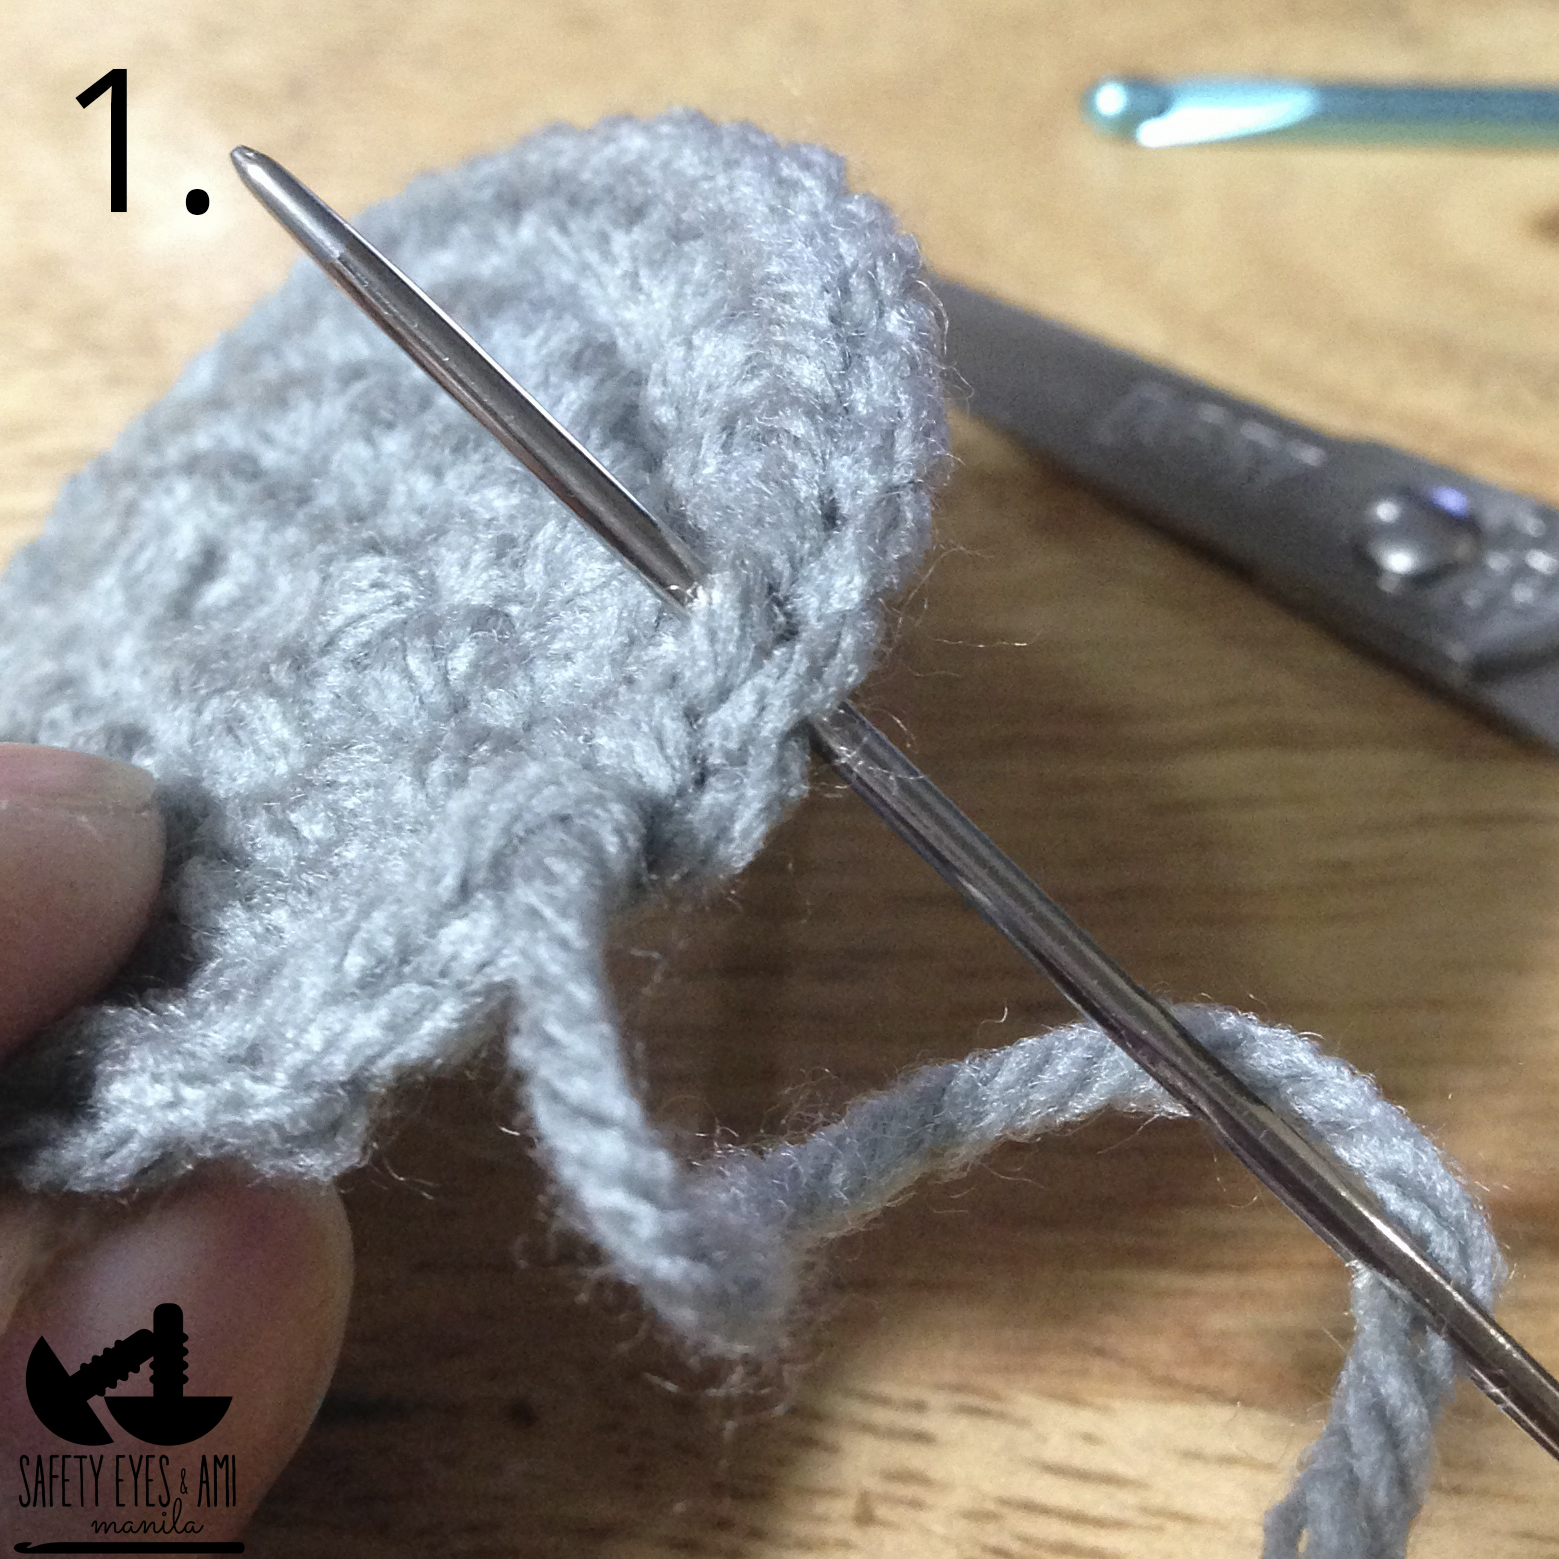
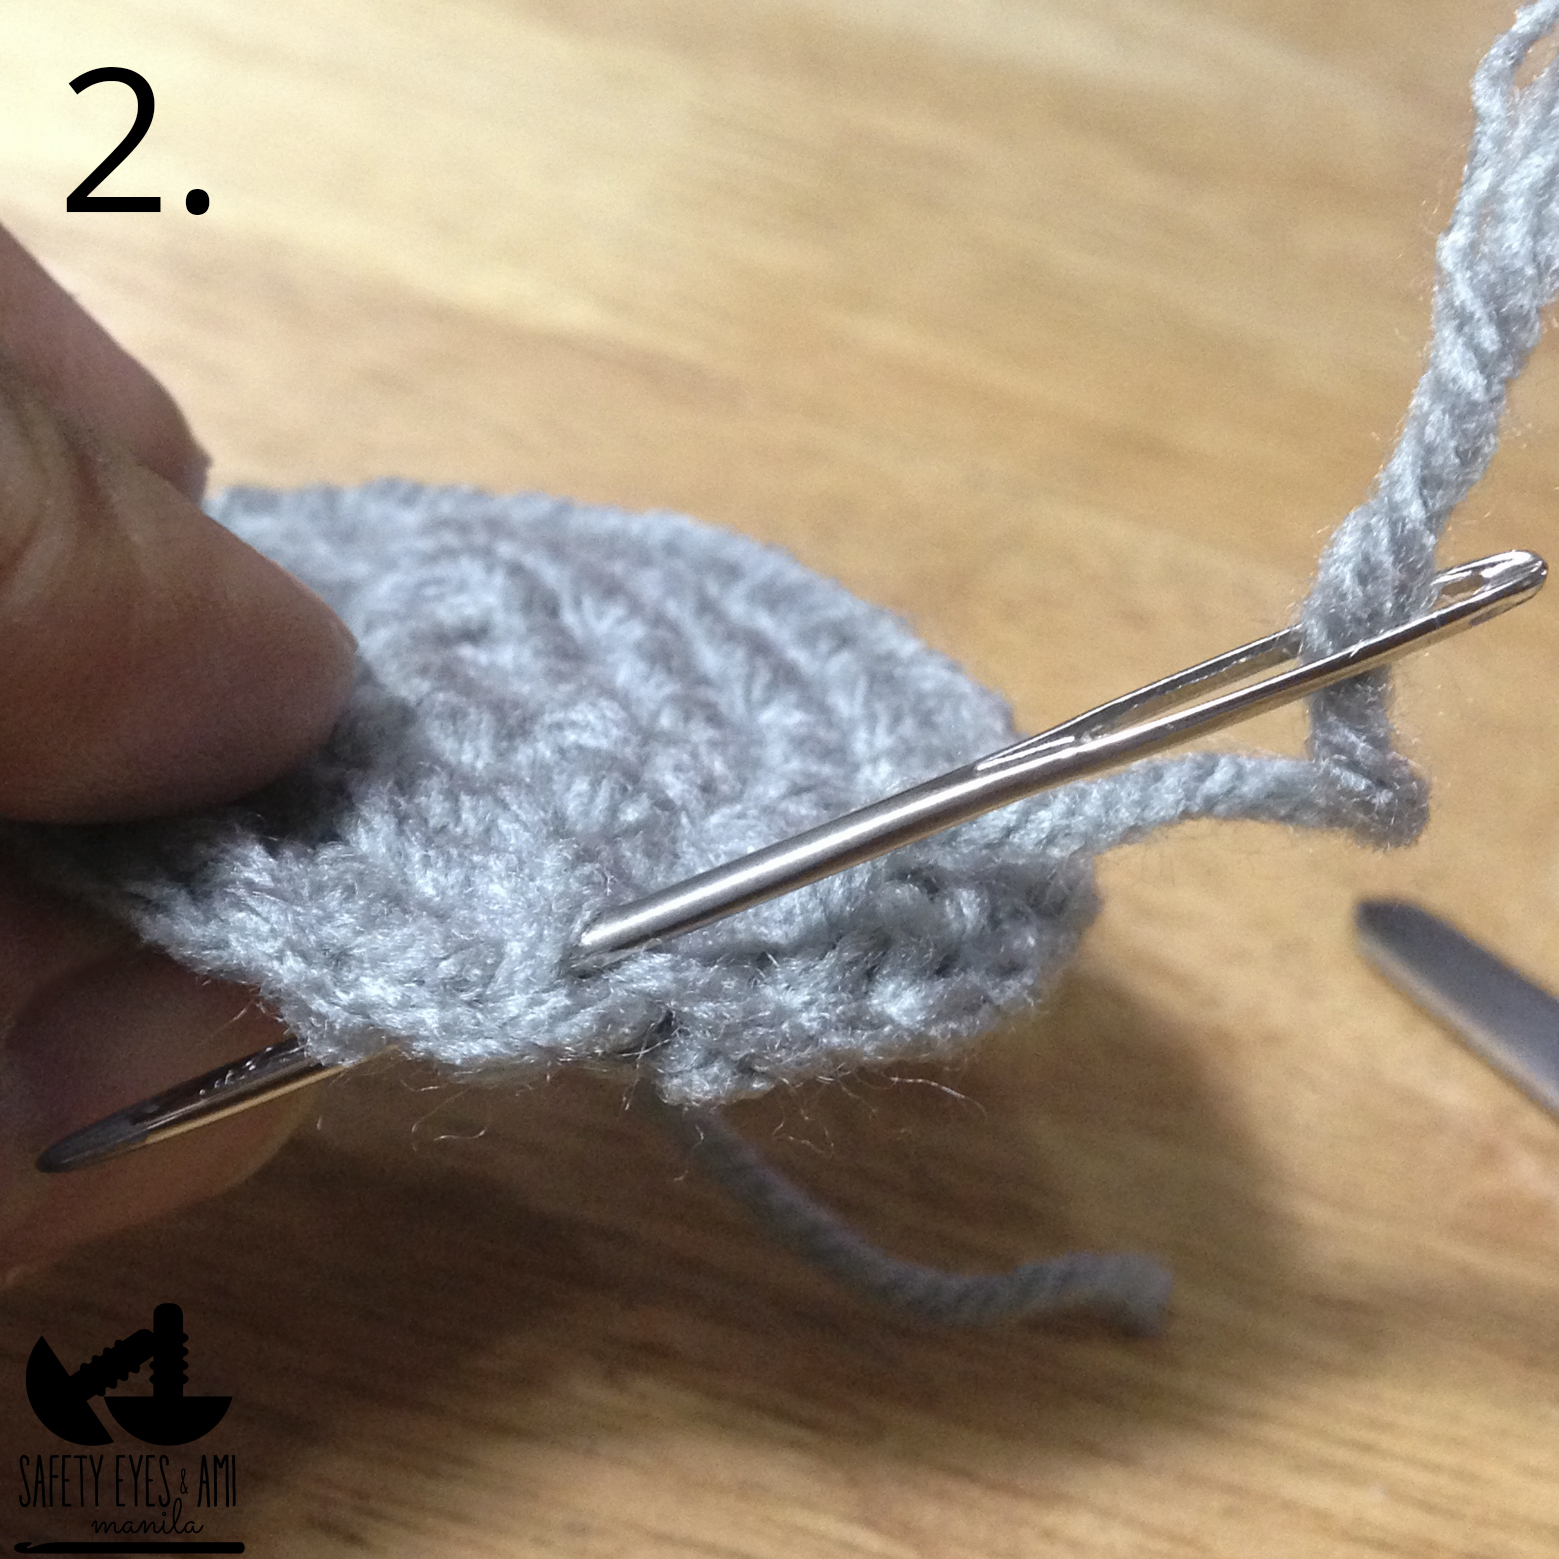
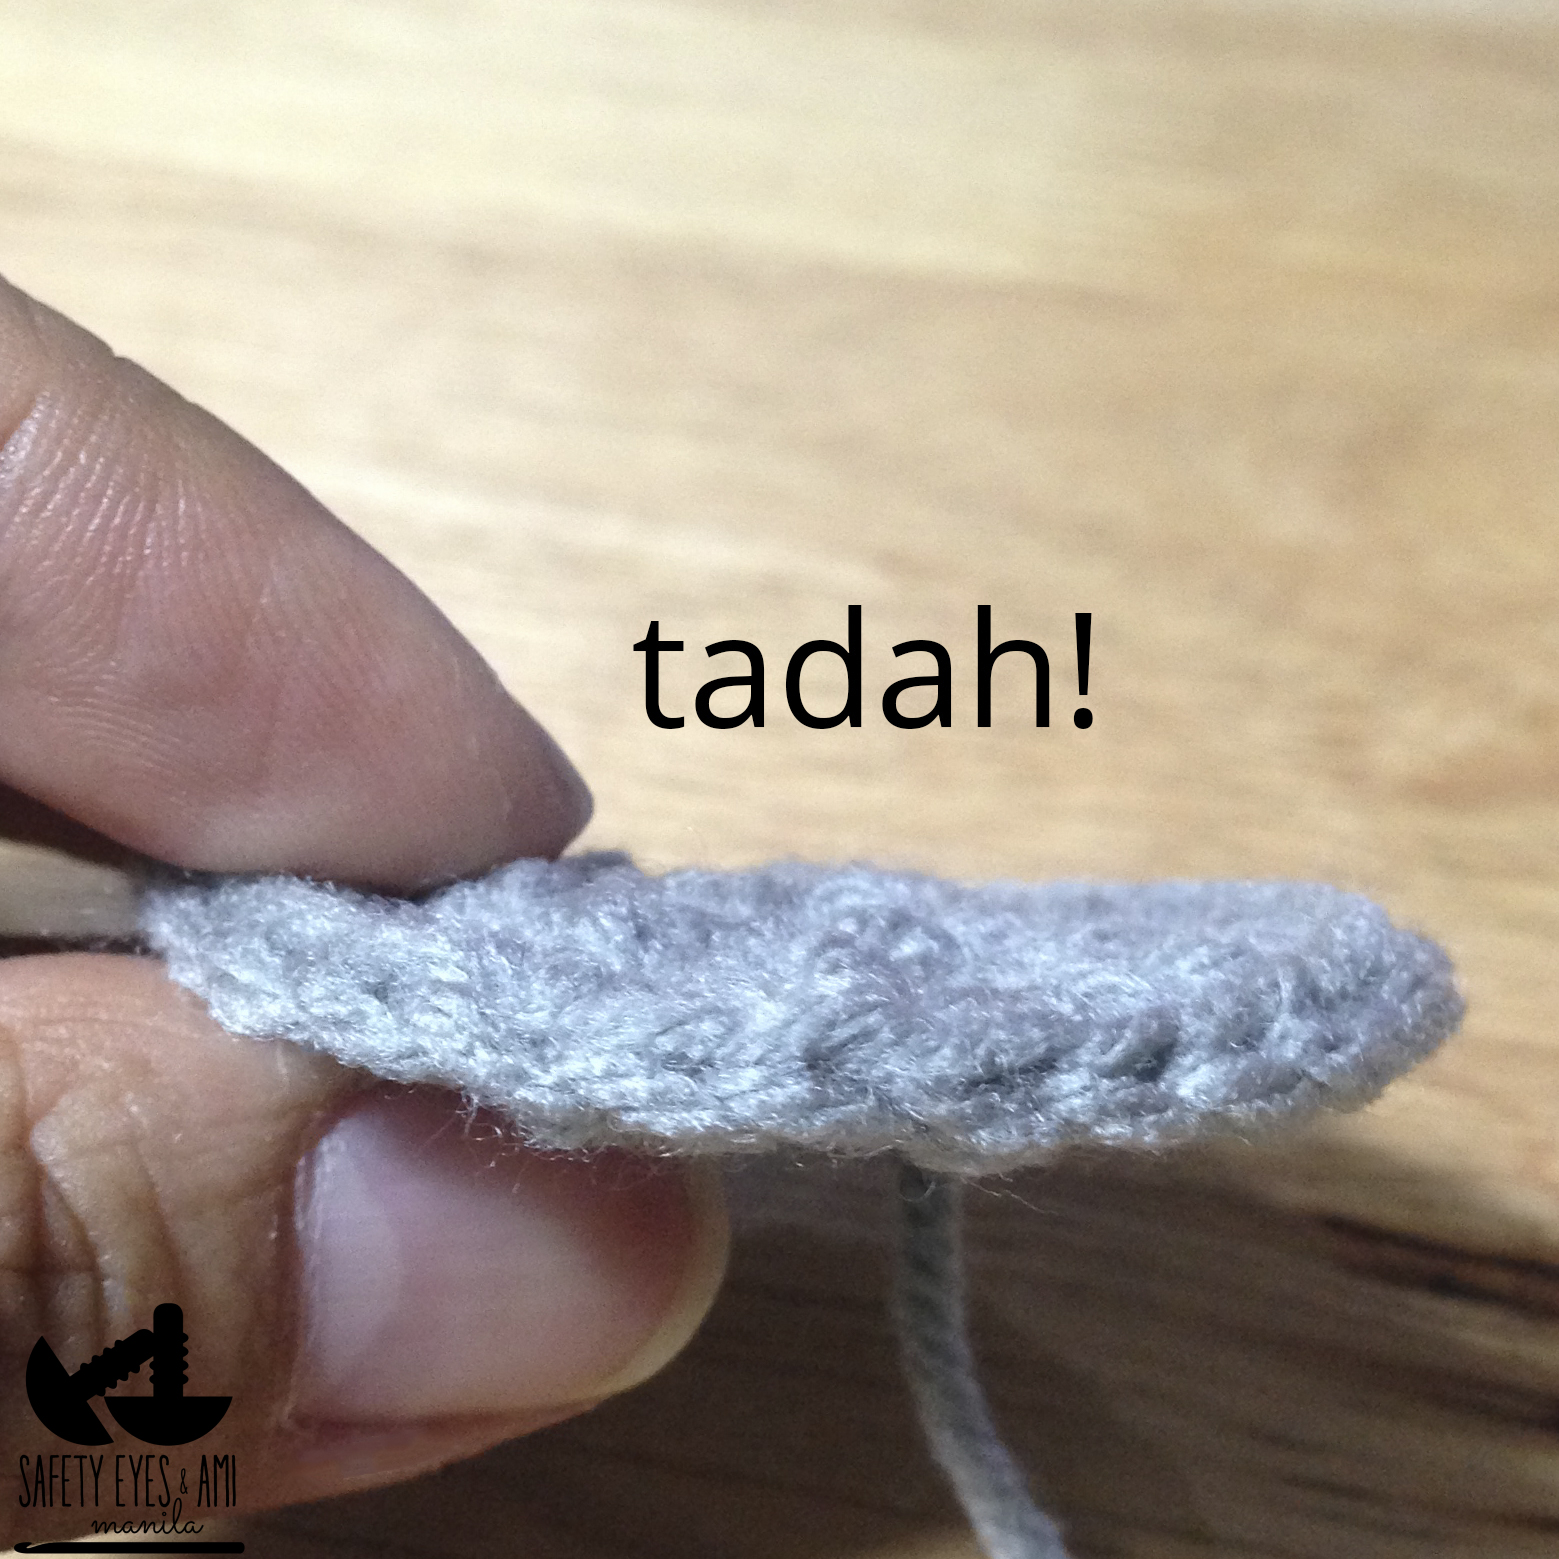
To finish and close, cut yarn leaving a tail about 1.5" and pull through loop.  Thread the tail under both loops of the 2nd stitch from your last sc.  Close the loop by threading back through the center of the previous sc.  You won't notice where you started and where you ended!  And even if it ends up a bit messy, you won't notice when you use black yarn. Just make sure you have a total of 36 stitches.  If you're making a smaller and skinnier Minion, you can stop at R3 with 24 st to make smaller boots.
Picture
Picture
Picture
Picture
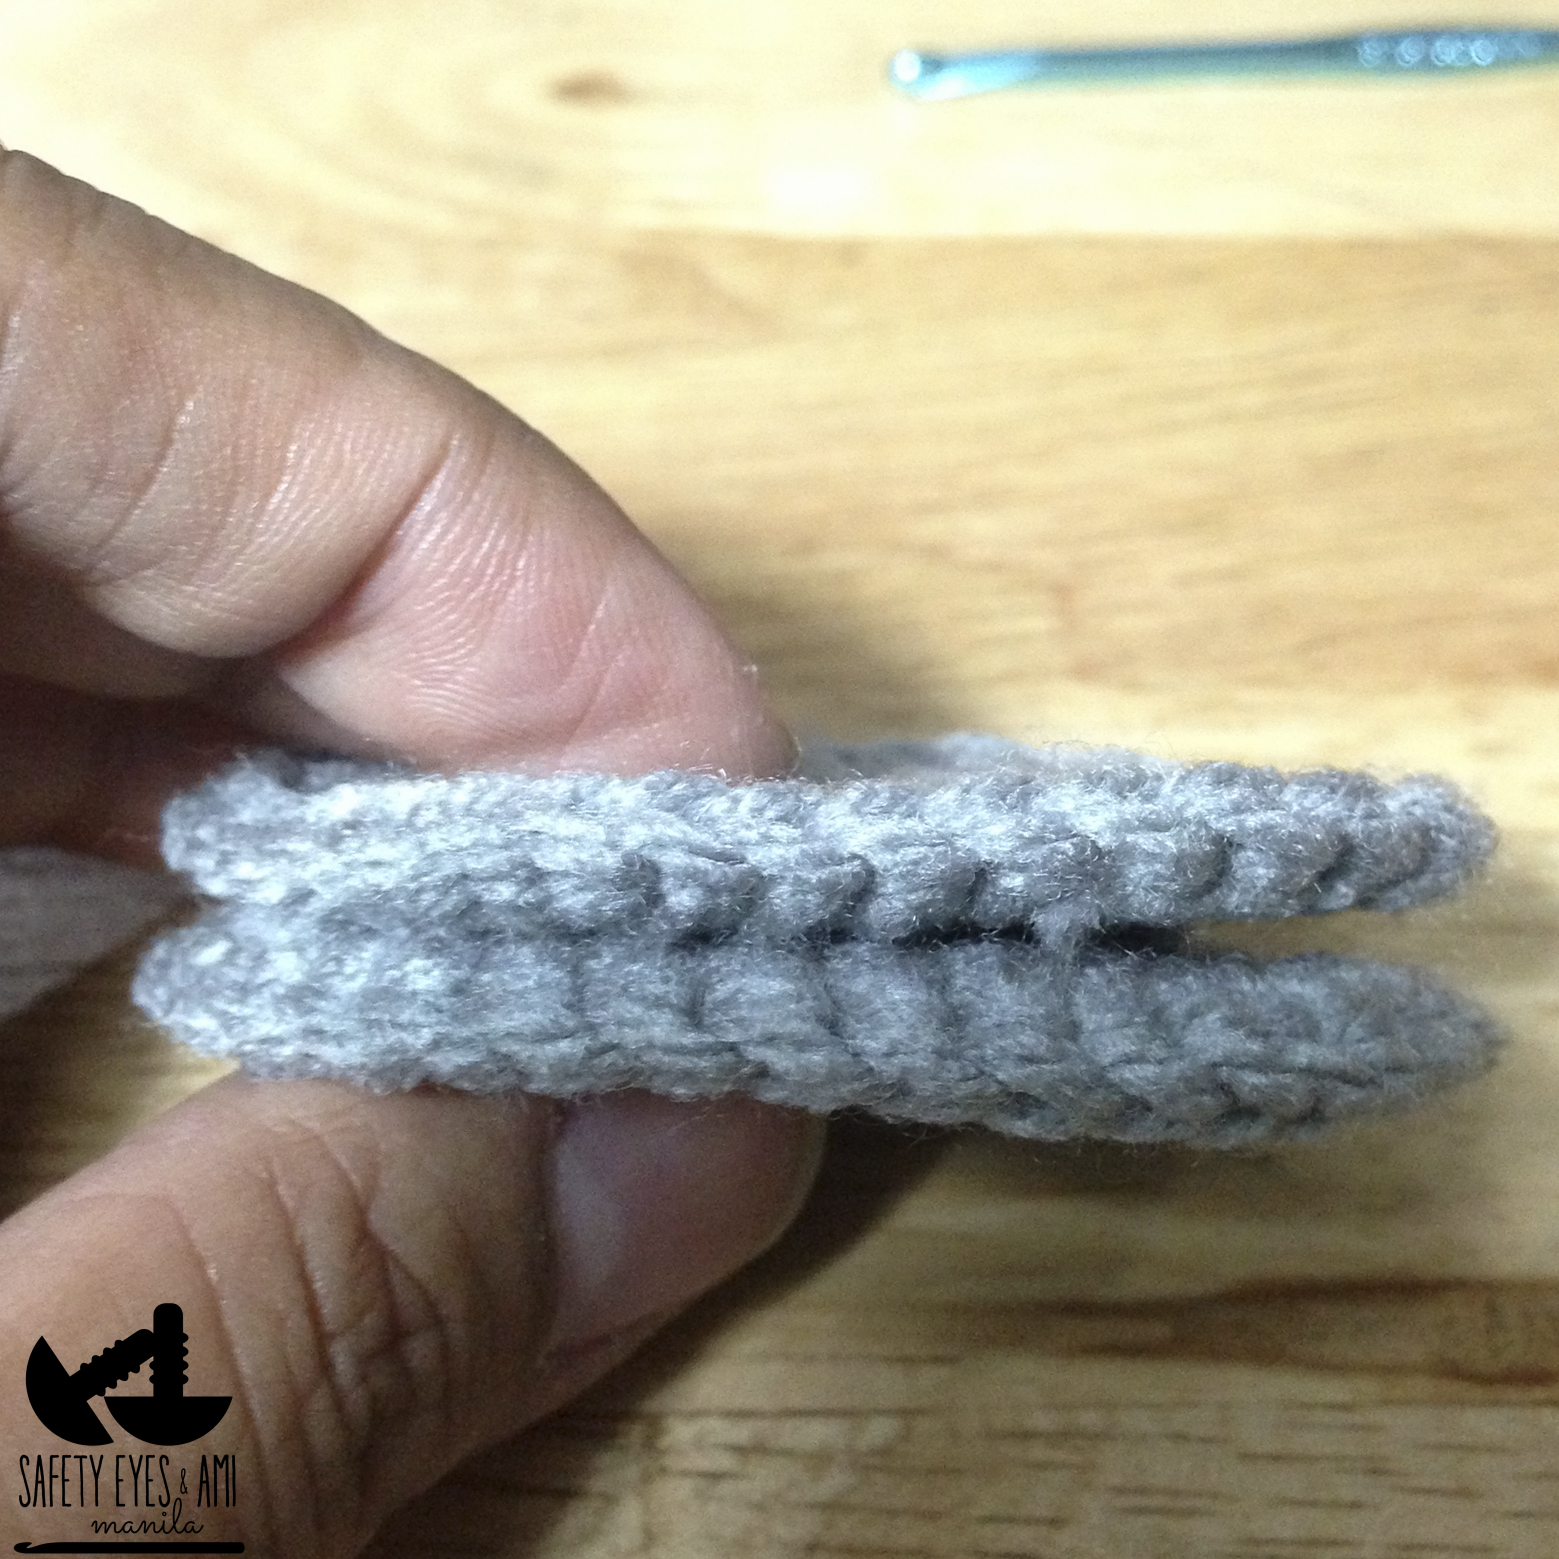
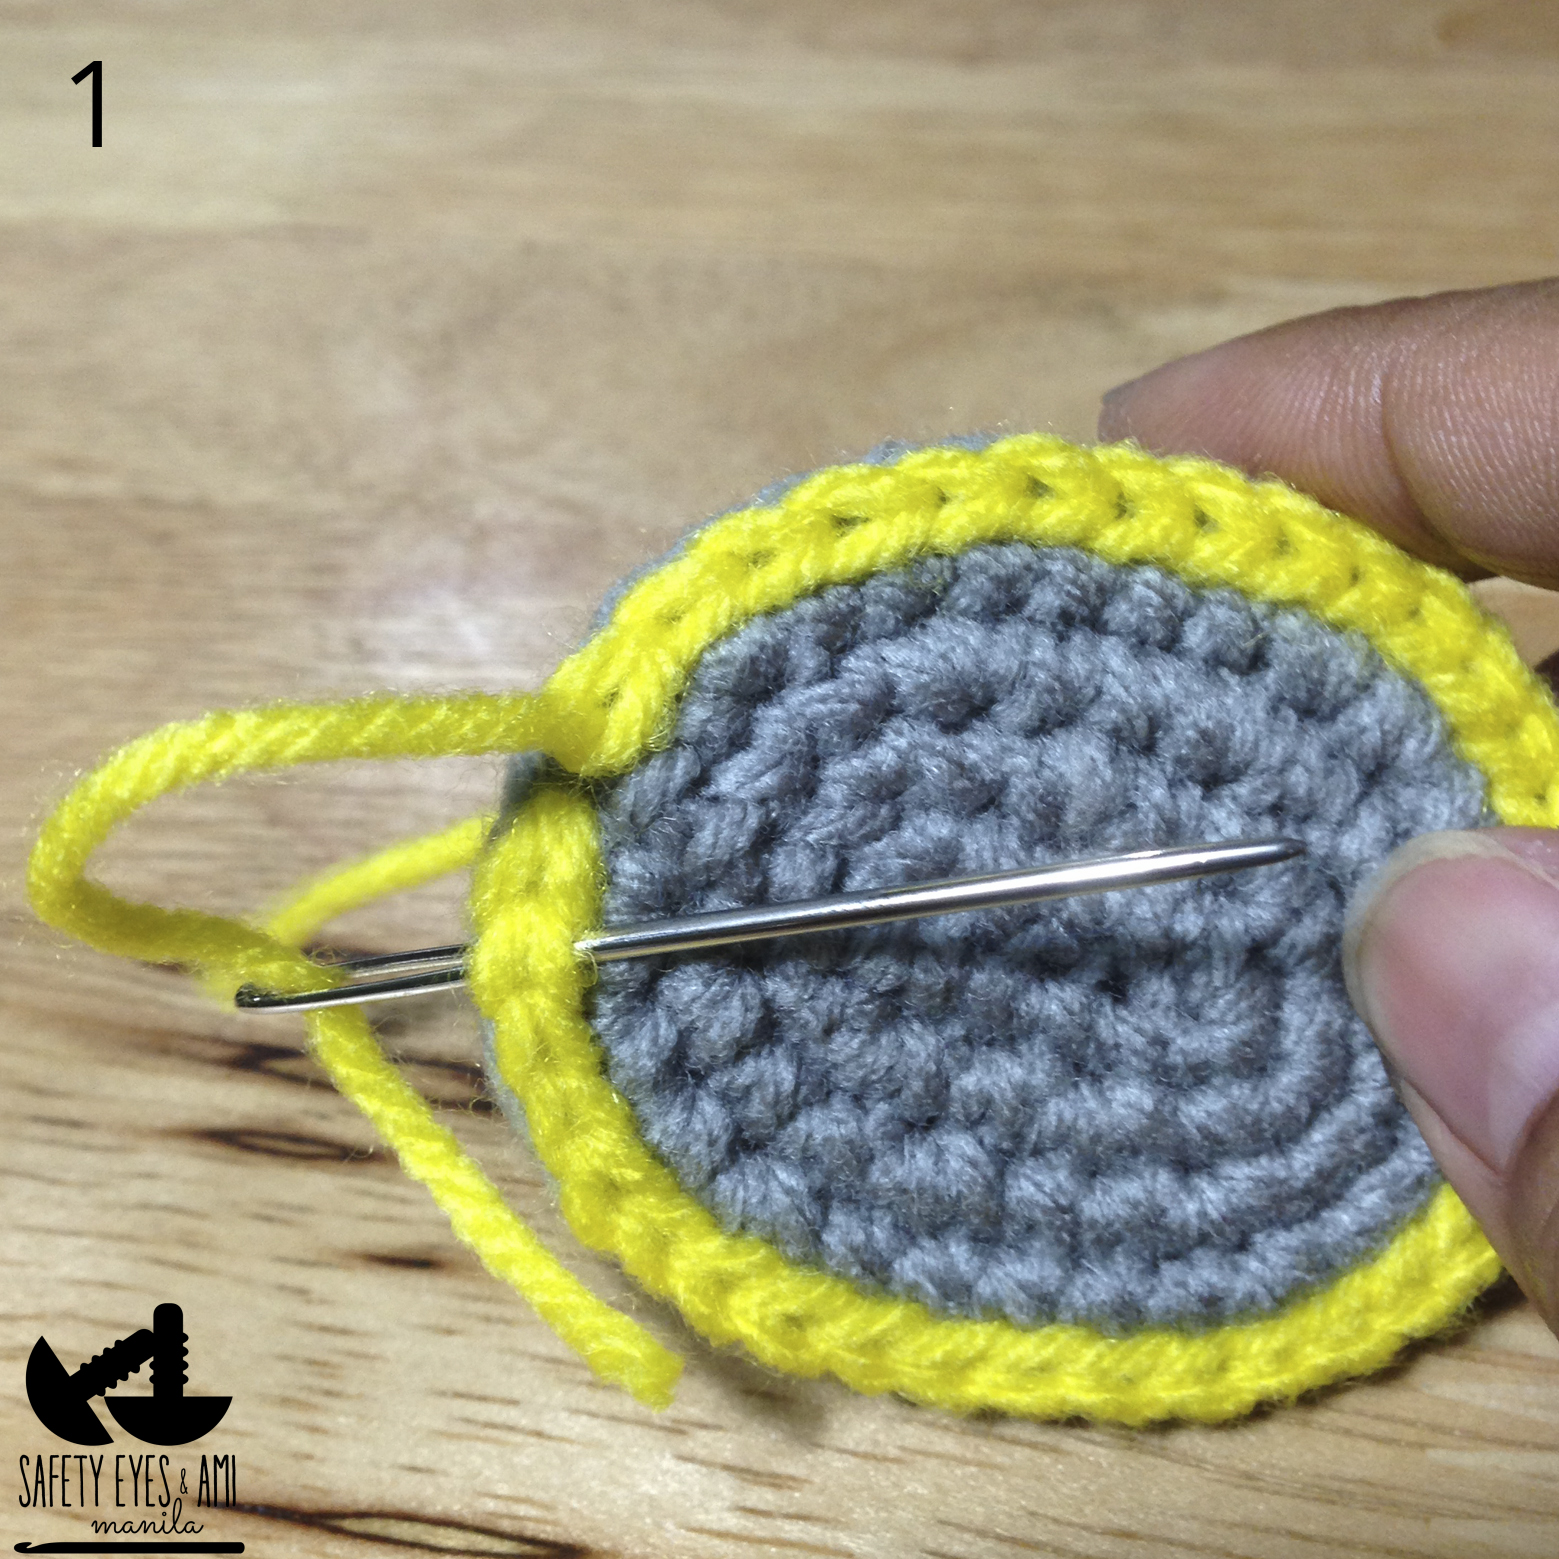
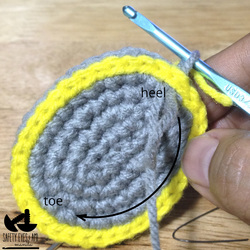
Take 2 soles.  Don't worry if they're not exactly the same size.  The stitches will eventually line up.  Put them together with the heels toward you and the right sides facing out.  You can hide all the extra hanging tails in between.  For the purposes of this tutorial, I used yellow yarn to stitch the 2 soles together so the chains can be easily seen.  
Picture
Picture
Picture
Picture
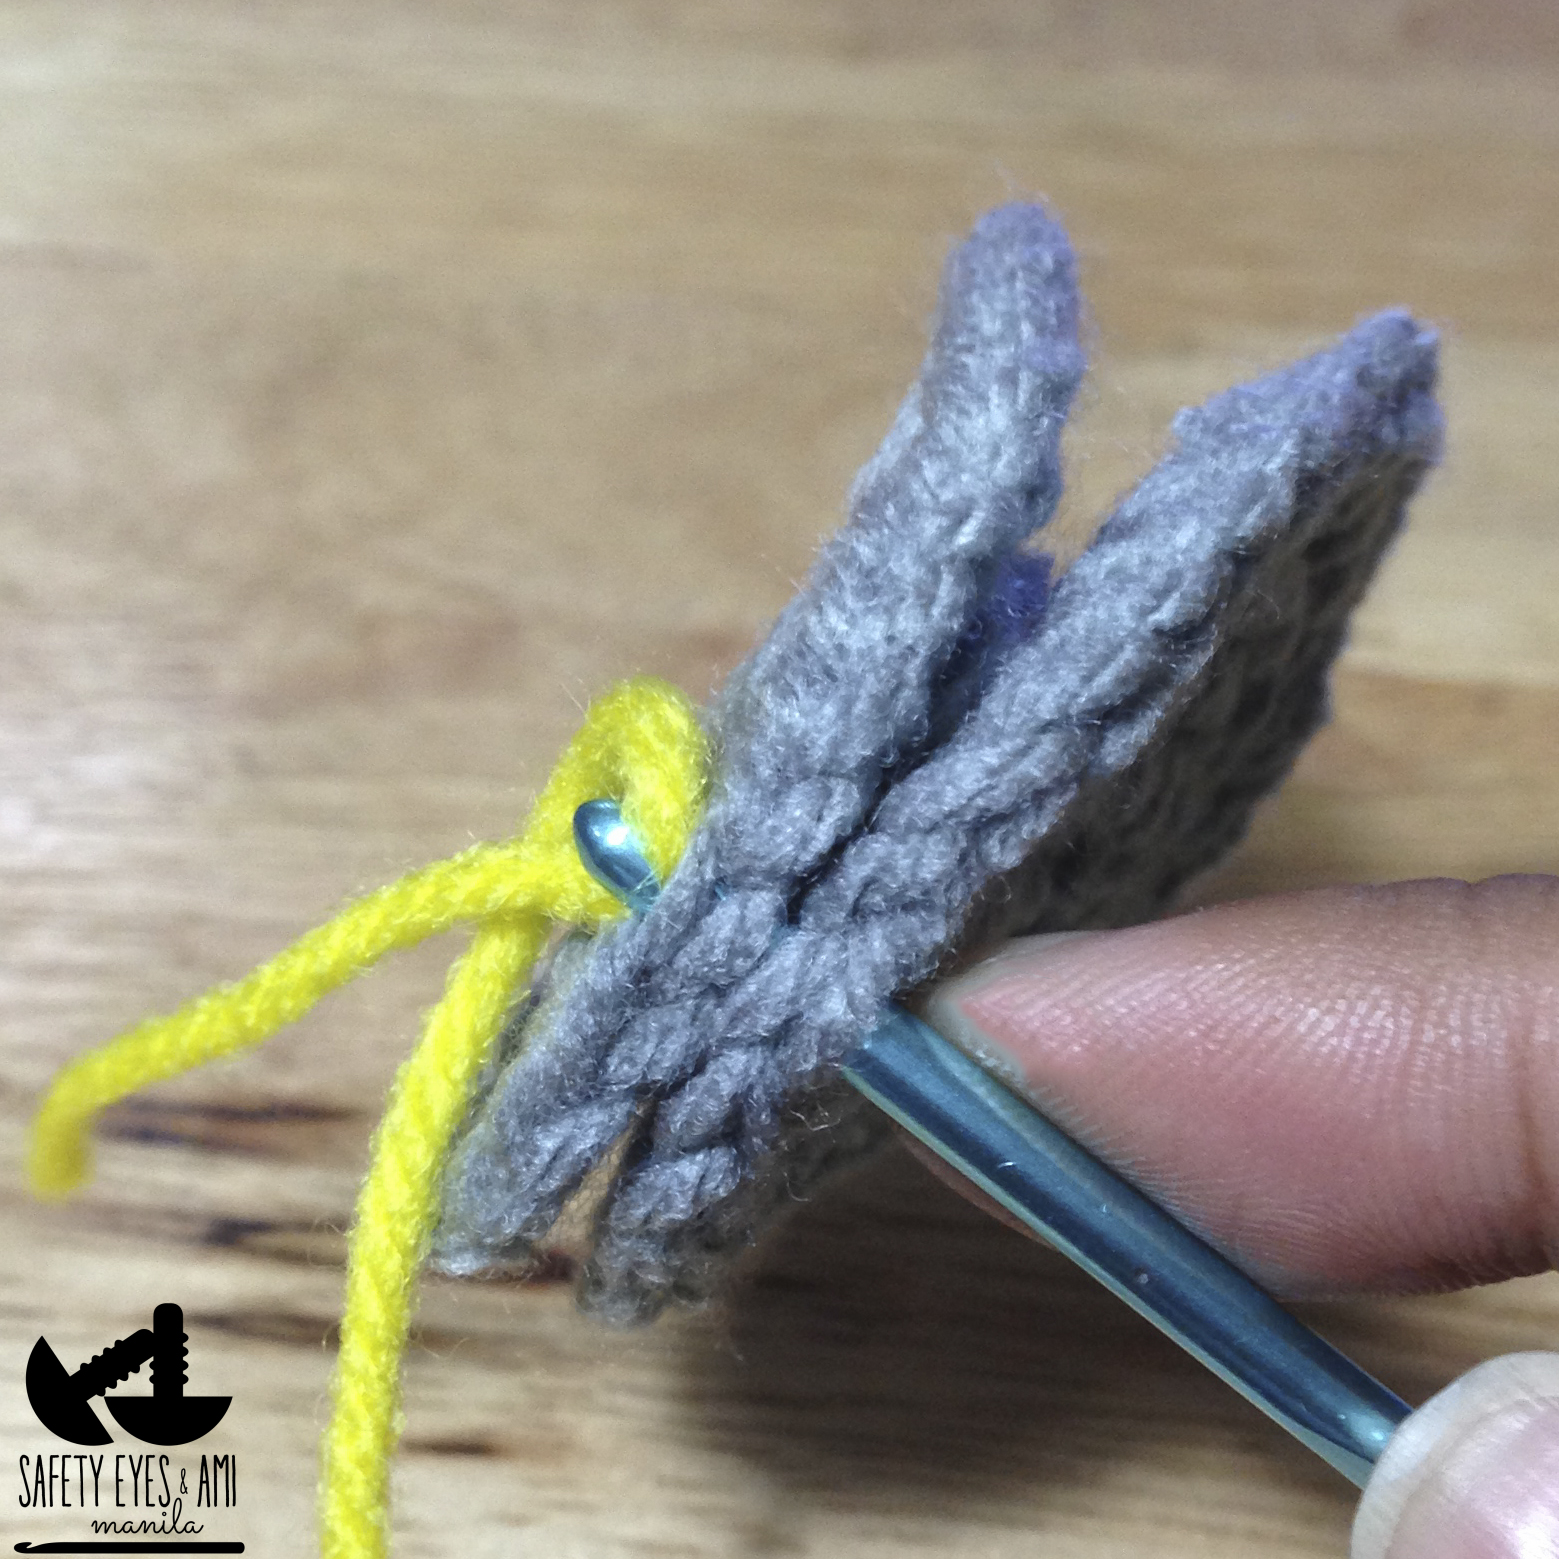
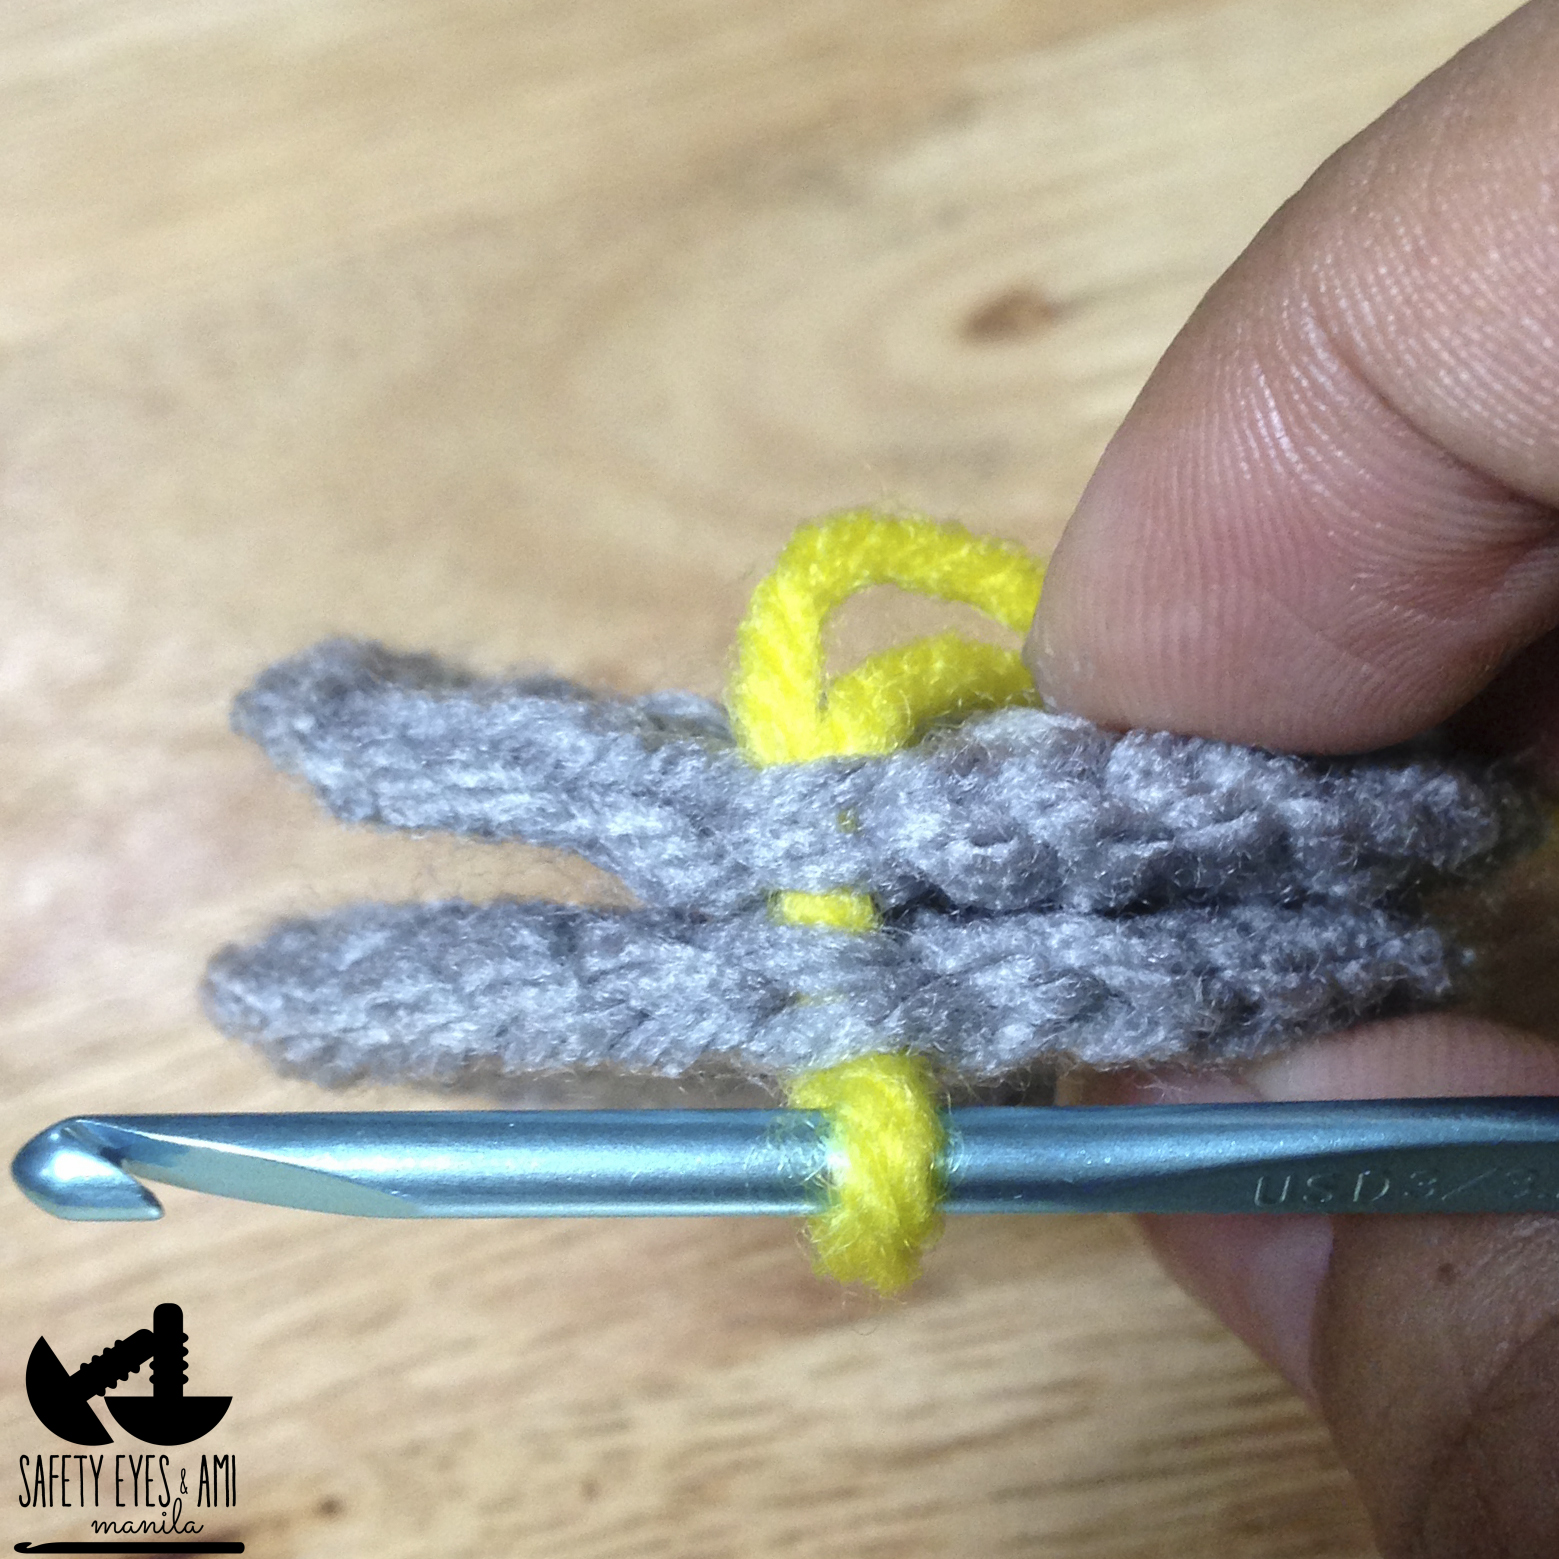
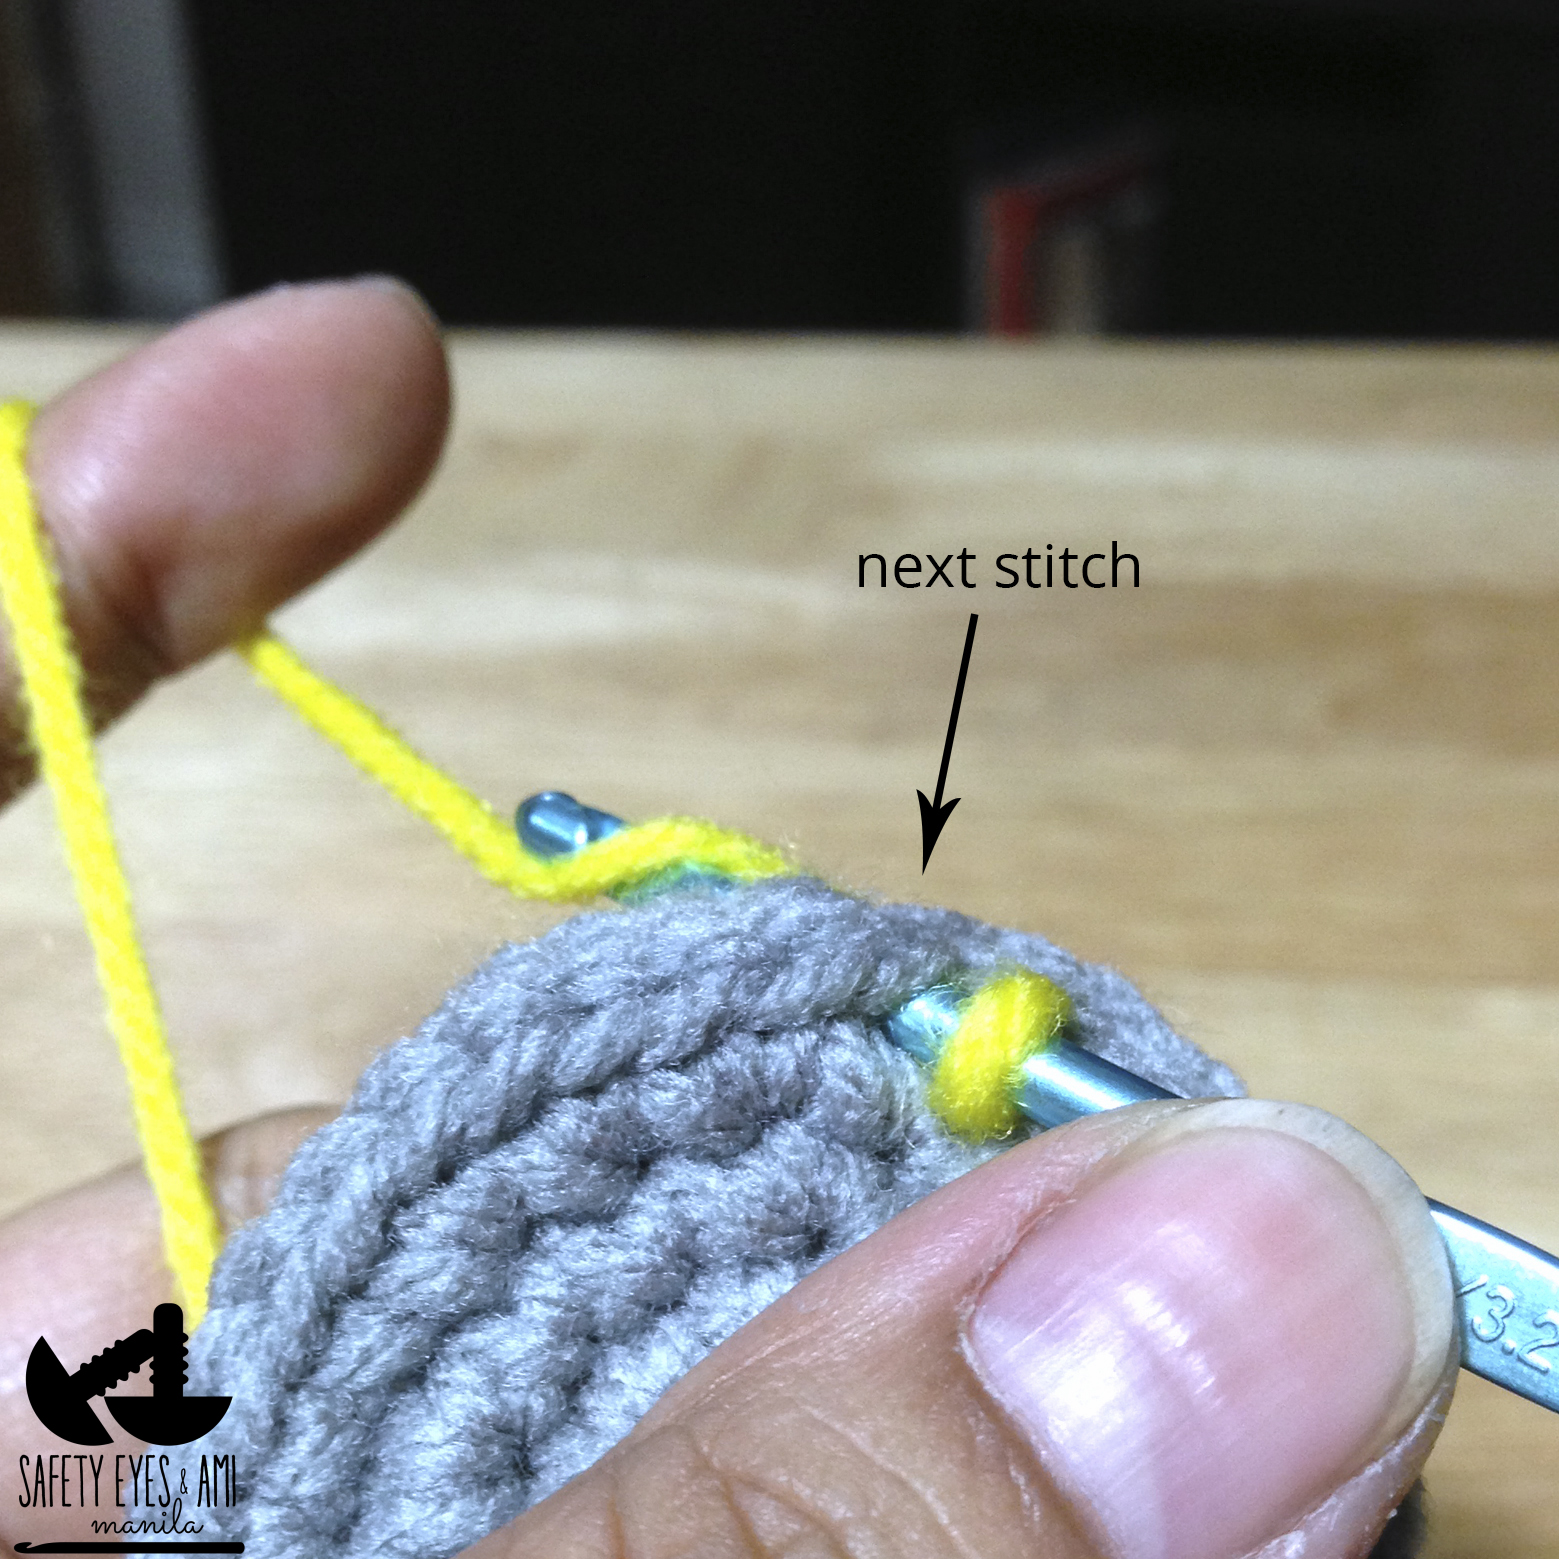
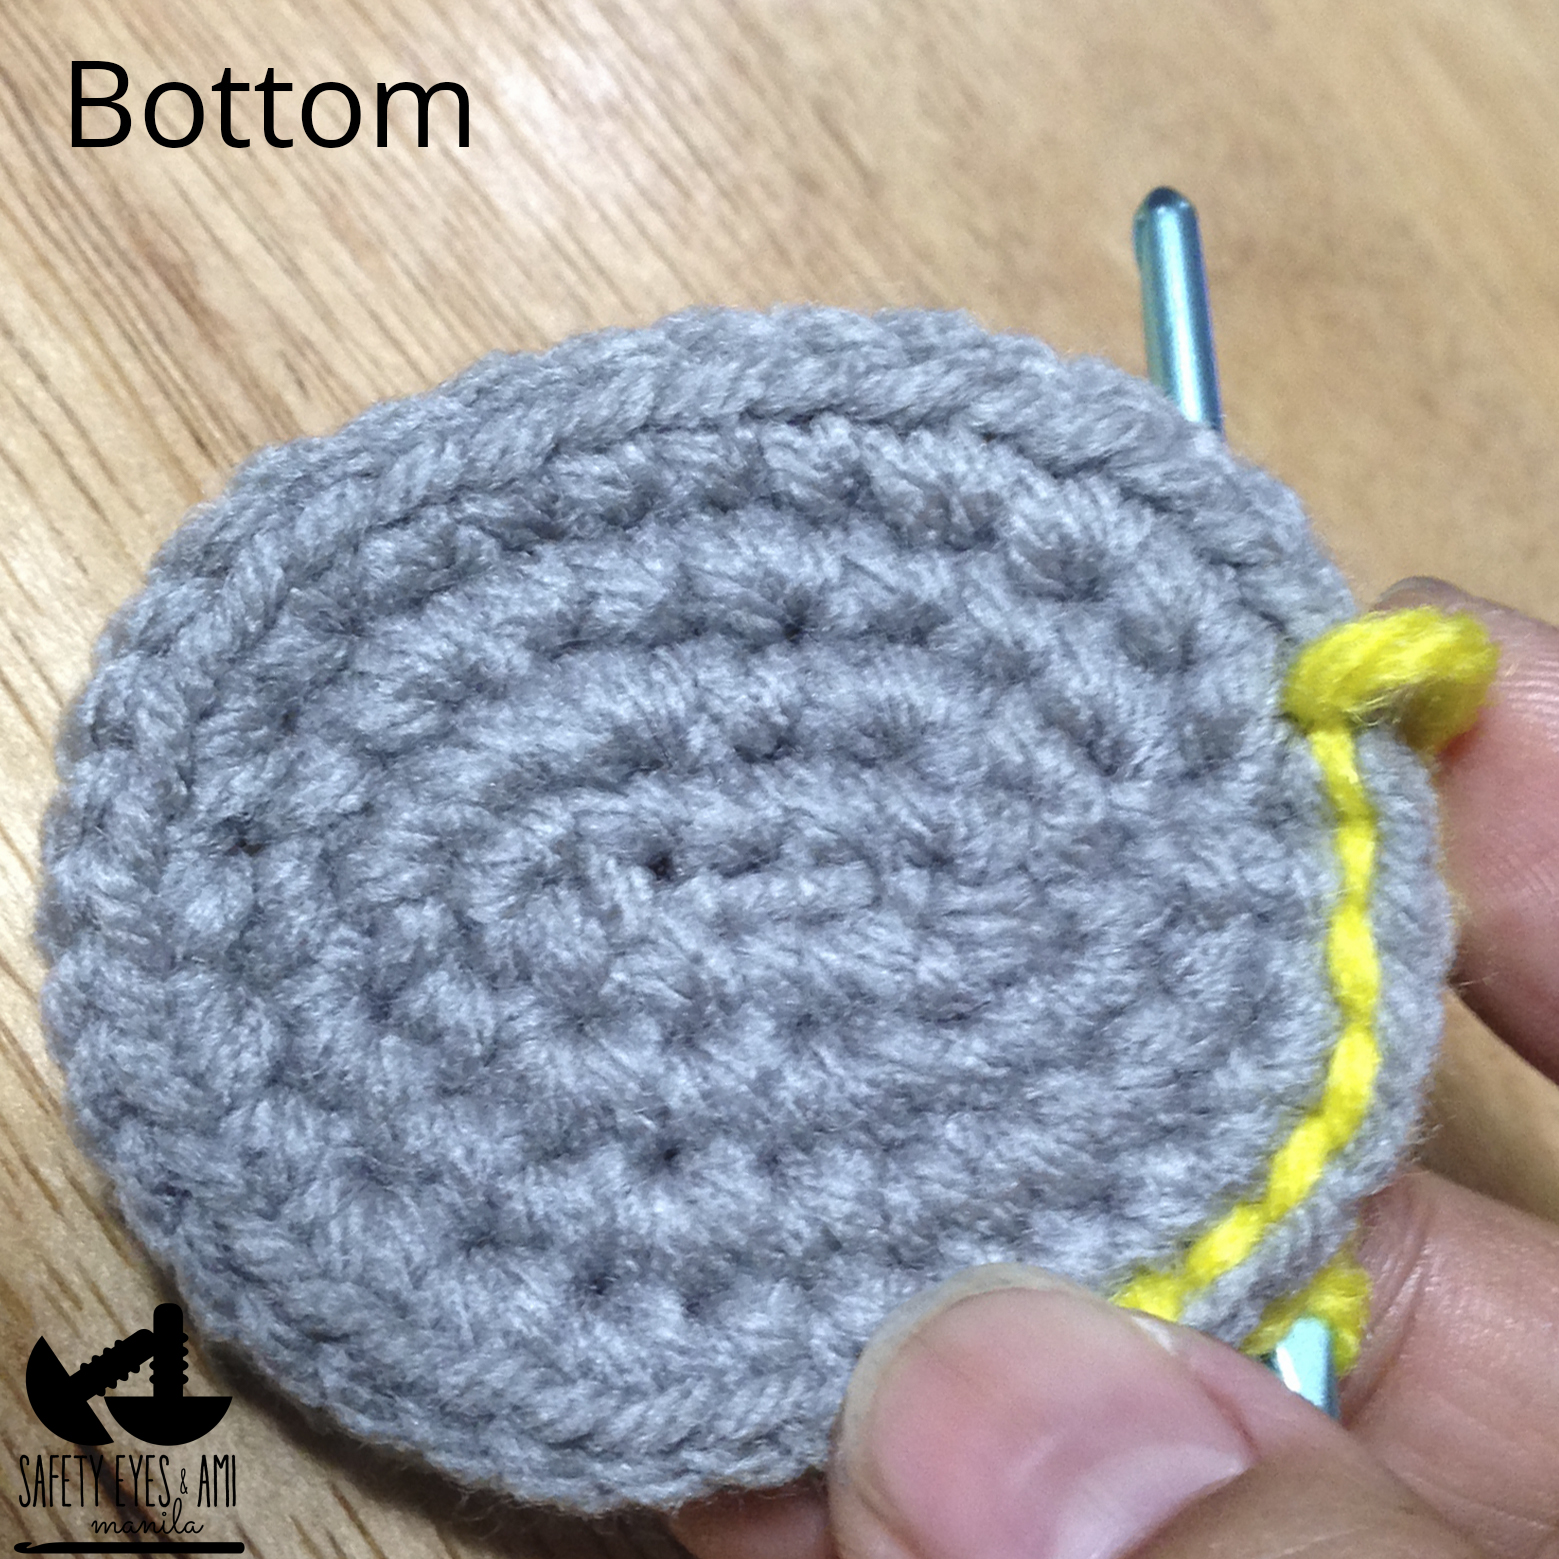
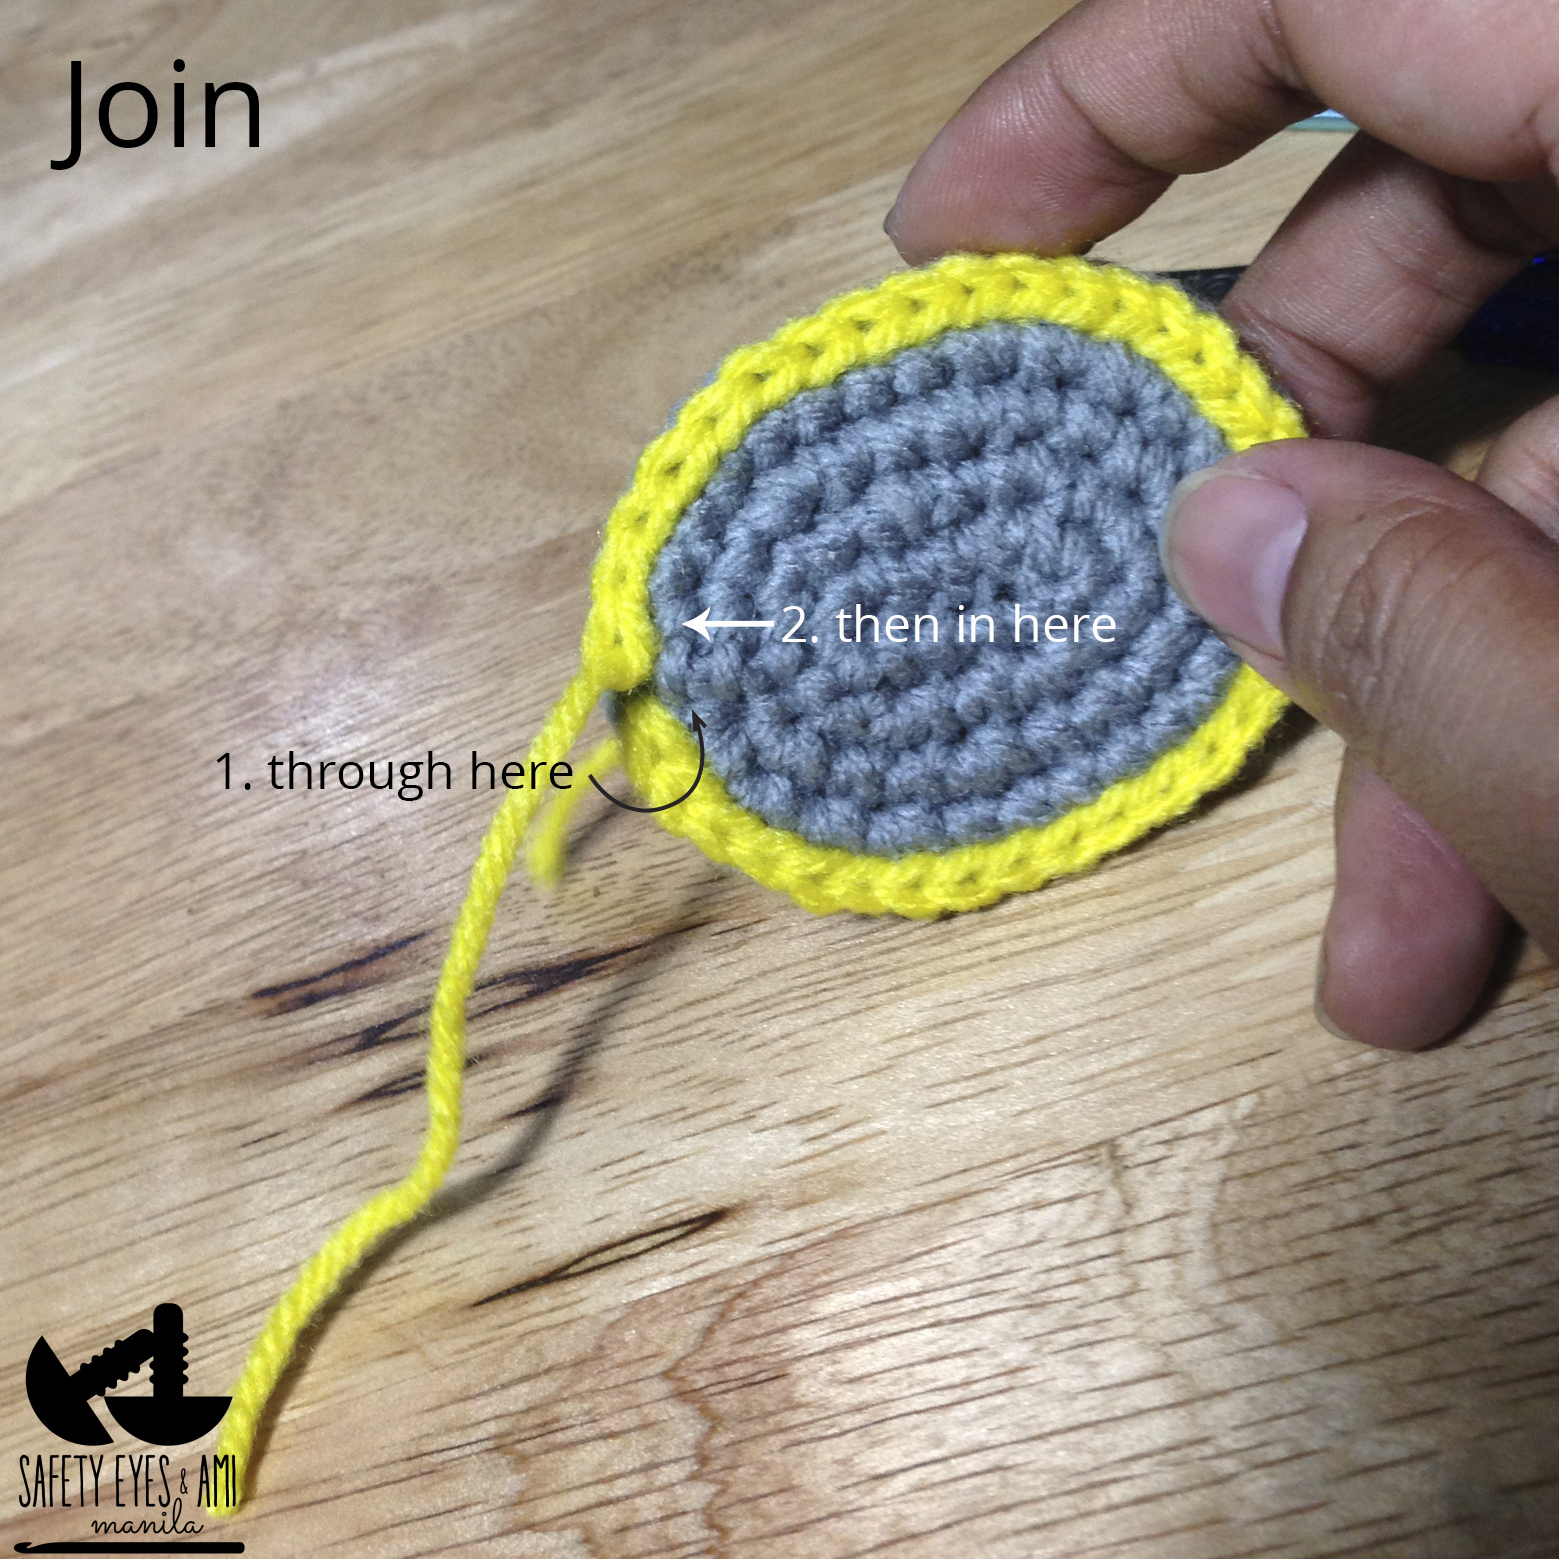
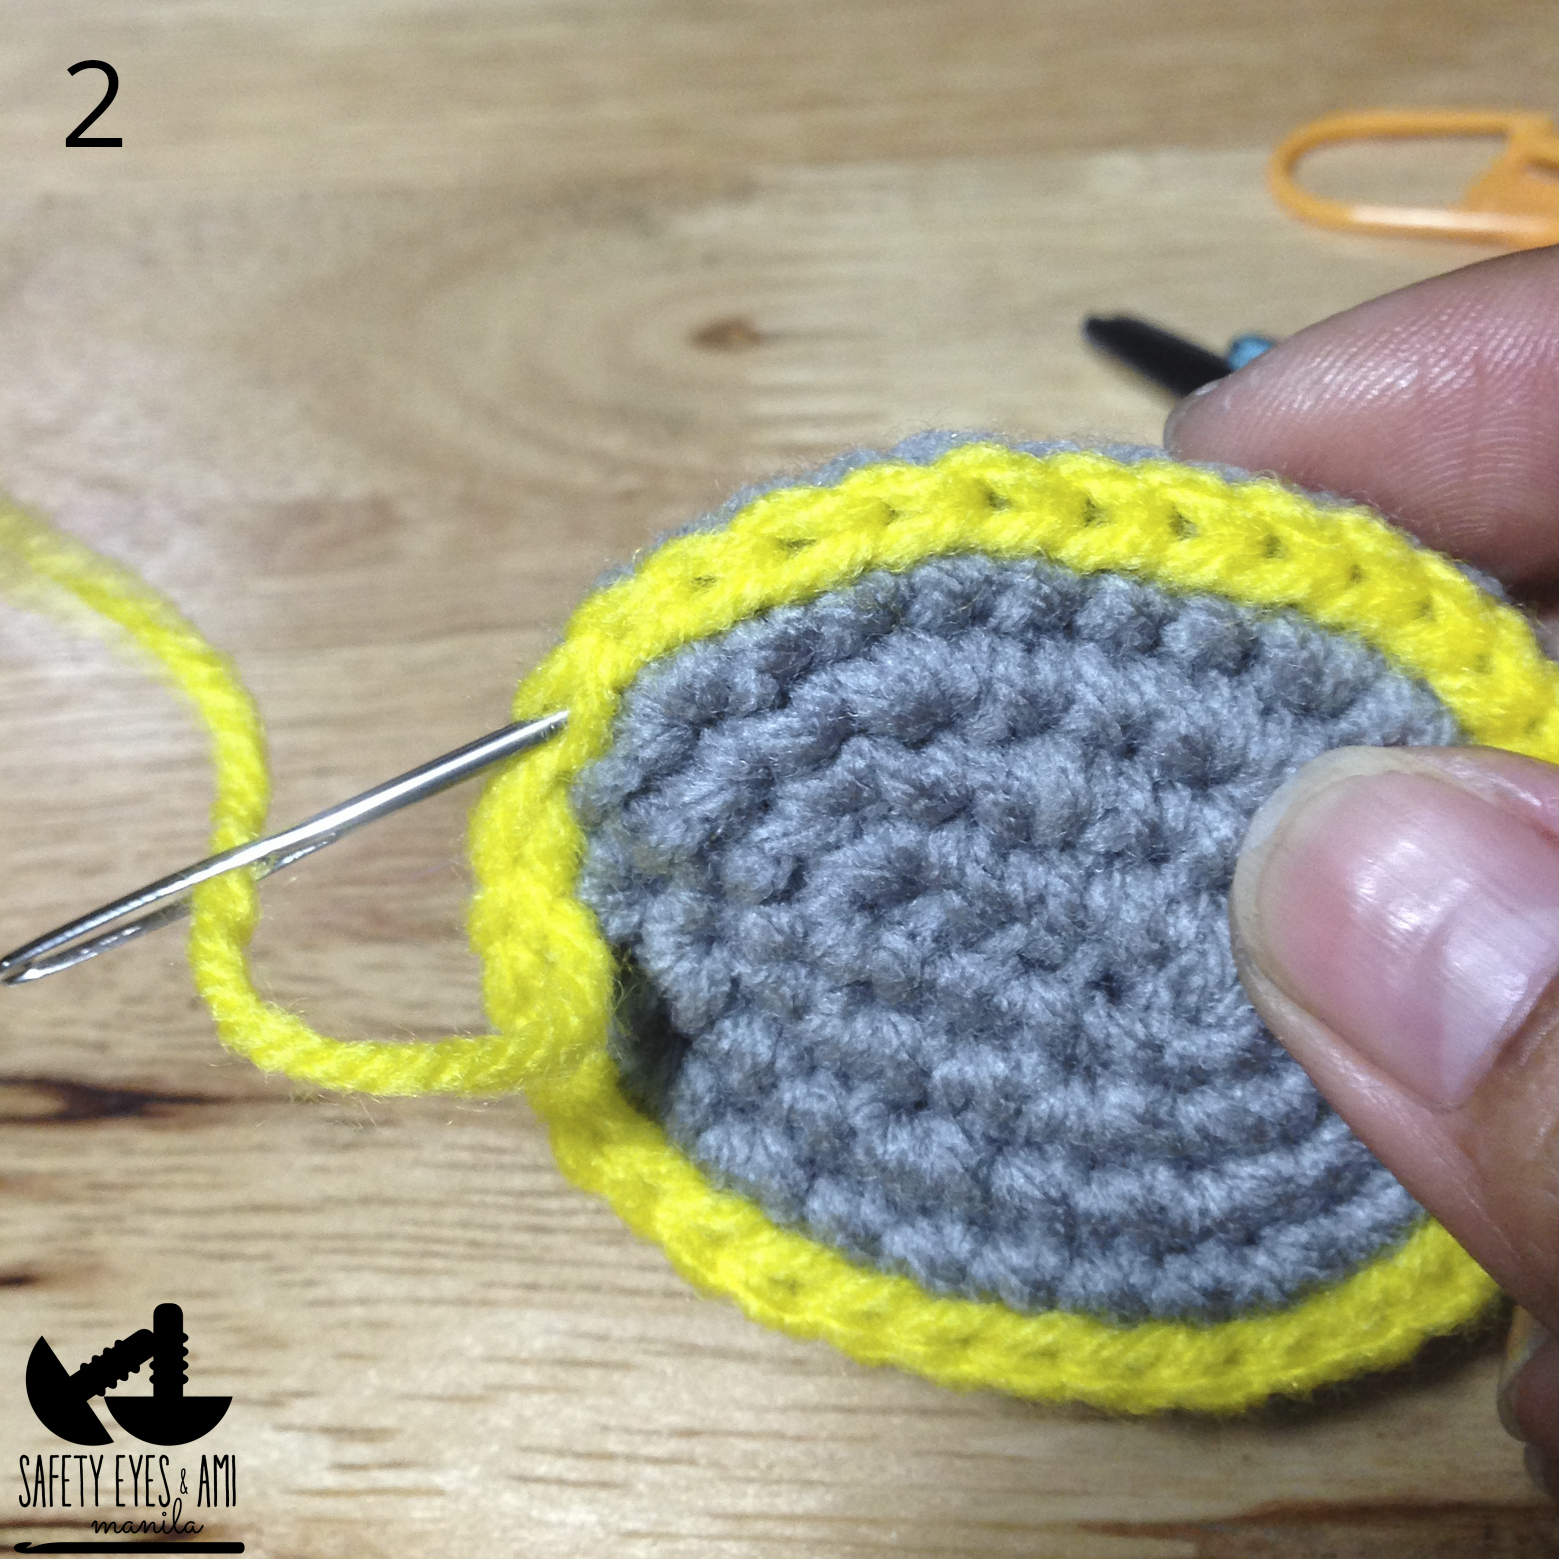
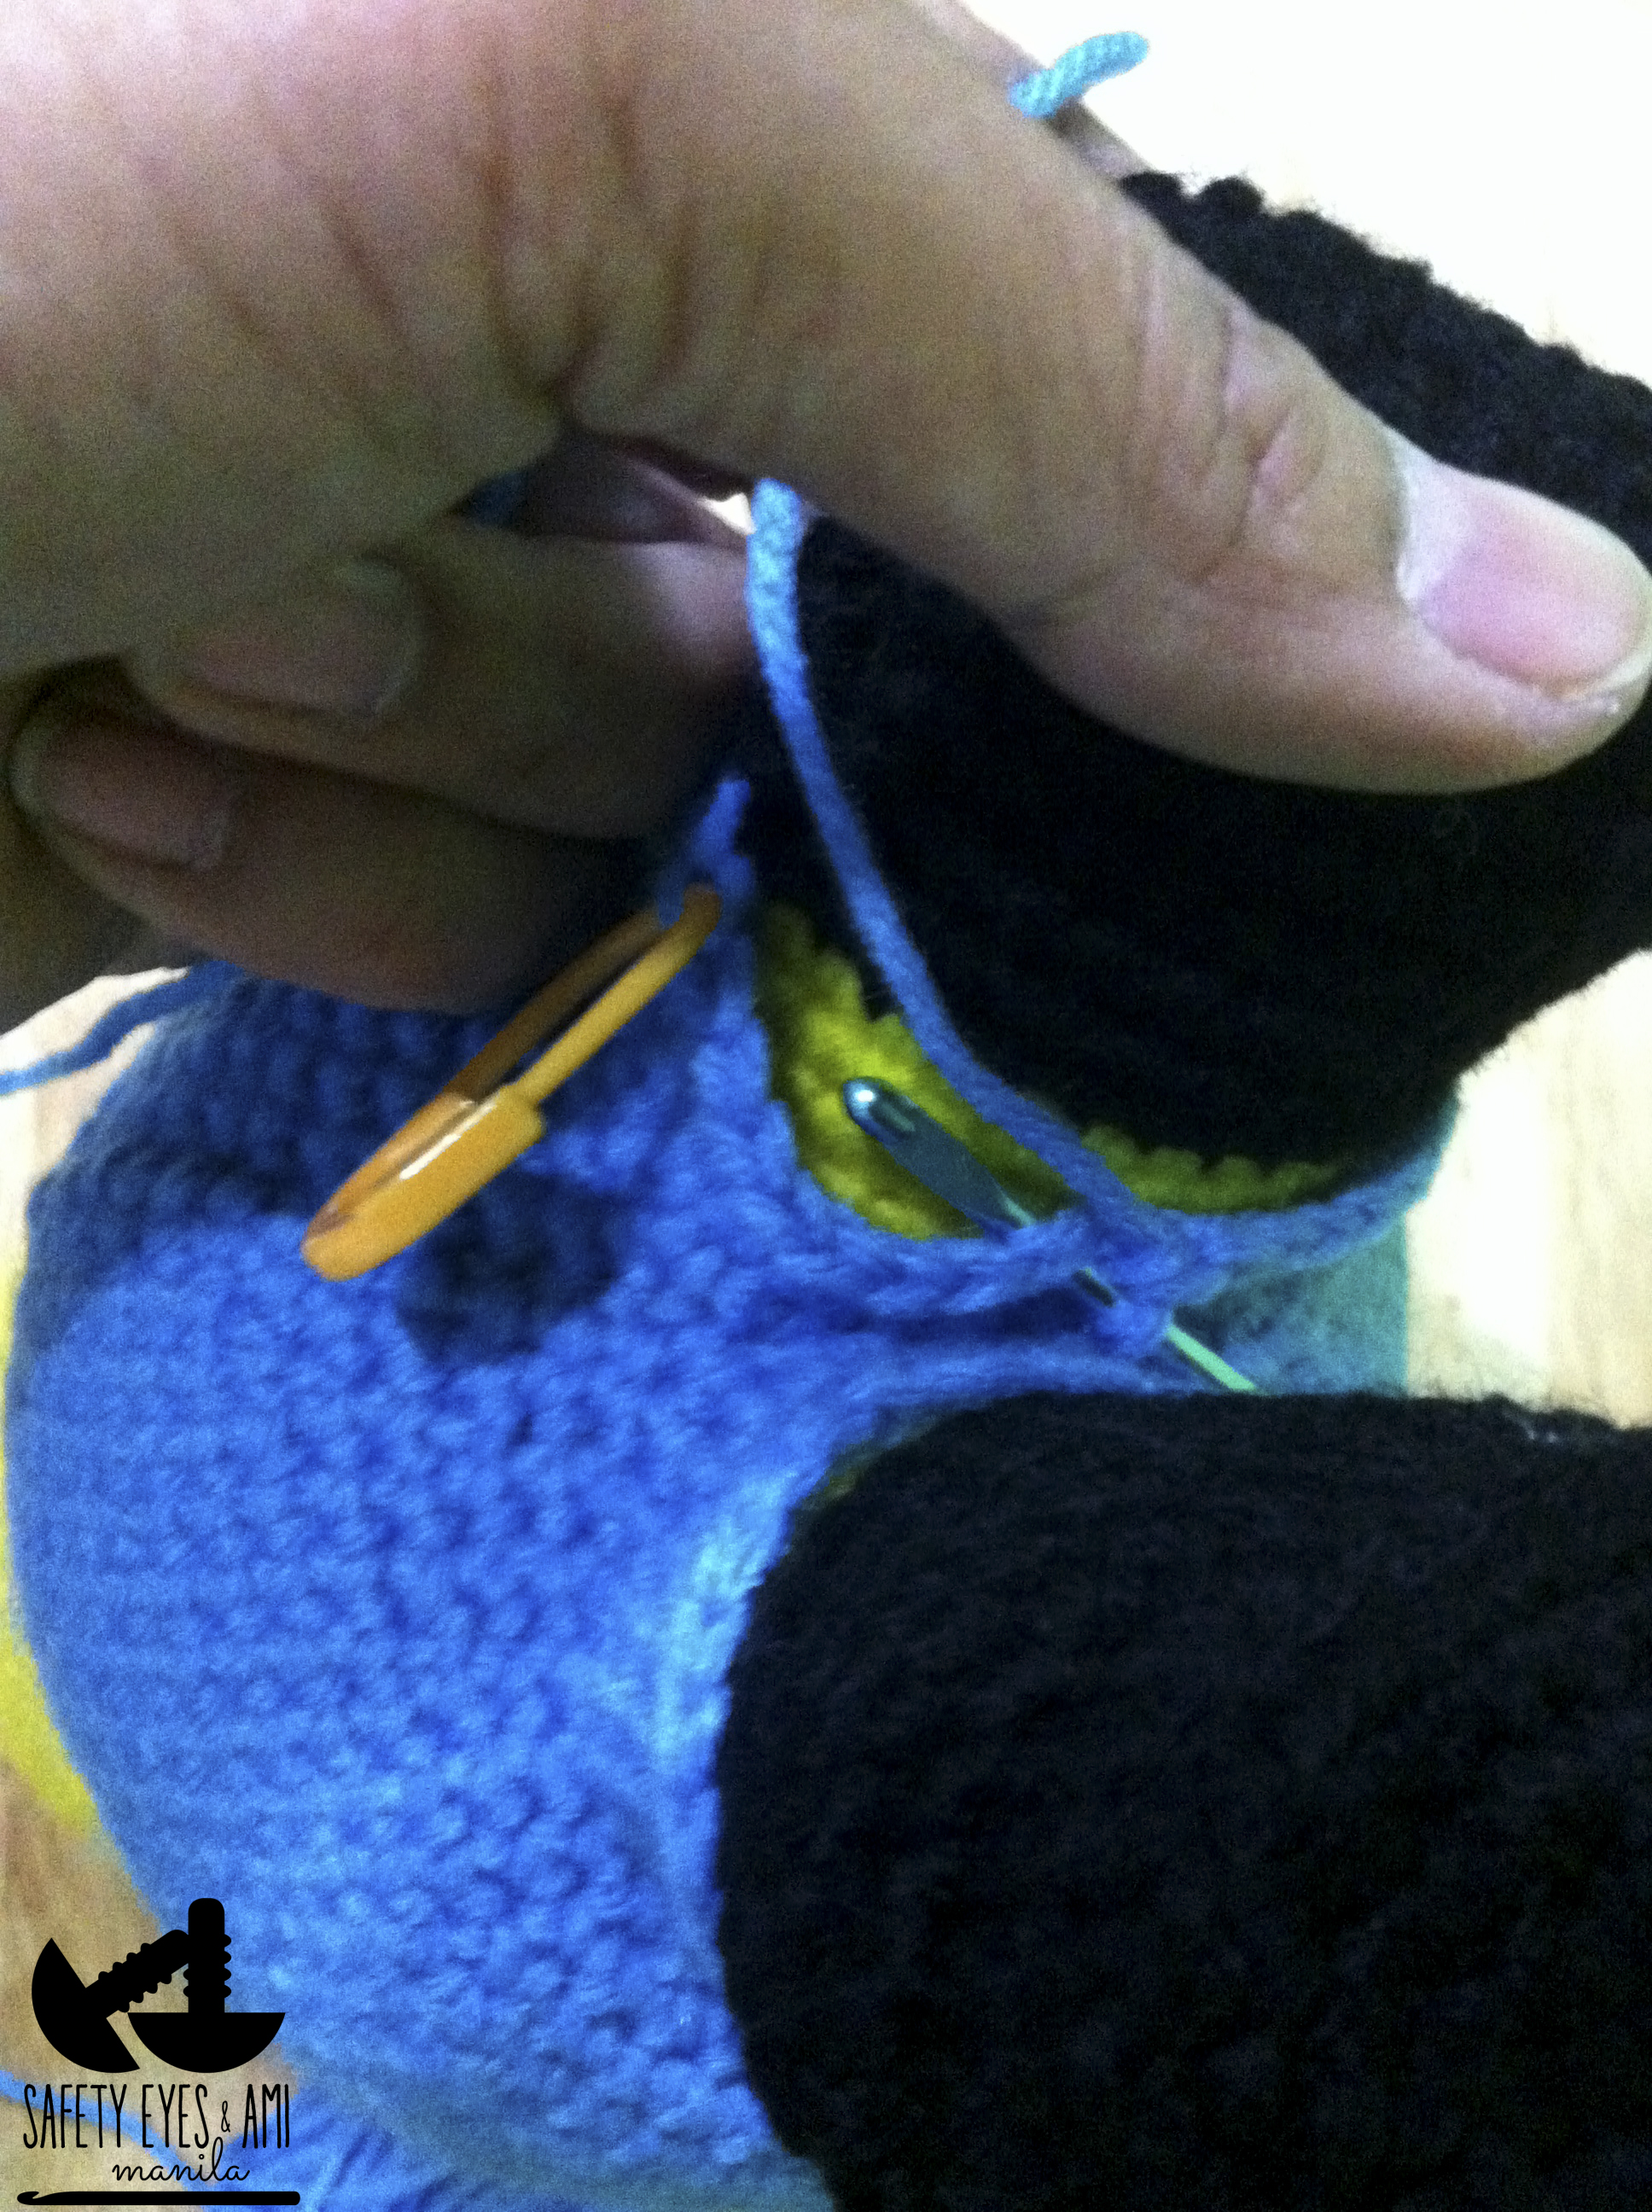
First, take the center of the heels and pull your yarn under all 4 loops - that's 2 from each sole.  You'll have 1 loop on your hook.   Then, insert your hook under the next set of loops, pick up the yarn and pull through the loop to make your 1st stitch.  Insert your hook under the next set of loops making sure you get under all 4 loops, pick up the yarn and pull through.  Keep doing this going around the sole.  The stitches facing you should look like chains. The side facing away from you will be the bottom of the boots and they'll have running stitches. 
Picture
Picture
Picture
Picture
You can tuck the tail in before you end this row.  You'll finish and close this row much like you did with the soles.  You should have 36 chains total.  Again, don't worry too much if it gets messy in the end as long as you have 36 chains.
Picture
Picture
Picture
Picture
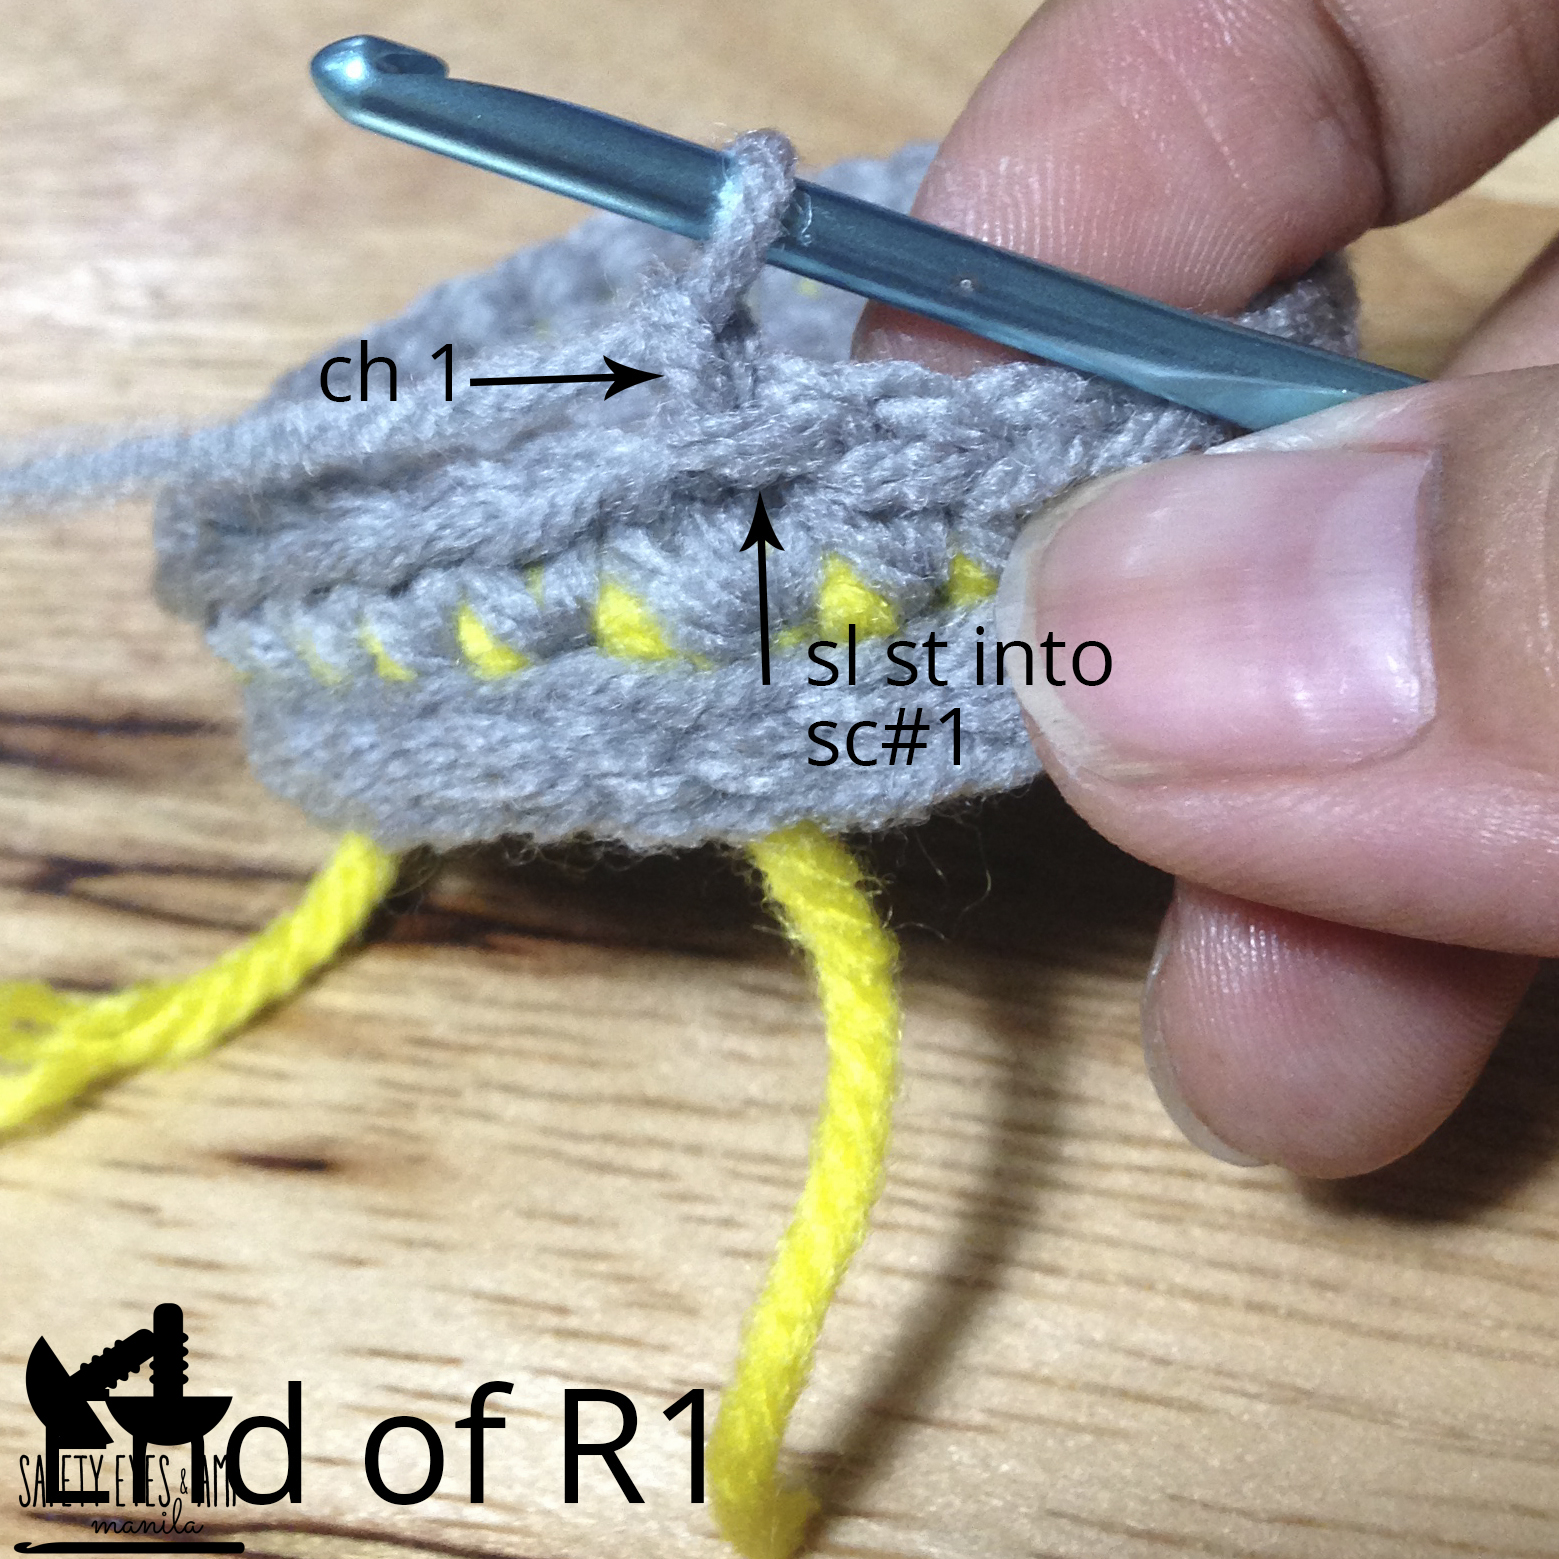
Let's go back to grey yarn to make the rest of the boot.  Again, starting at the center of the heel, insert your hook under the 2 loops of the chain, pick up the grey yarn and pull through the chain.  You'll have 1 loop on your hook.  Yarn over, pull through the loop, insert your hook into the same (center) chain, yarn over, pull though.  You'll have 2 loops on your hook.  Yarn over and pull through 2 loops to make your 1st sc.  Then sc all around.  This is R1.  End with a sl st into sc #1.  Ch 1.  Mark the ch1.
Picture
Picture
Picture
Picture
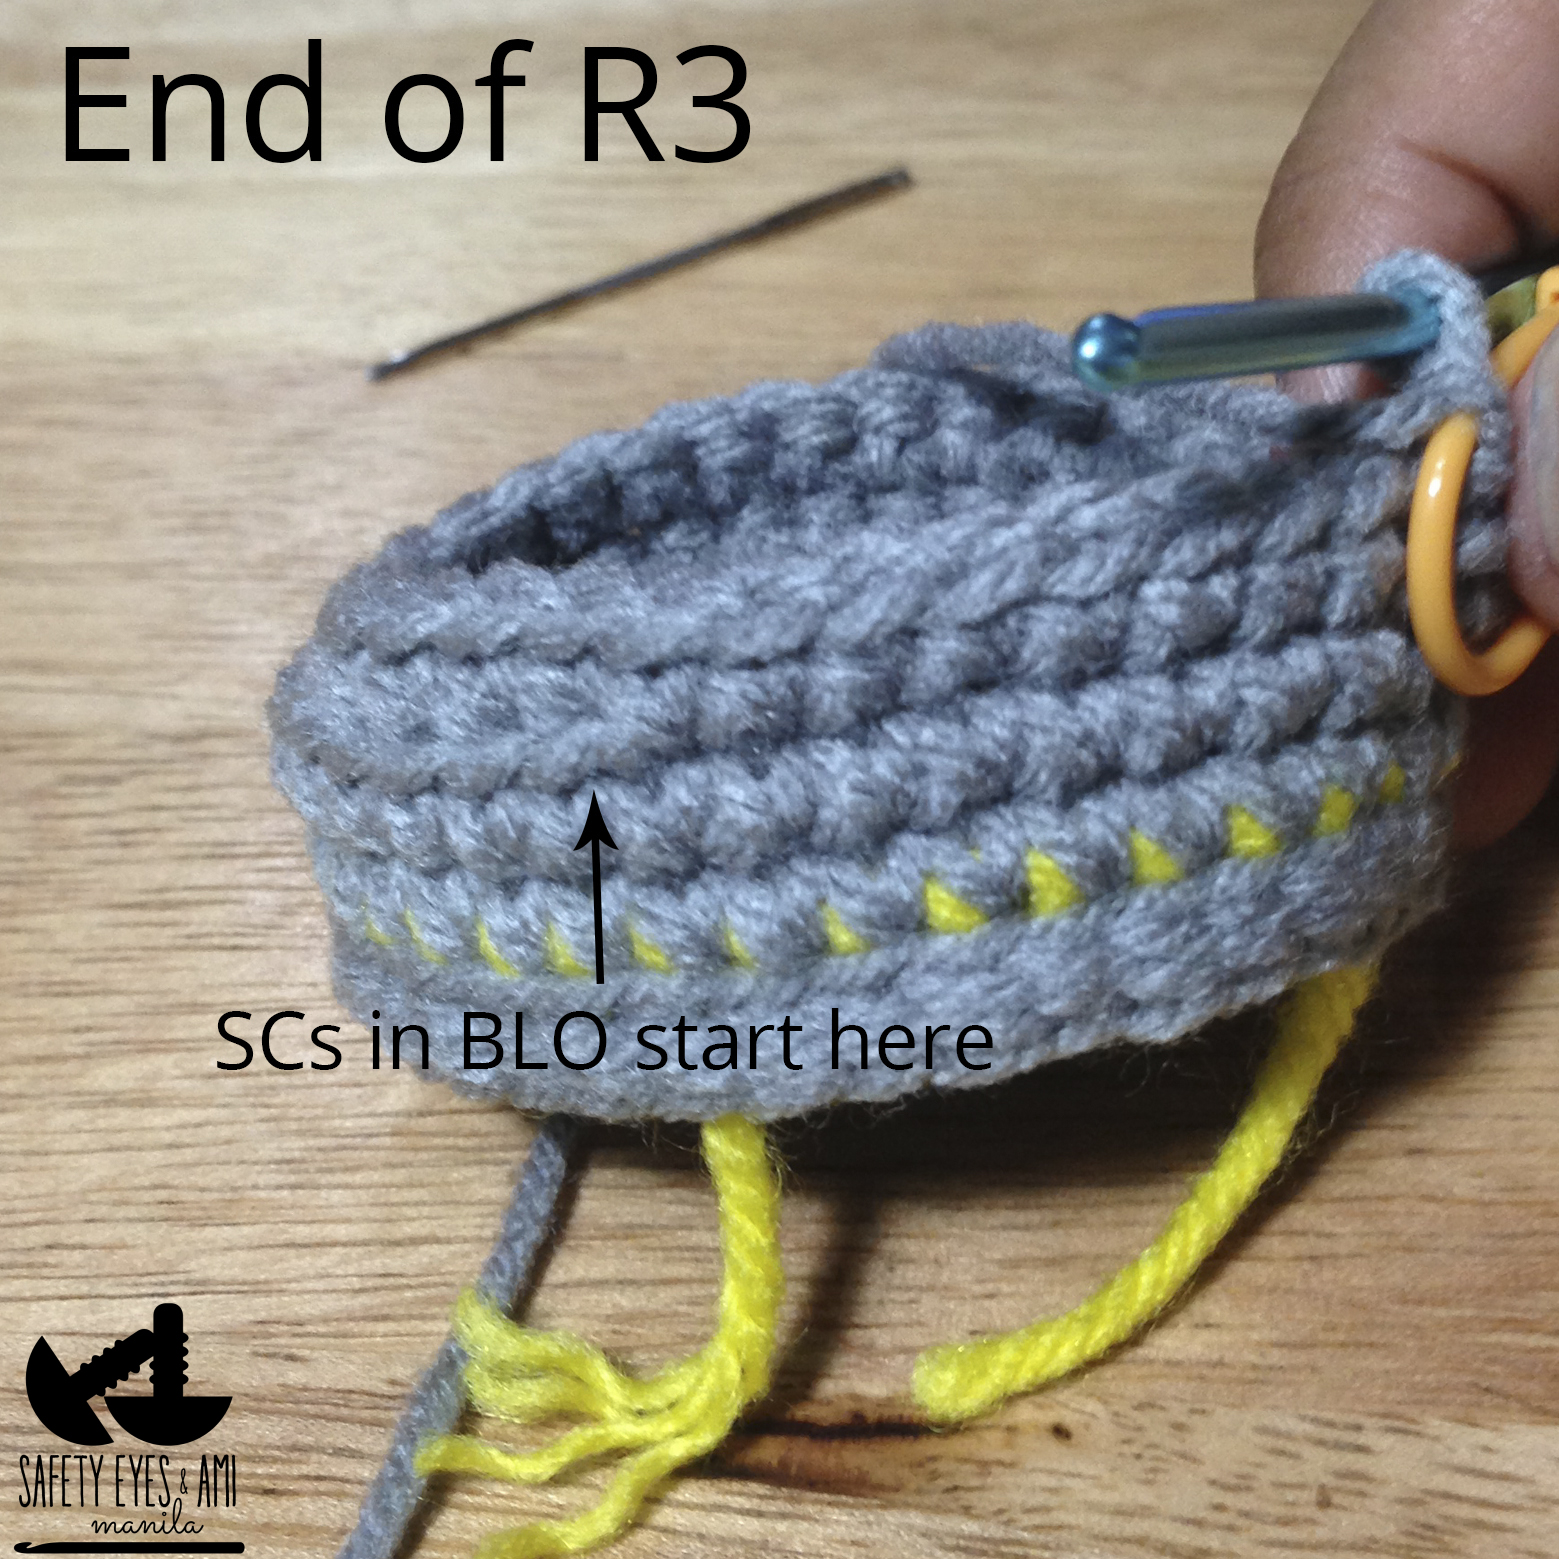
R2 sc around (36) skip last st, sl st into ch1 of previous round and ch1.R3 sc 8, [sc 6, dec 4x, sc 6] in BLO (back loop only), sc 8 (32) skip last st, sl st into ch1 of previous round. Ch1.
R4 dec, sc 12, dec 2x, sc12, dec (28) skip last st, sl st into ch1 of previous round. Ch1.
R5 sc 10, dec 4x, sc 10 (24) skip last st, sl st into ch1 of previous round.  Ch1.
Picture
Picture
Picture
Picture
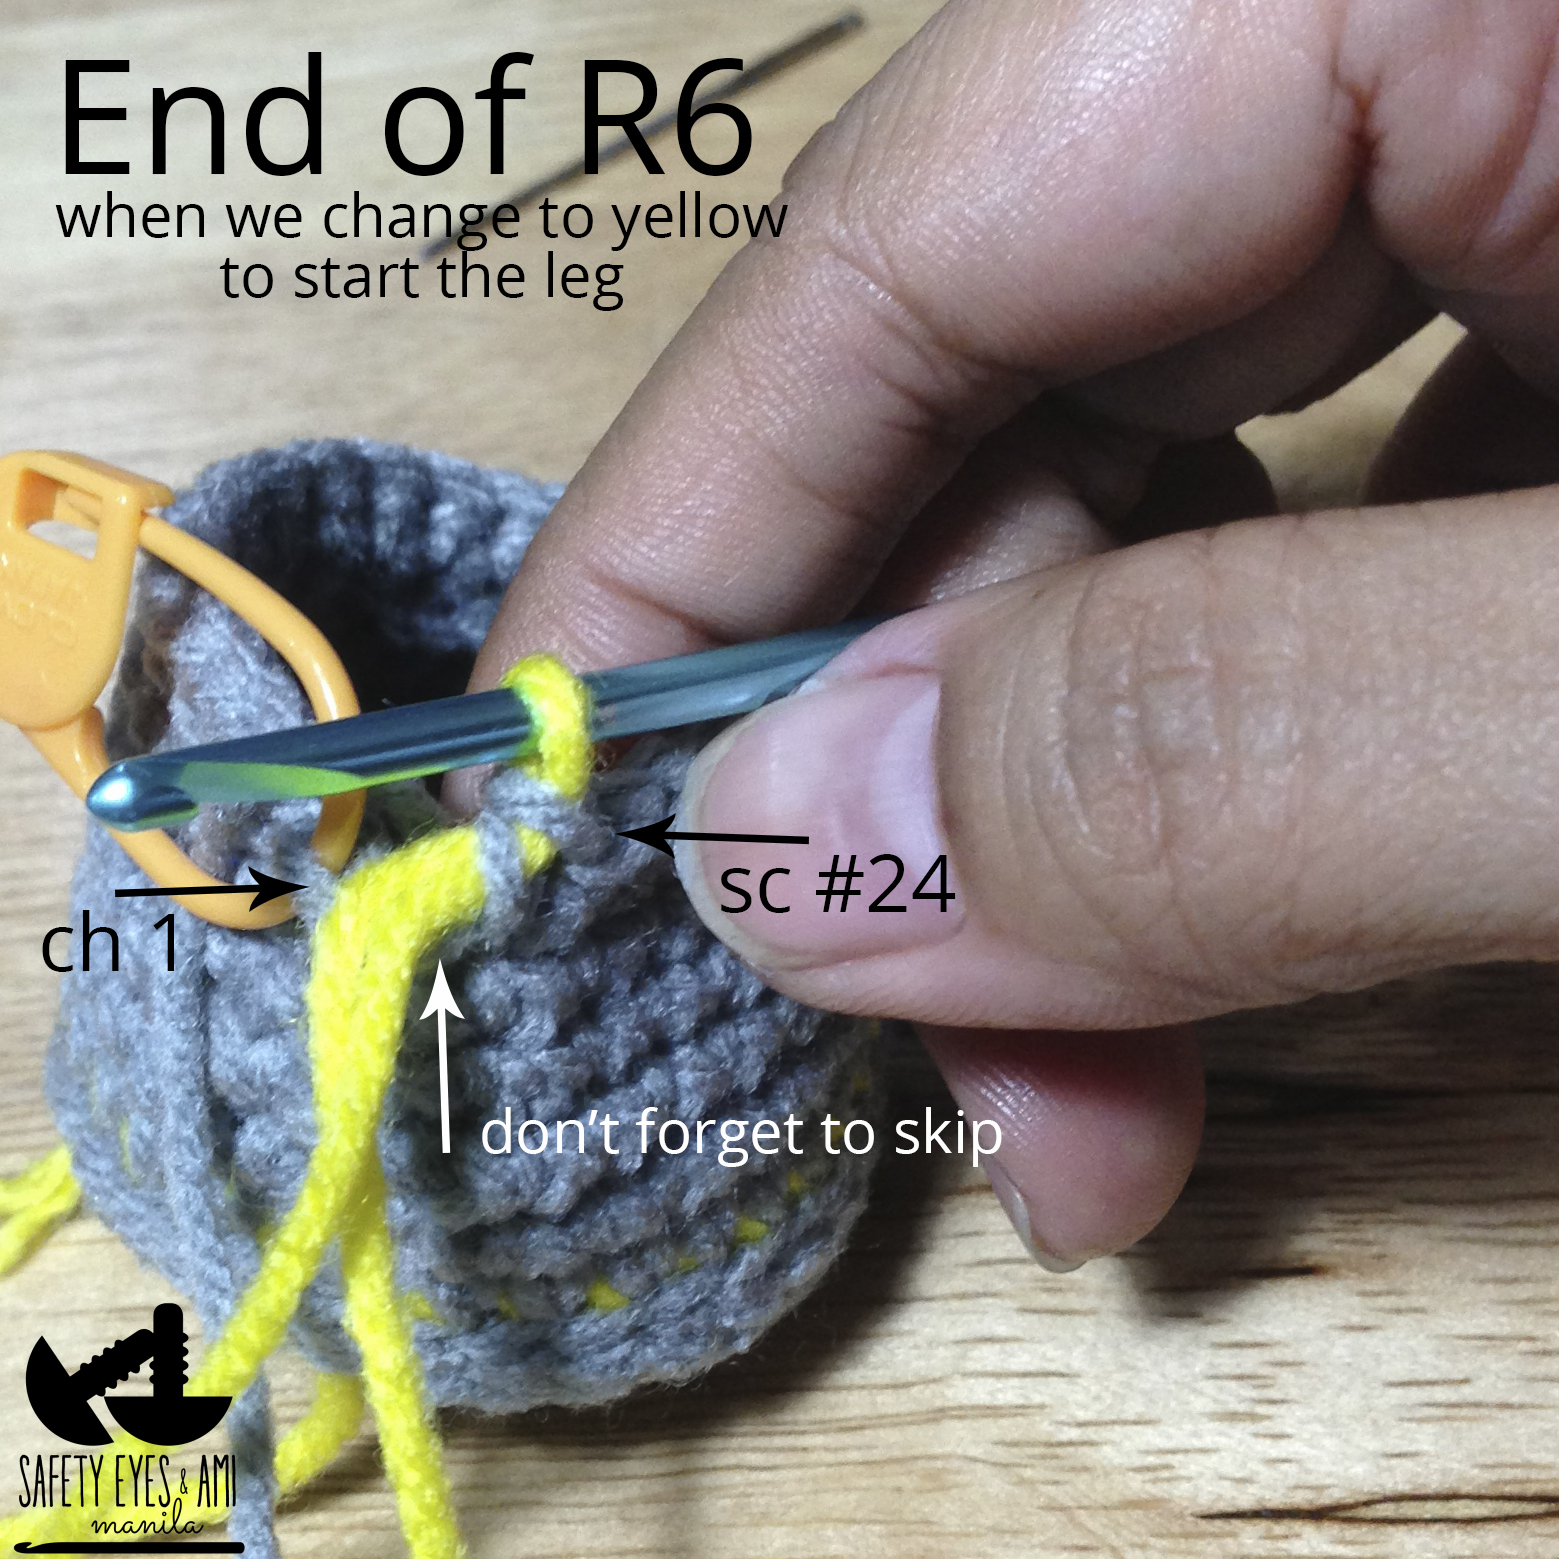
R6 sc around (24) change to yellow before your last yarn over so you pull through with yellow yarn.  skip last st, sl st into ch1 of previous round. Ch1.
R7 sc around in BLO (24) skip last st, sl st into ch1 of previous round. Ch1.
R8 - 10 sc around (24) skip last st, sl st into ch1 of previous round. Ch1.
Picture
Picture
Picture
Picture
Picture
Picture
Picture
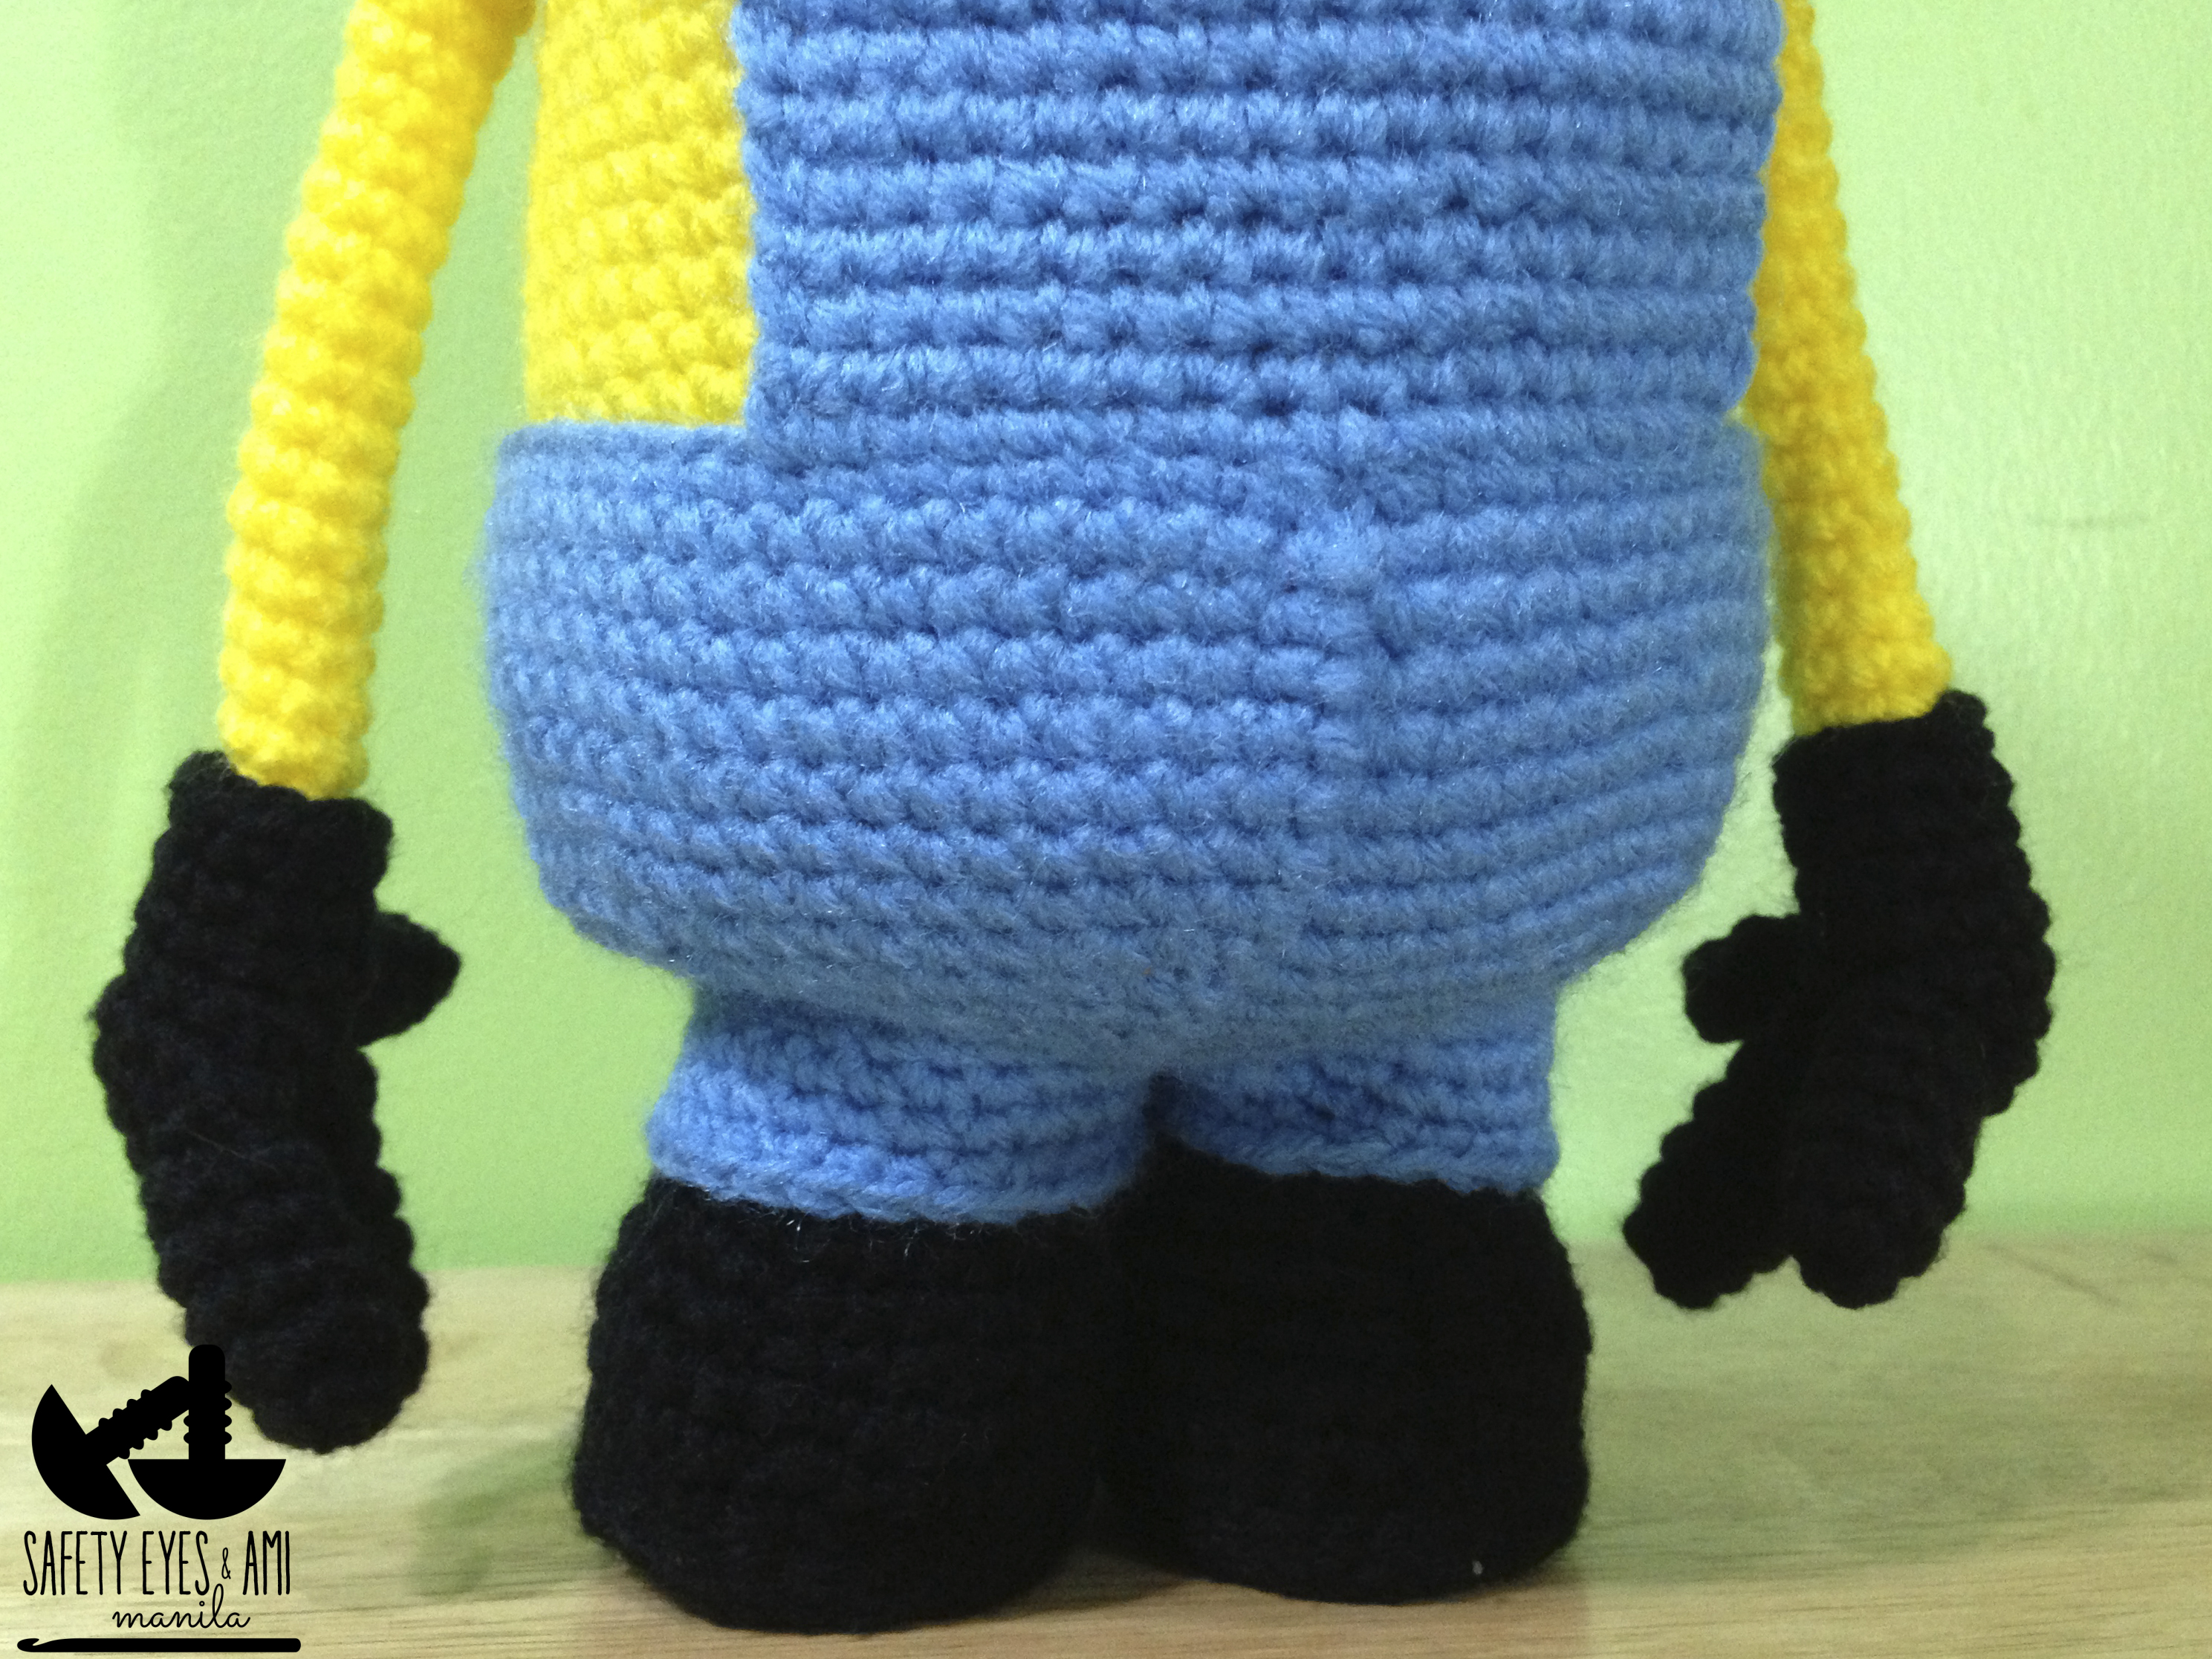
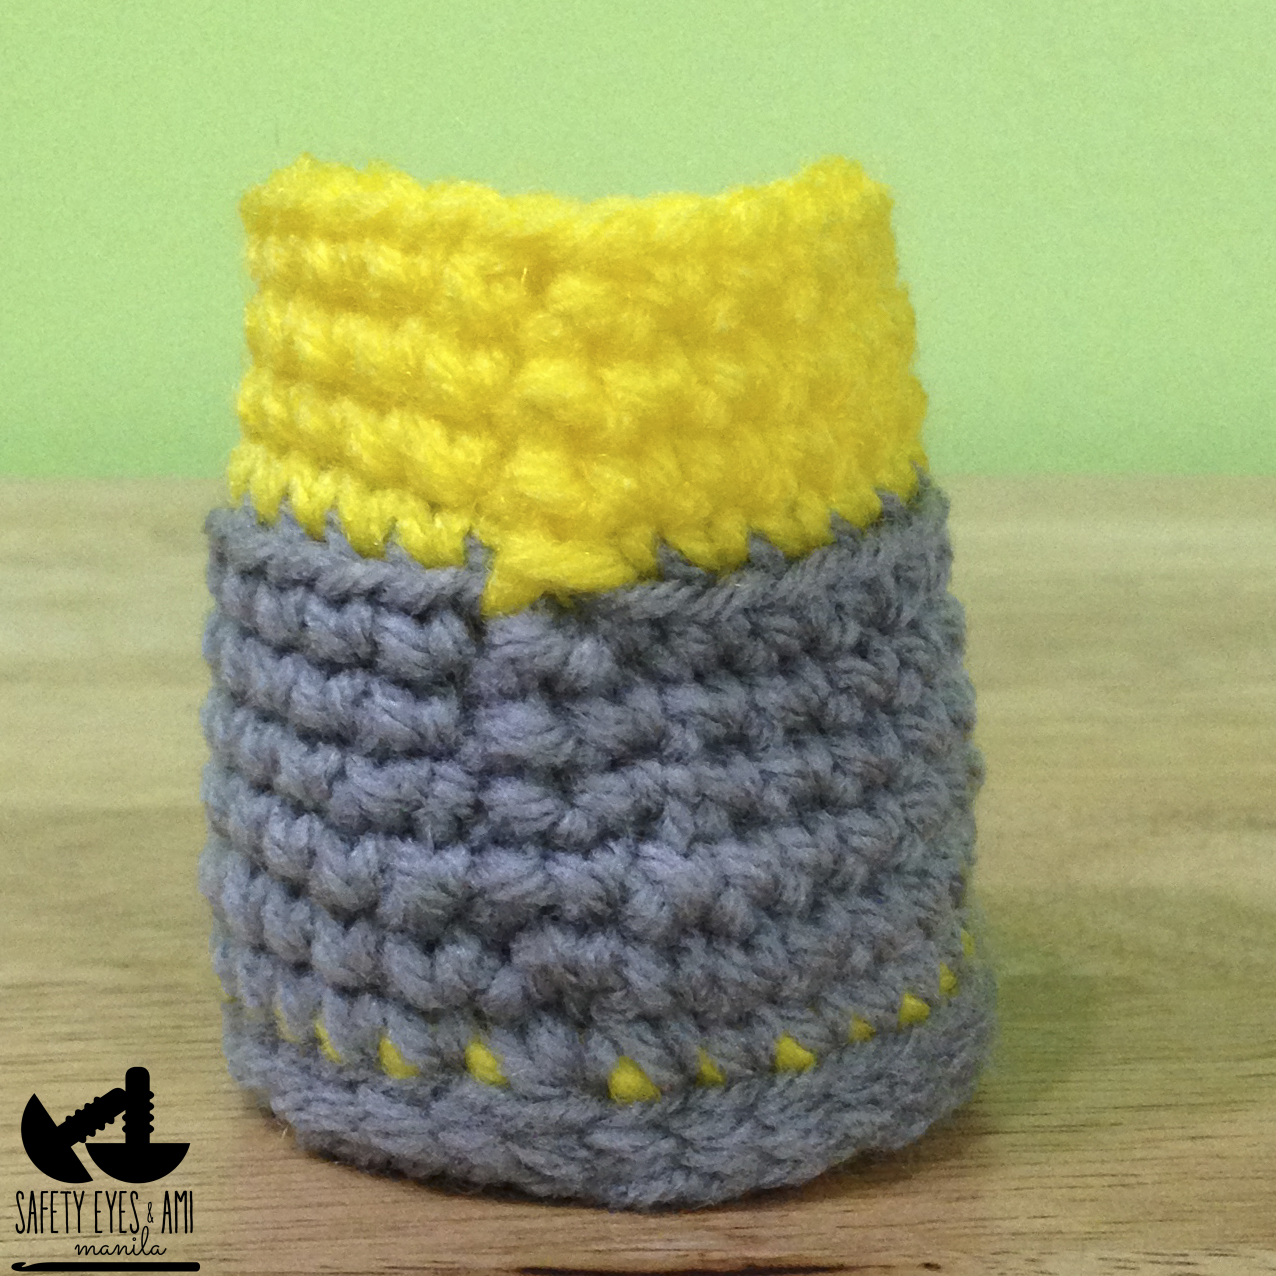
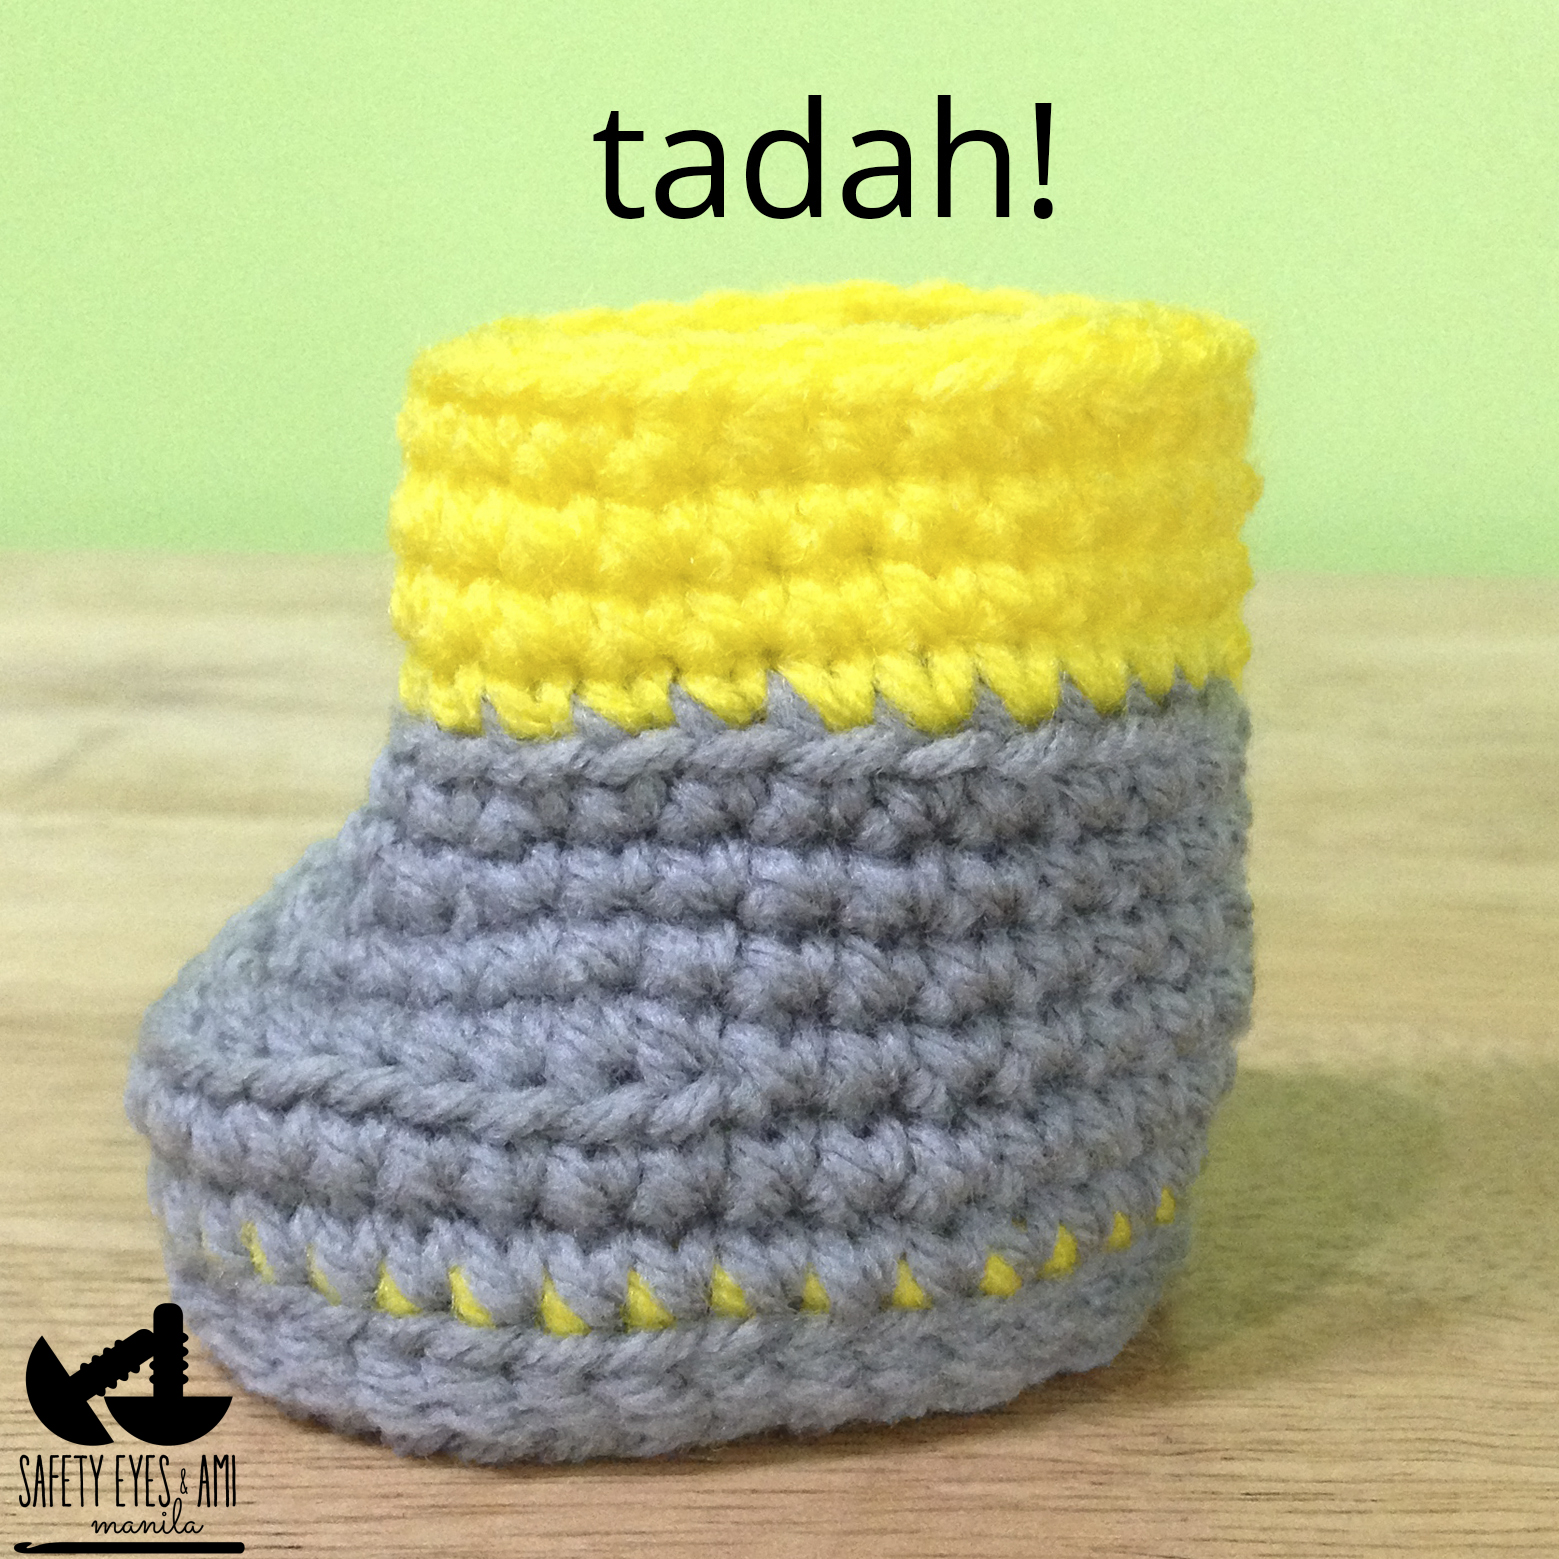
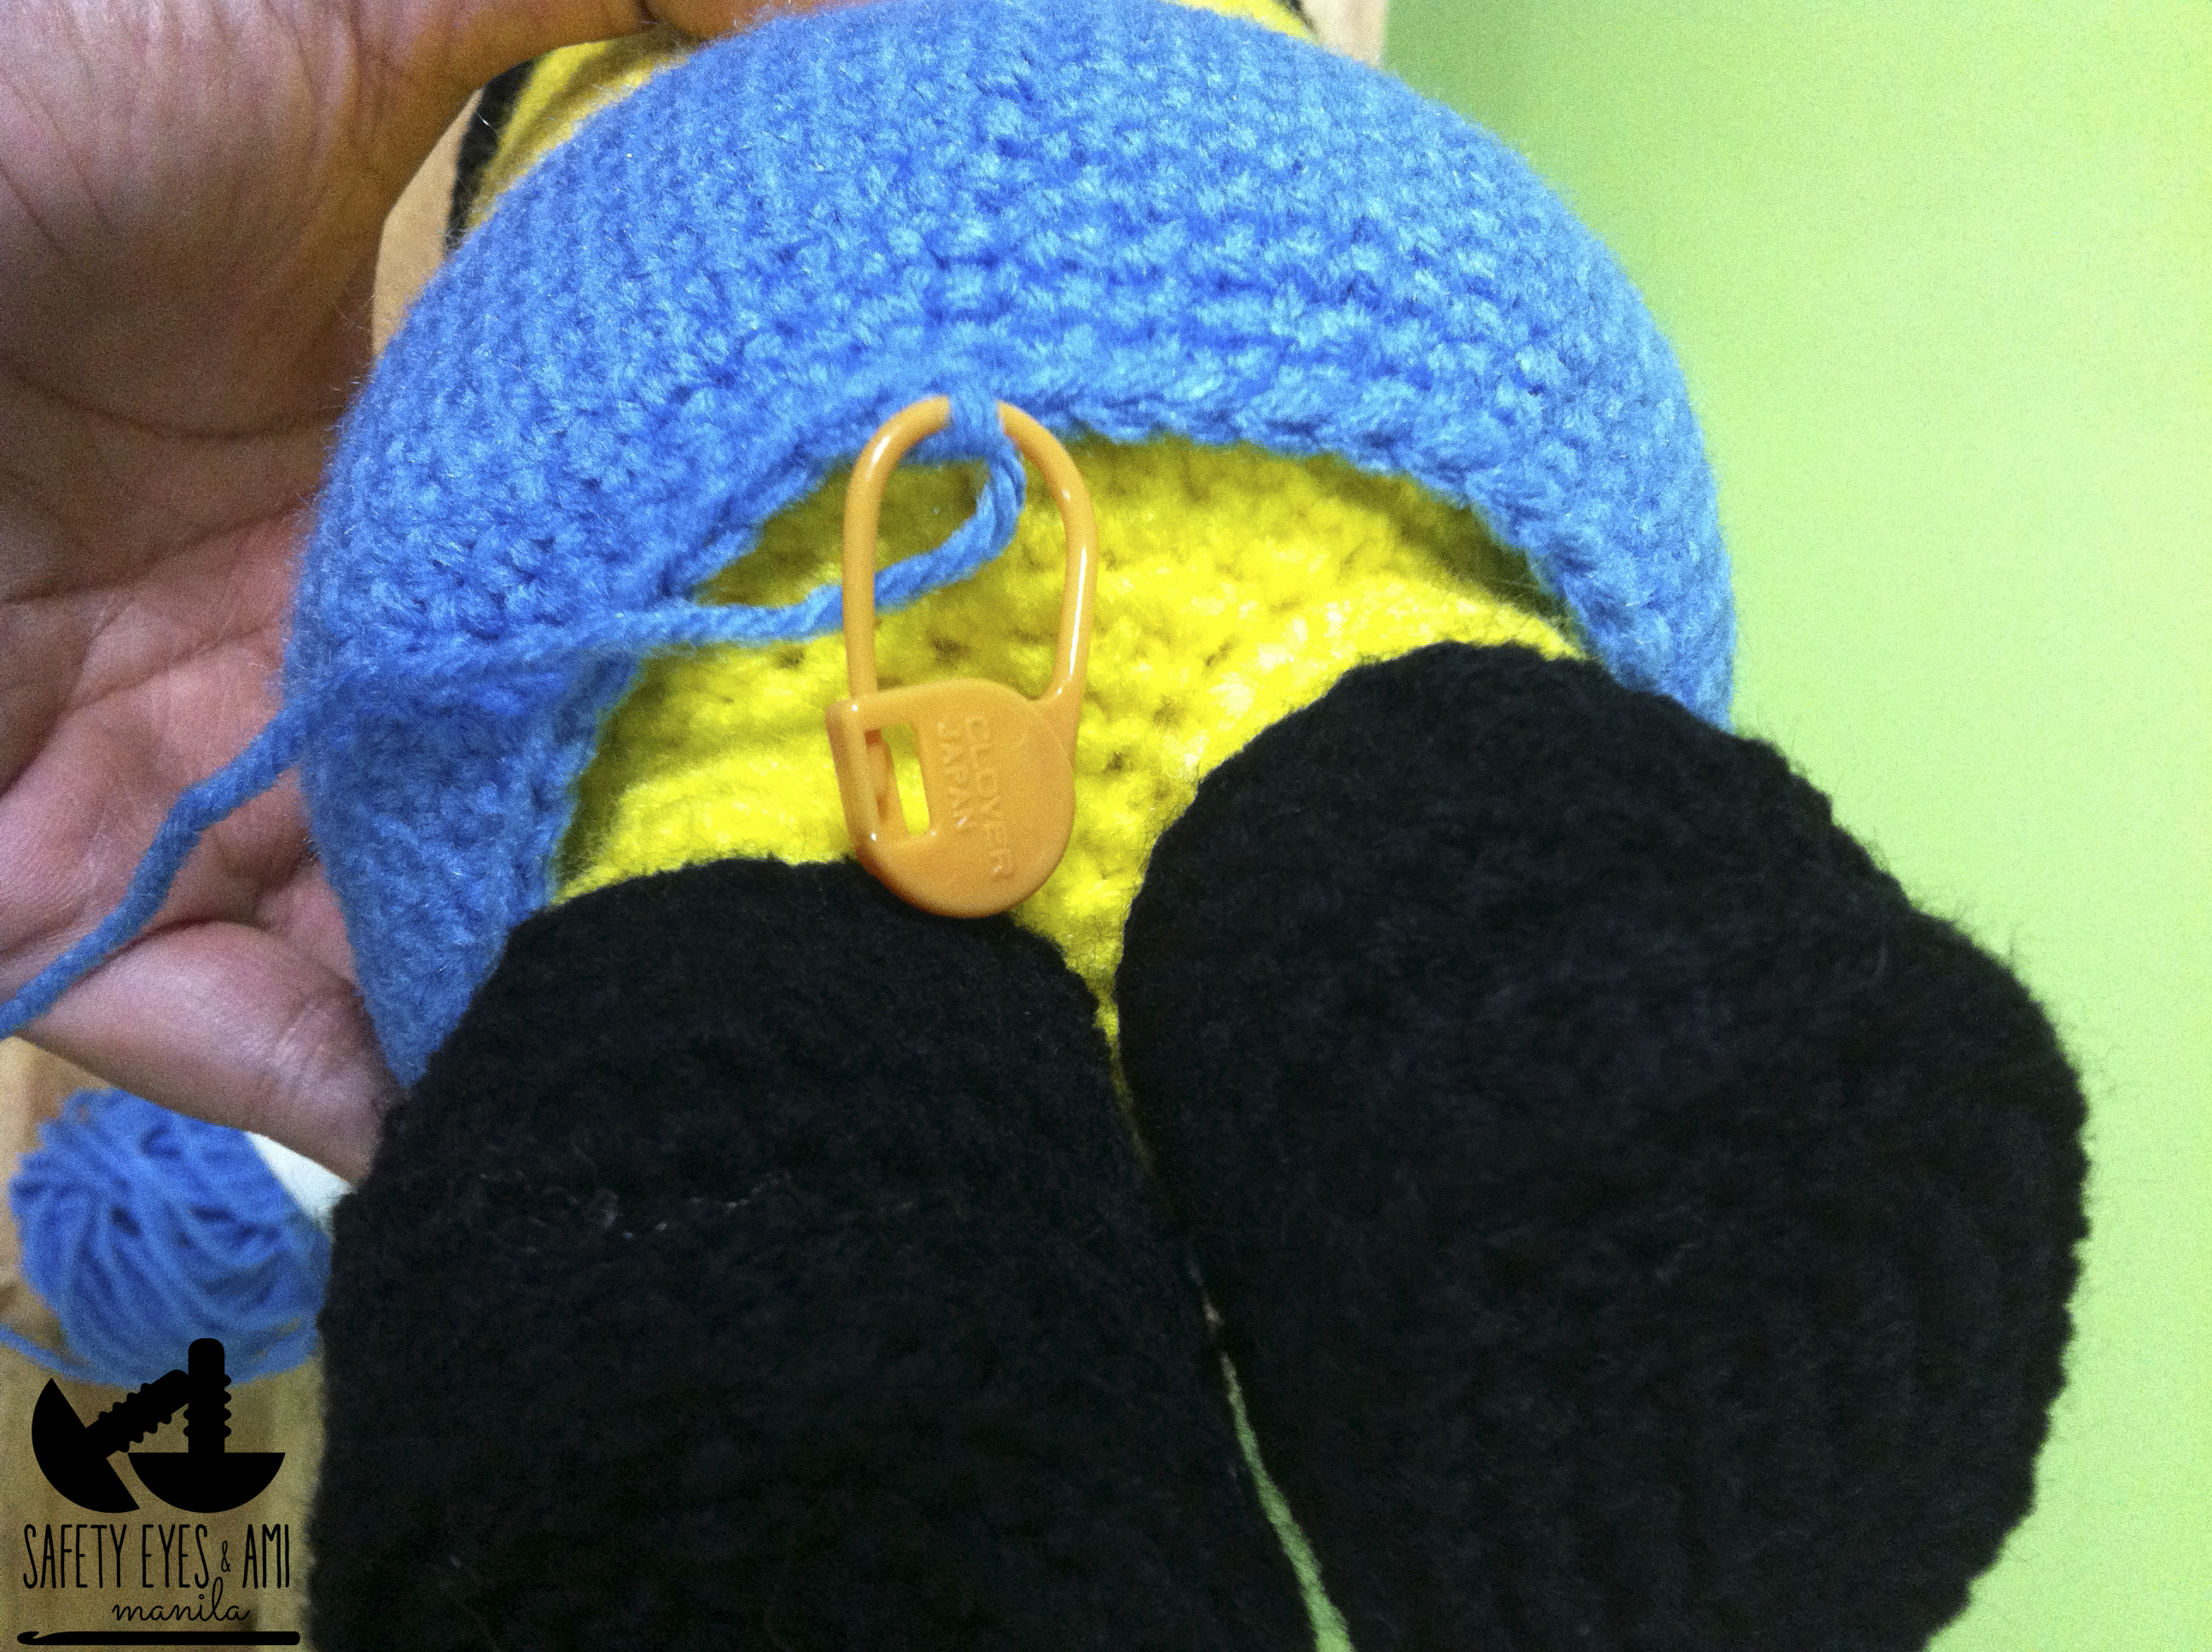
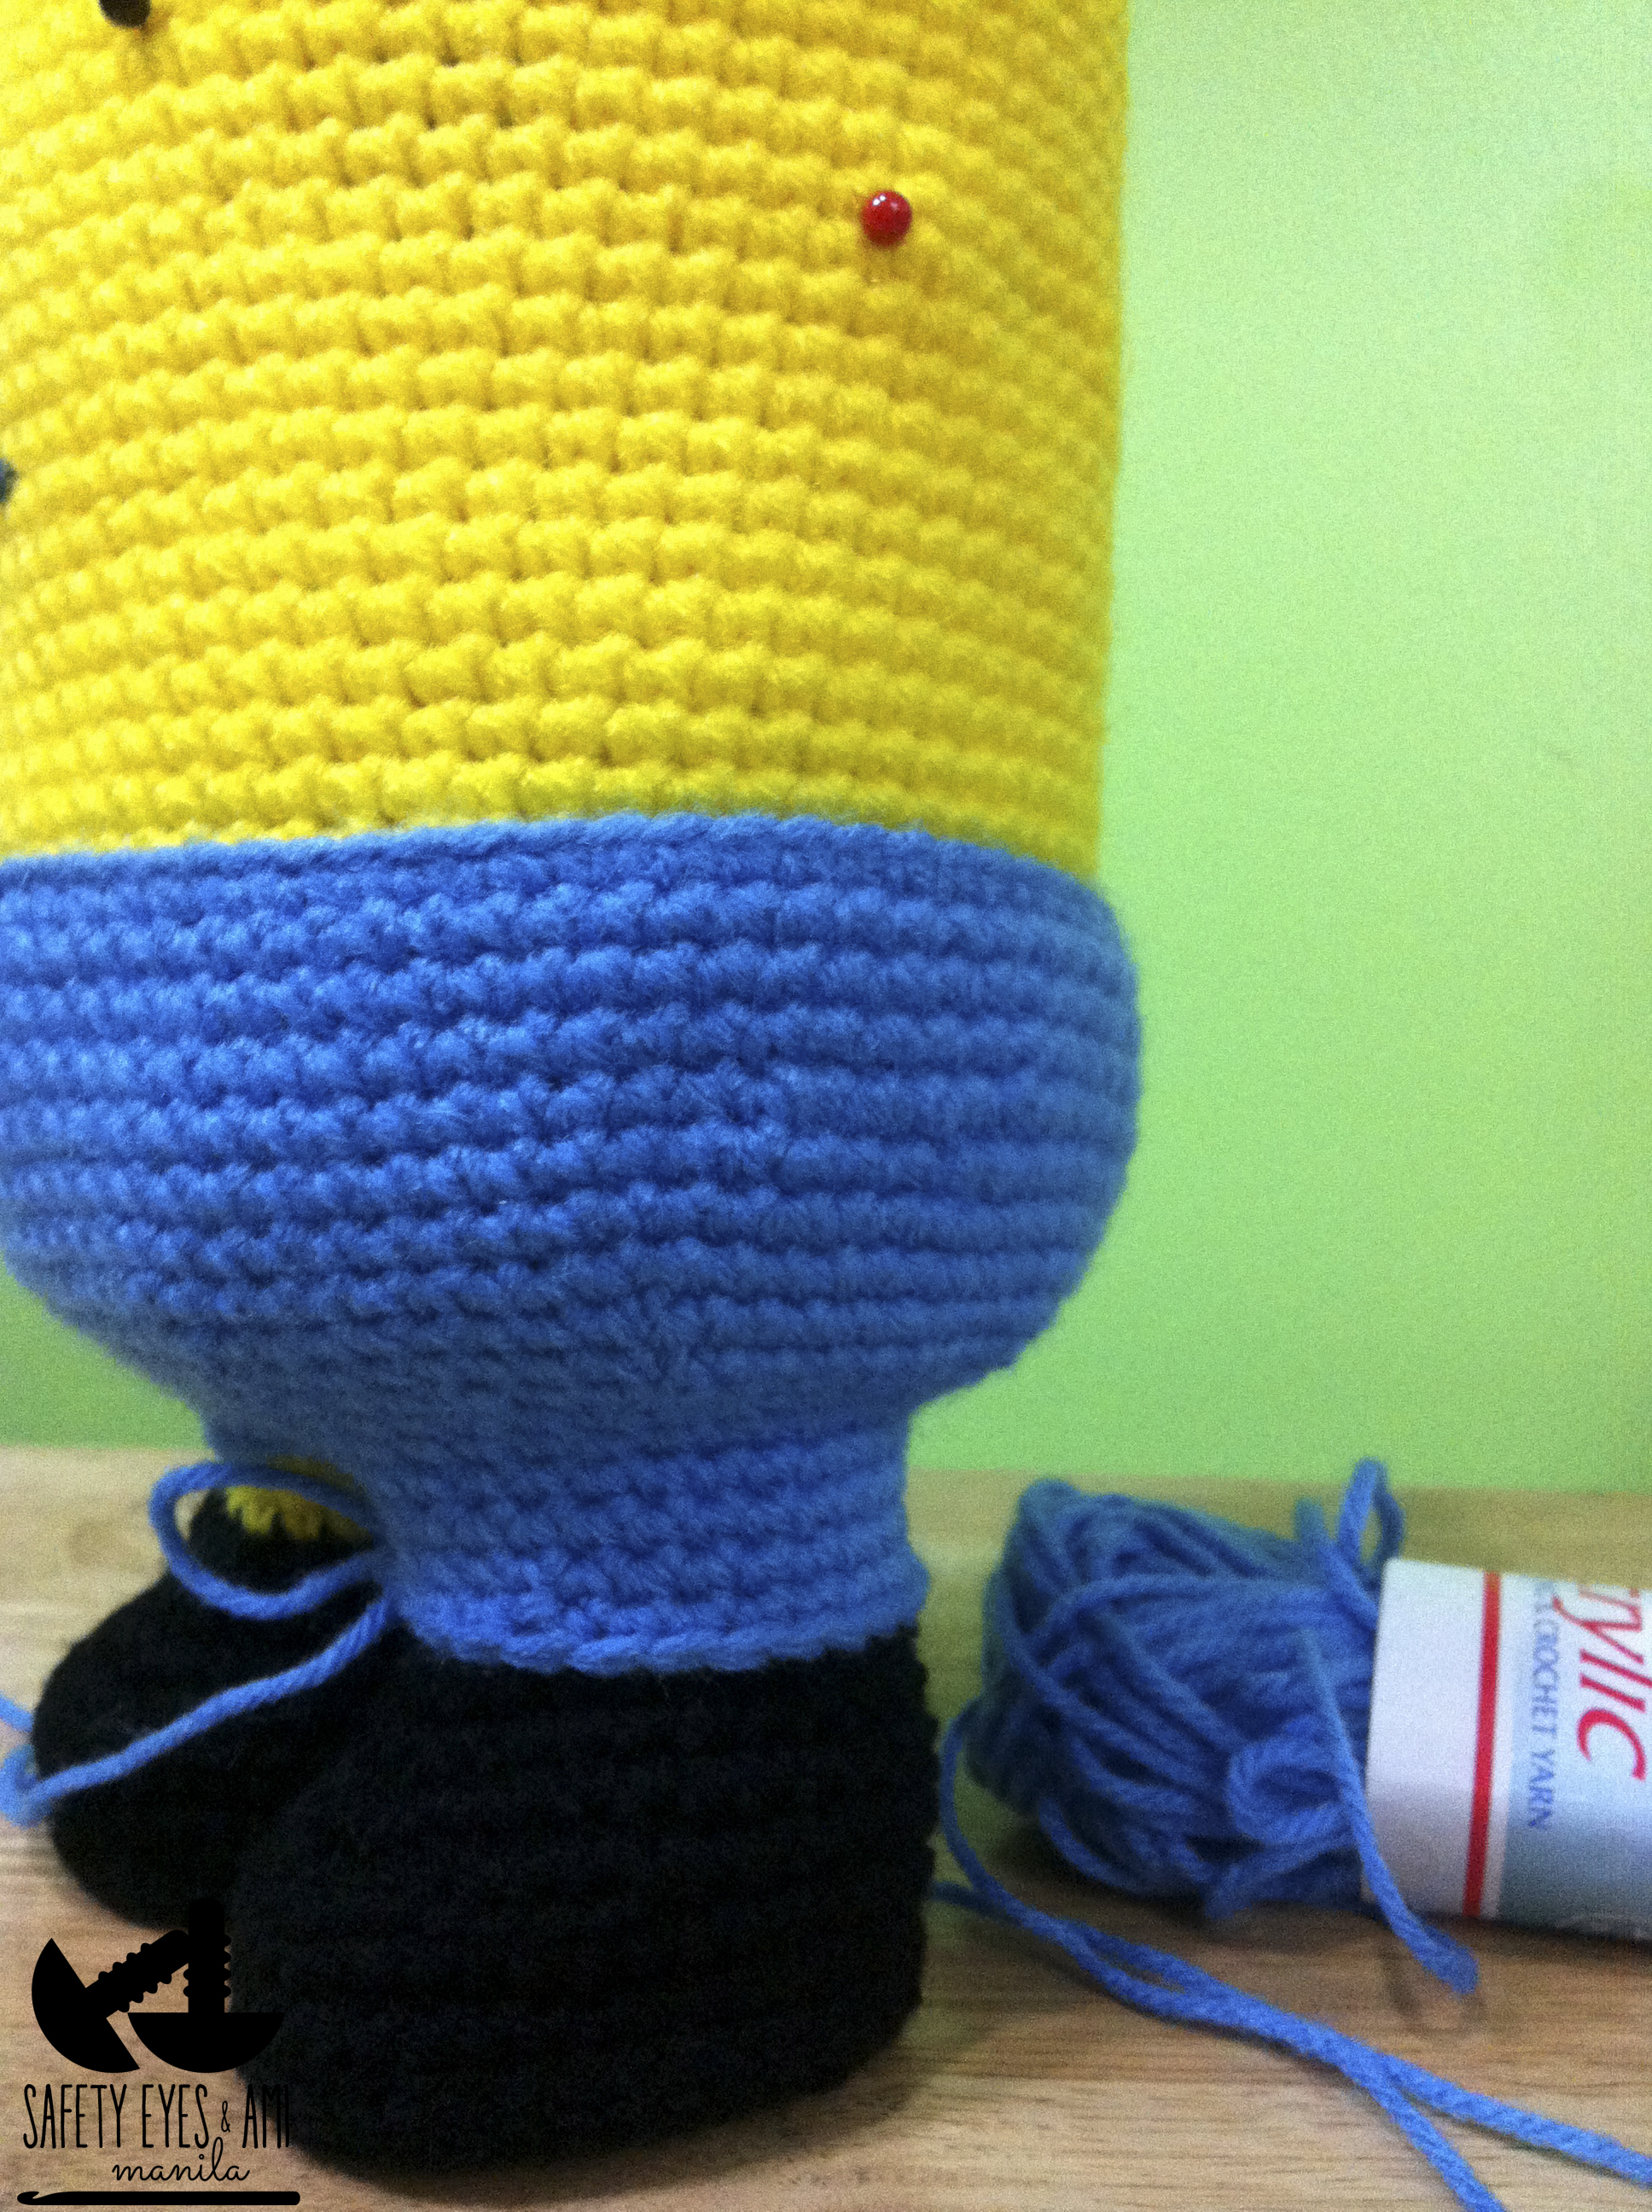
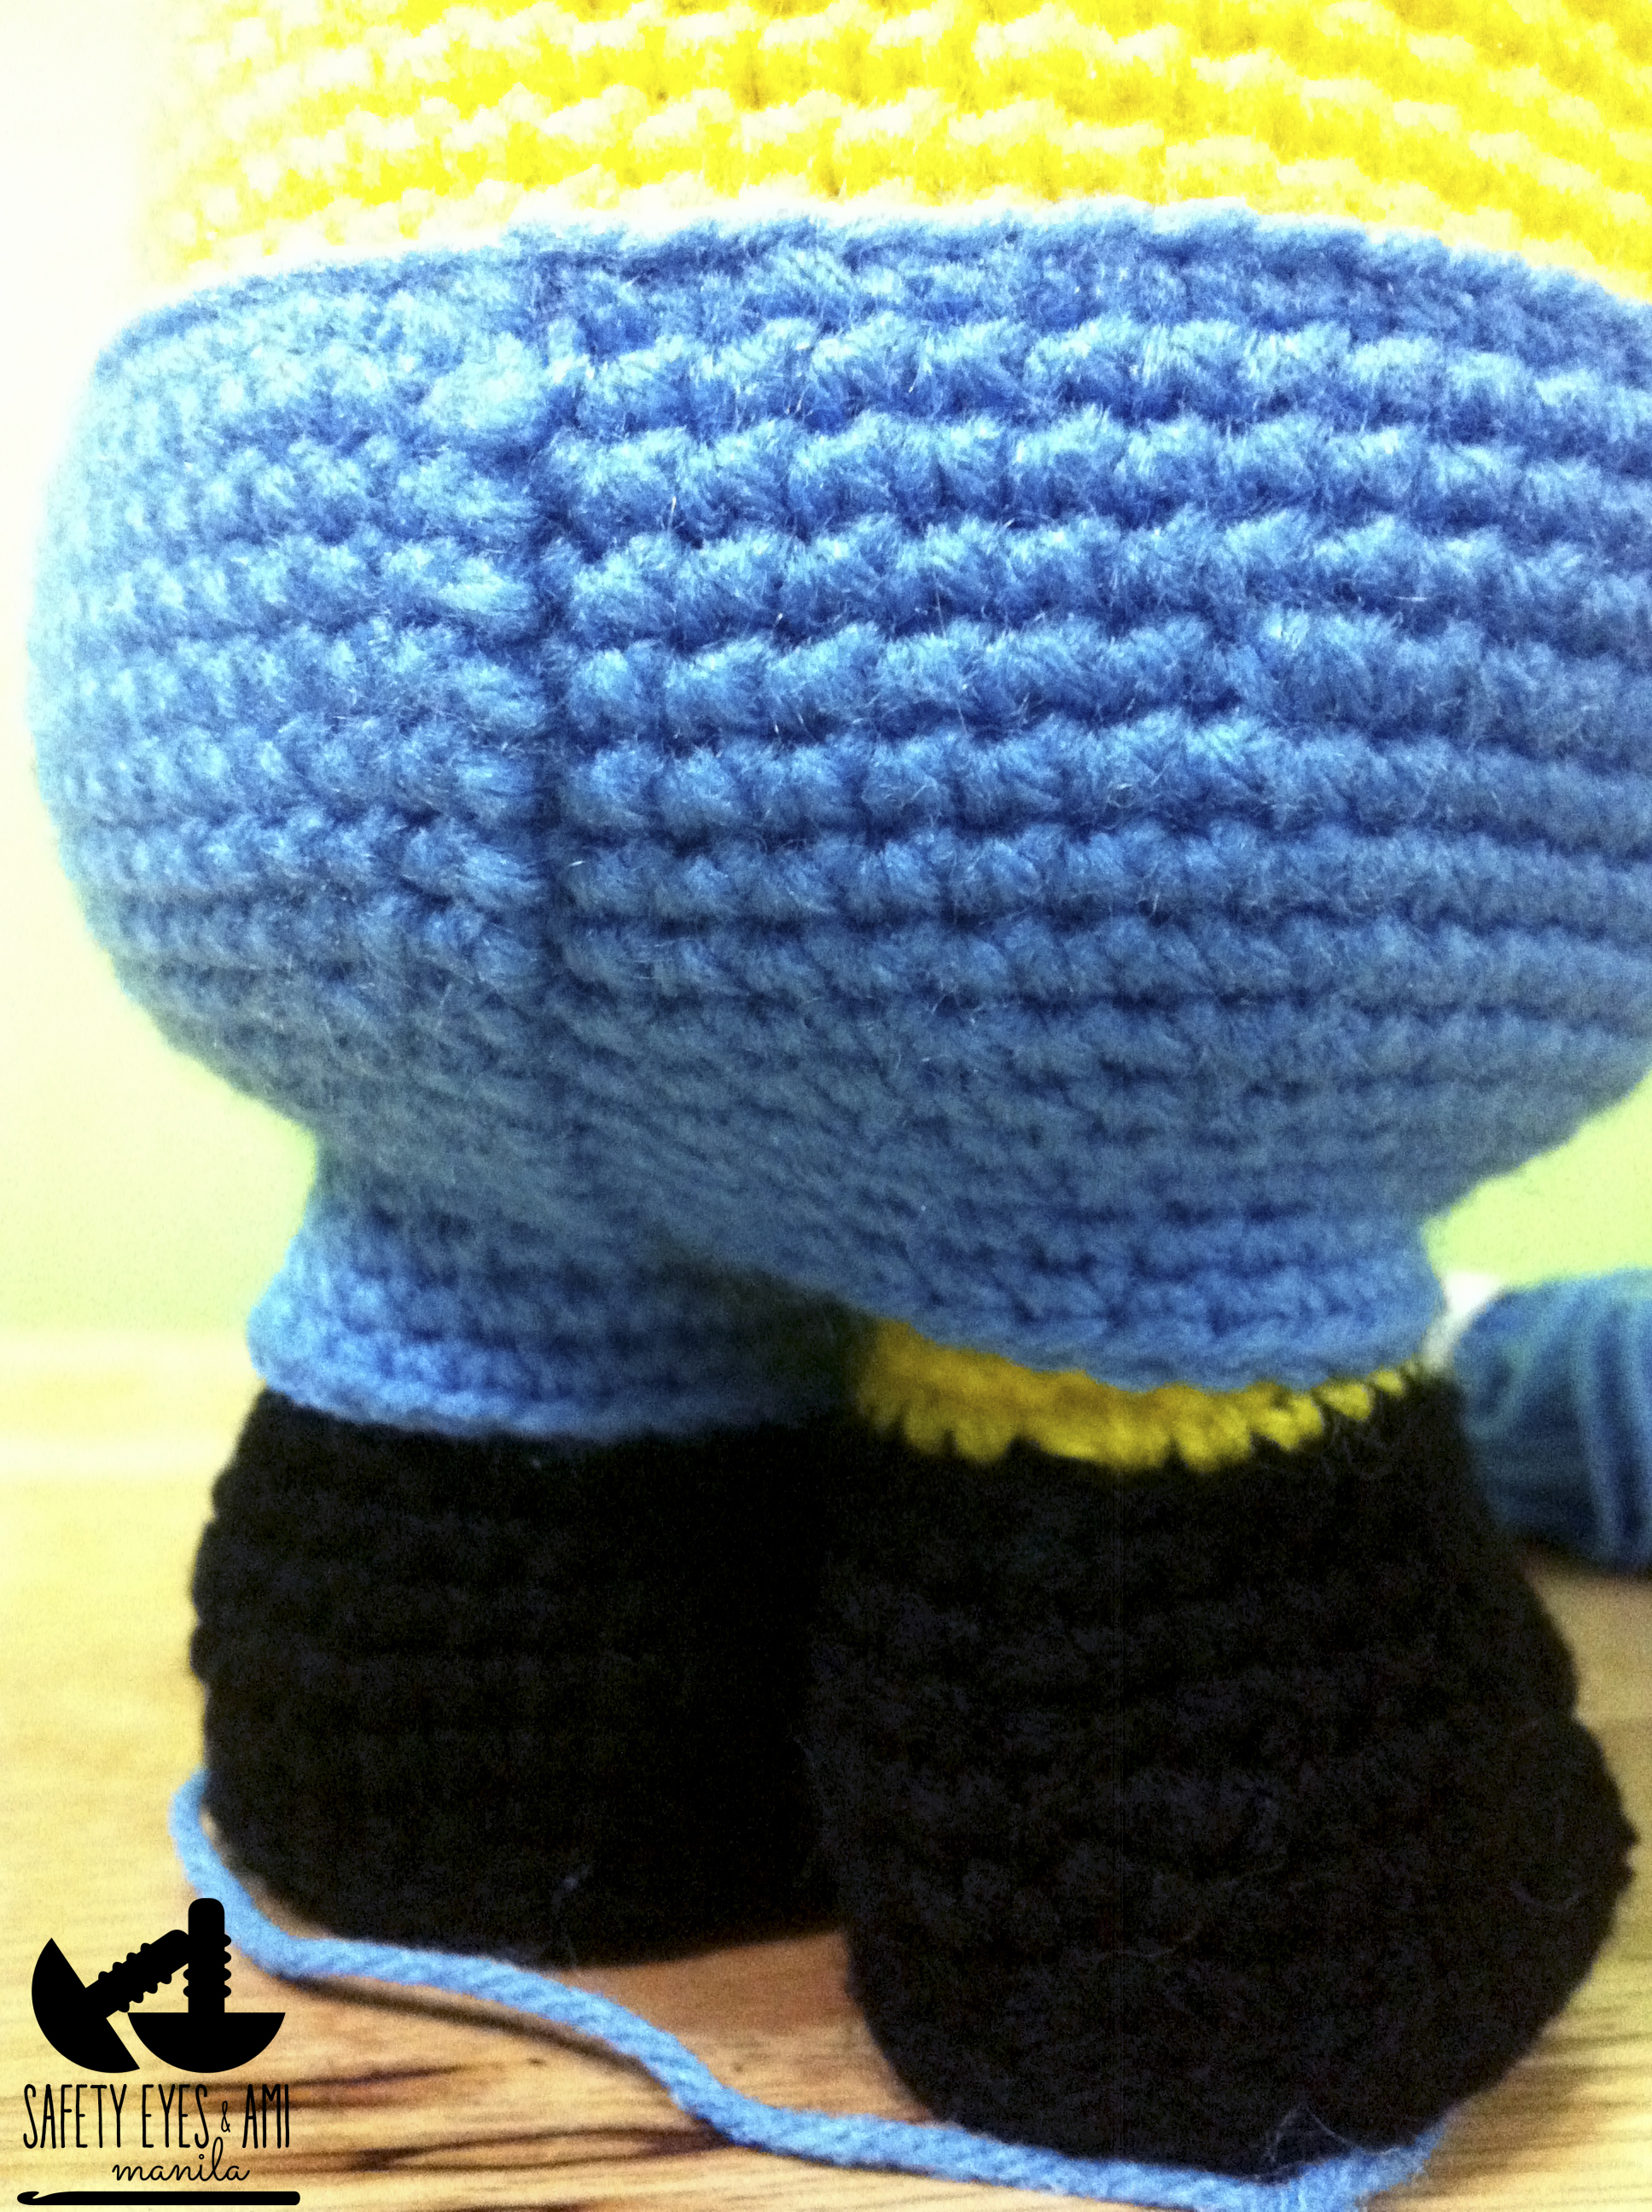
In the end you should have a fairly even color change.  You can always cover any mess with the trouser legs later on :)  Finish and close R10 like you did with the soles.  Go ahead and make your 2nd boot. Try to keep the same amount of tension so your boots and legs end up about the same size.  Sew the boots and legs to the body.  I like to use stitches that go straight down and diagonally to make them look like crochet stitches.
PLACE YOUR MARKERS
Put the goggles on your Minion and mark where you want his smile, where his arms should go, where you want his trousers to start and how high his bib should go.
Despicable Me Crochet Minion
OVERALLS
While the original pattern starts at the bottom and increases up to the waist part of the trousers, I started at the waist and decreased.  
Ch 71.  Sl st to ch1 to make a circle.  Ch1
At the end of each round, skip the last stitch, sl st in ch1 and ch1 again as you did with the sole and boots.  Doing this will create the bum seam.  Make sure to keep count of your stitches.
R1 - R8 sc around (70)
R9 sc 4  dec [sc8, dec] 6x, sc4 (63)
R10 [sc7, dec] 7x (56)
R11 sc3, dec [sc6, dec] 6x, sc3 (49)
R12 [sc5, dec] 7x (42)
At this point, you can slip the trousers on.  You should stop decreasing at the point where the trousers touch the legs.
Despicable Me Crochet Minion
Pin the trousers on to the body making sure the bum seam is aligned down the center of the back.  the seam shifts to the left due to the decreases so pin it in place as straight as you possibly can.

R13-14 sc around (42) or sc til you can see only 1 row of yellow on the legs.  In my case, it took only 2 rows.
Next, ch enough to join to the the middle front part of the trousers.  It's up to you how tight or loose you want your trouser legs to be.  Length of chain will also depend on the kind of yarn you use.  
Despicable Me Crochet Minion
You can join anywhere and sc around to make the right trouser leg.
Despicable Me Crochet Minion
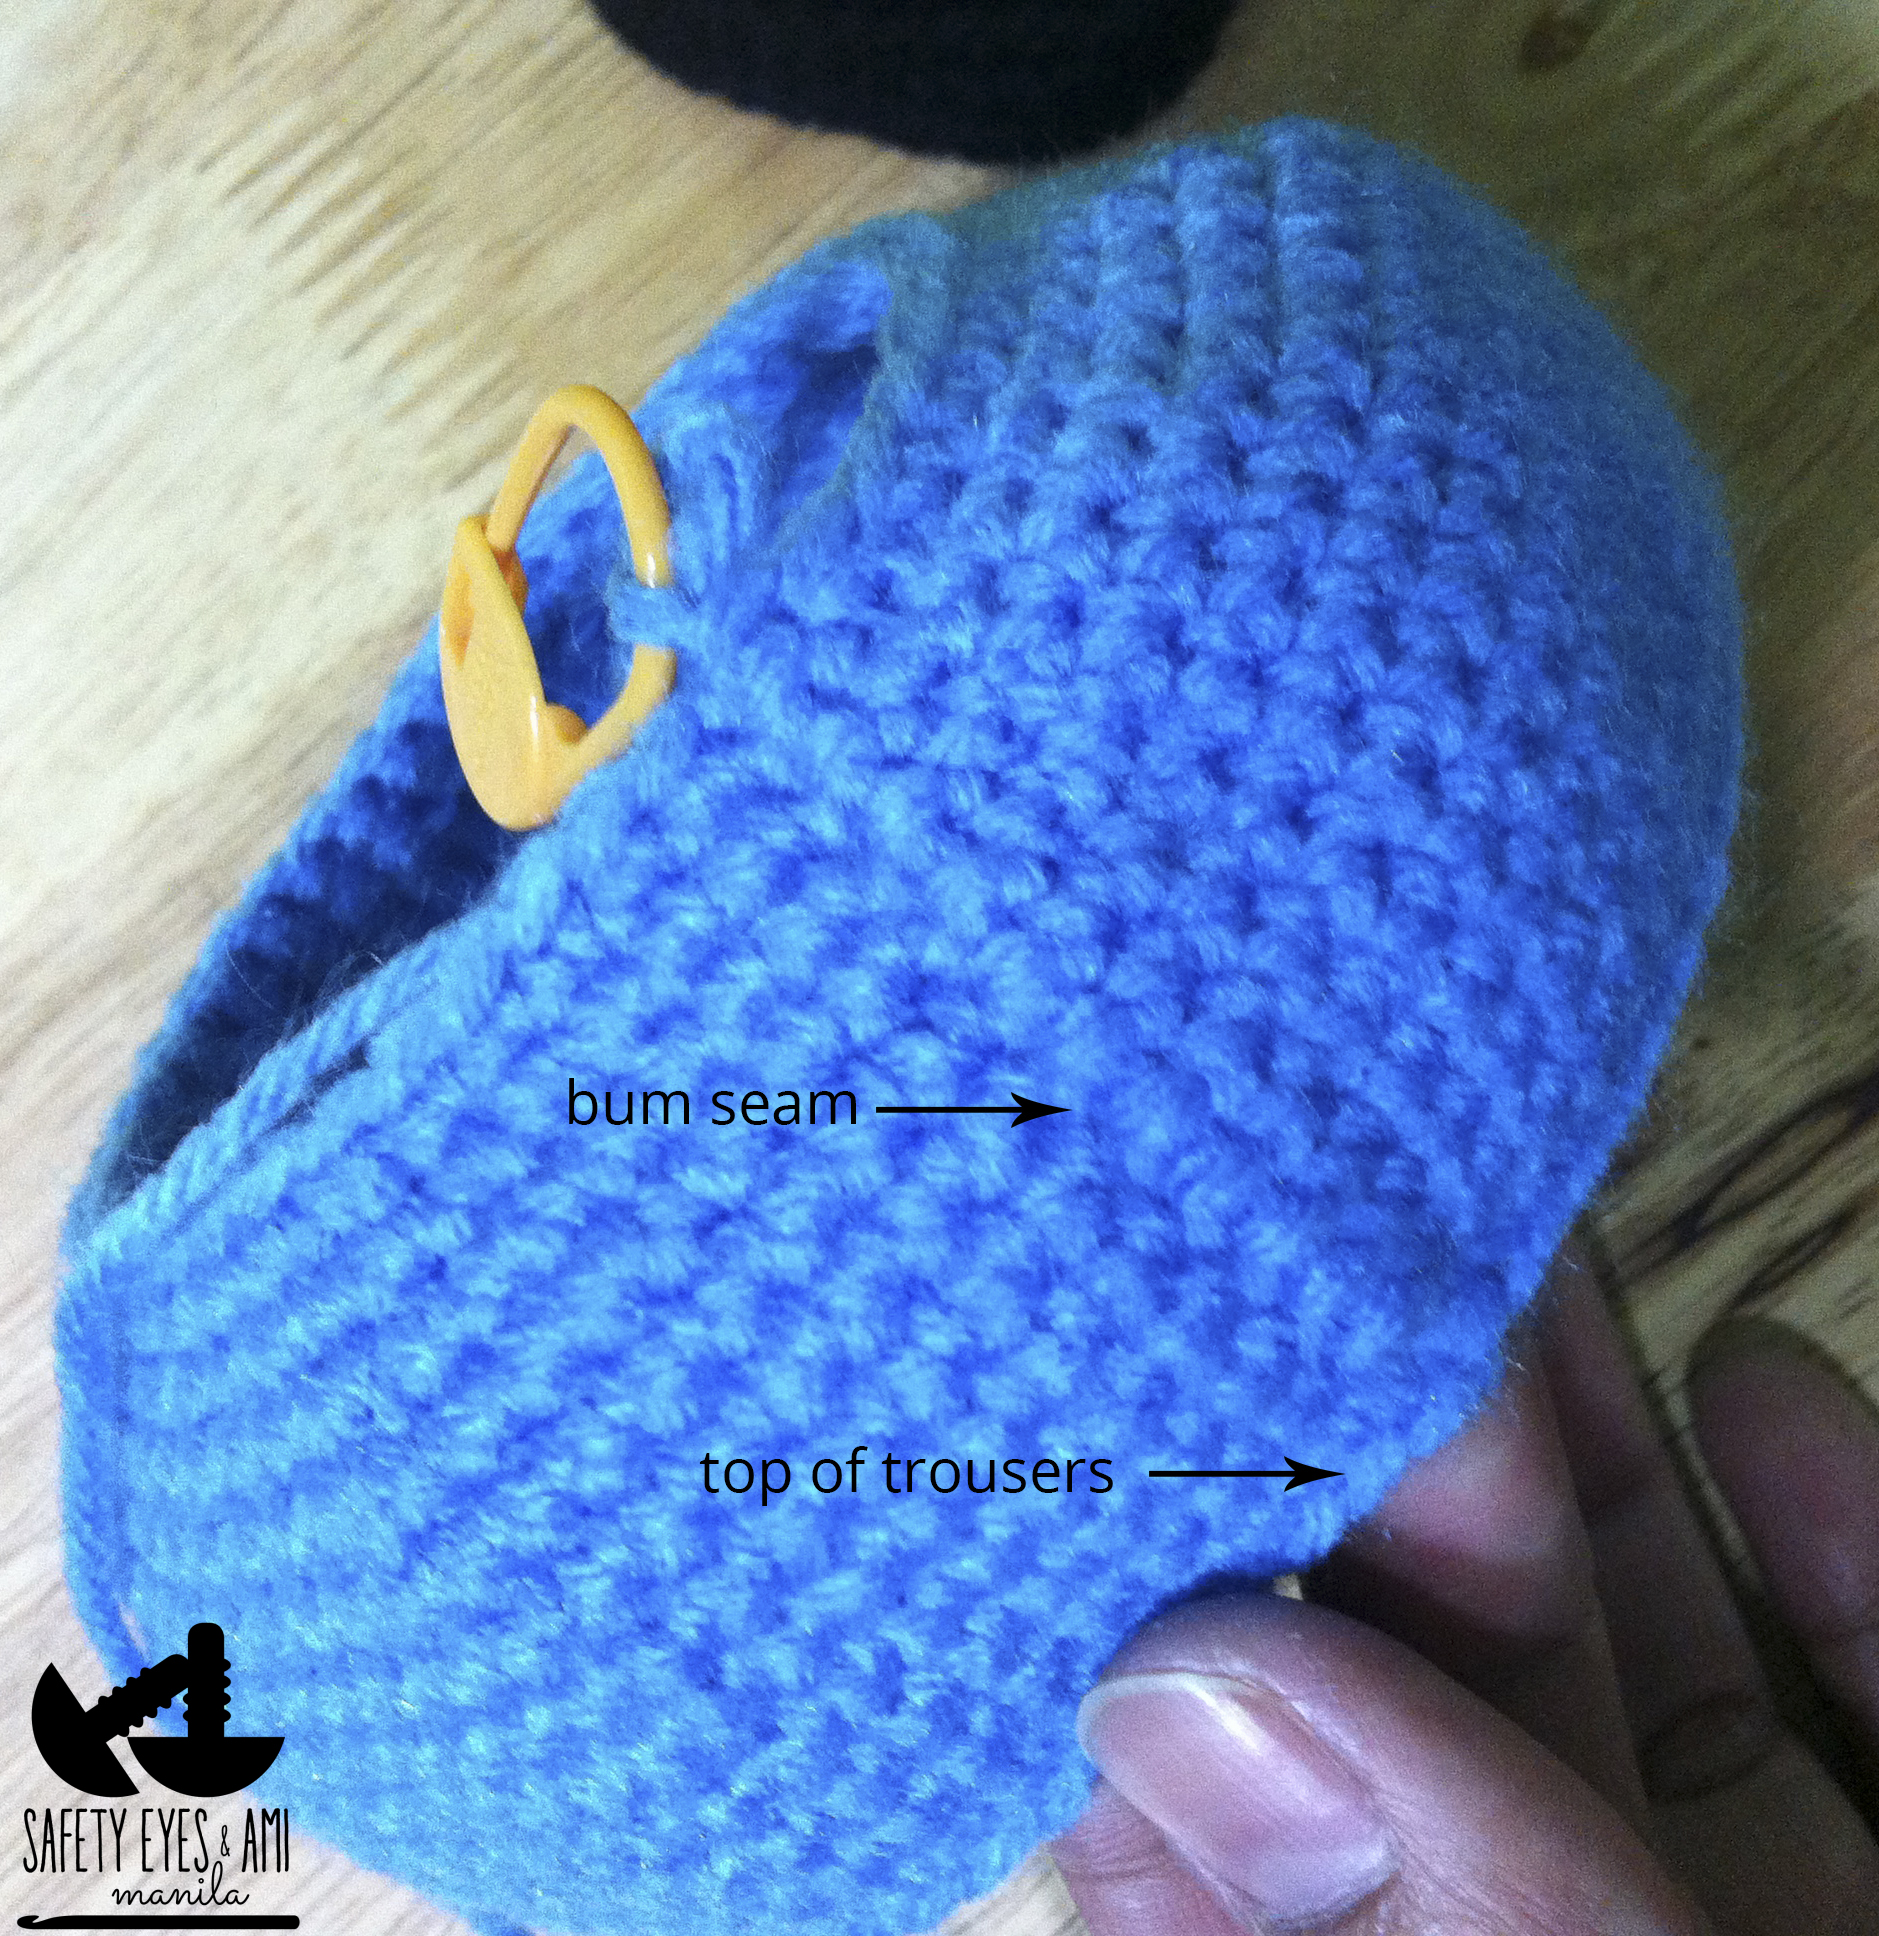
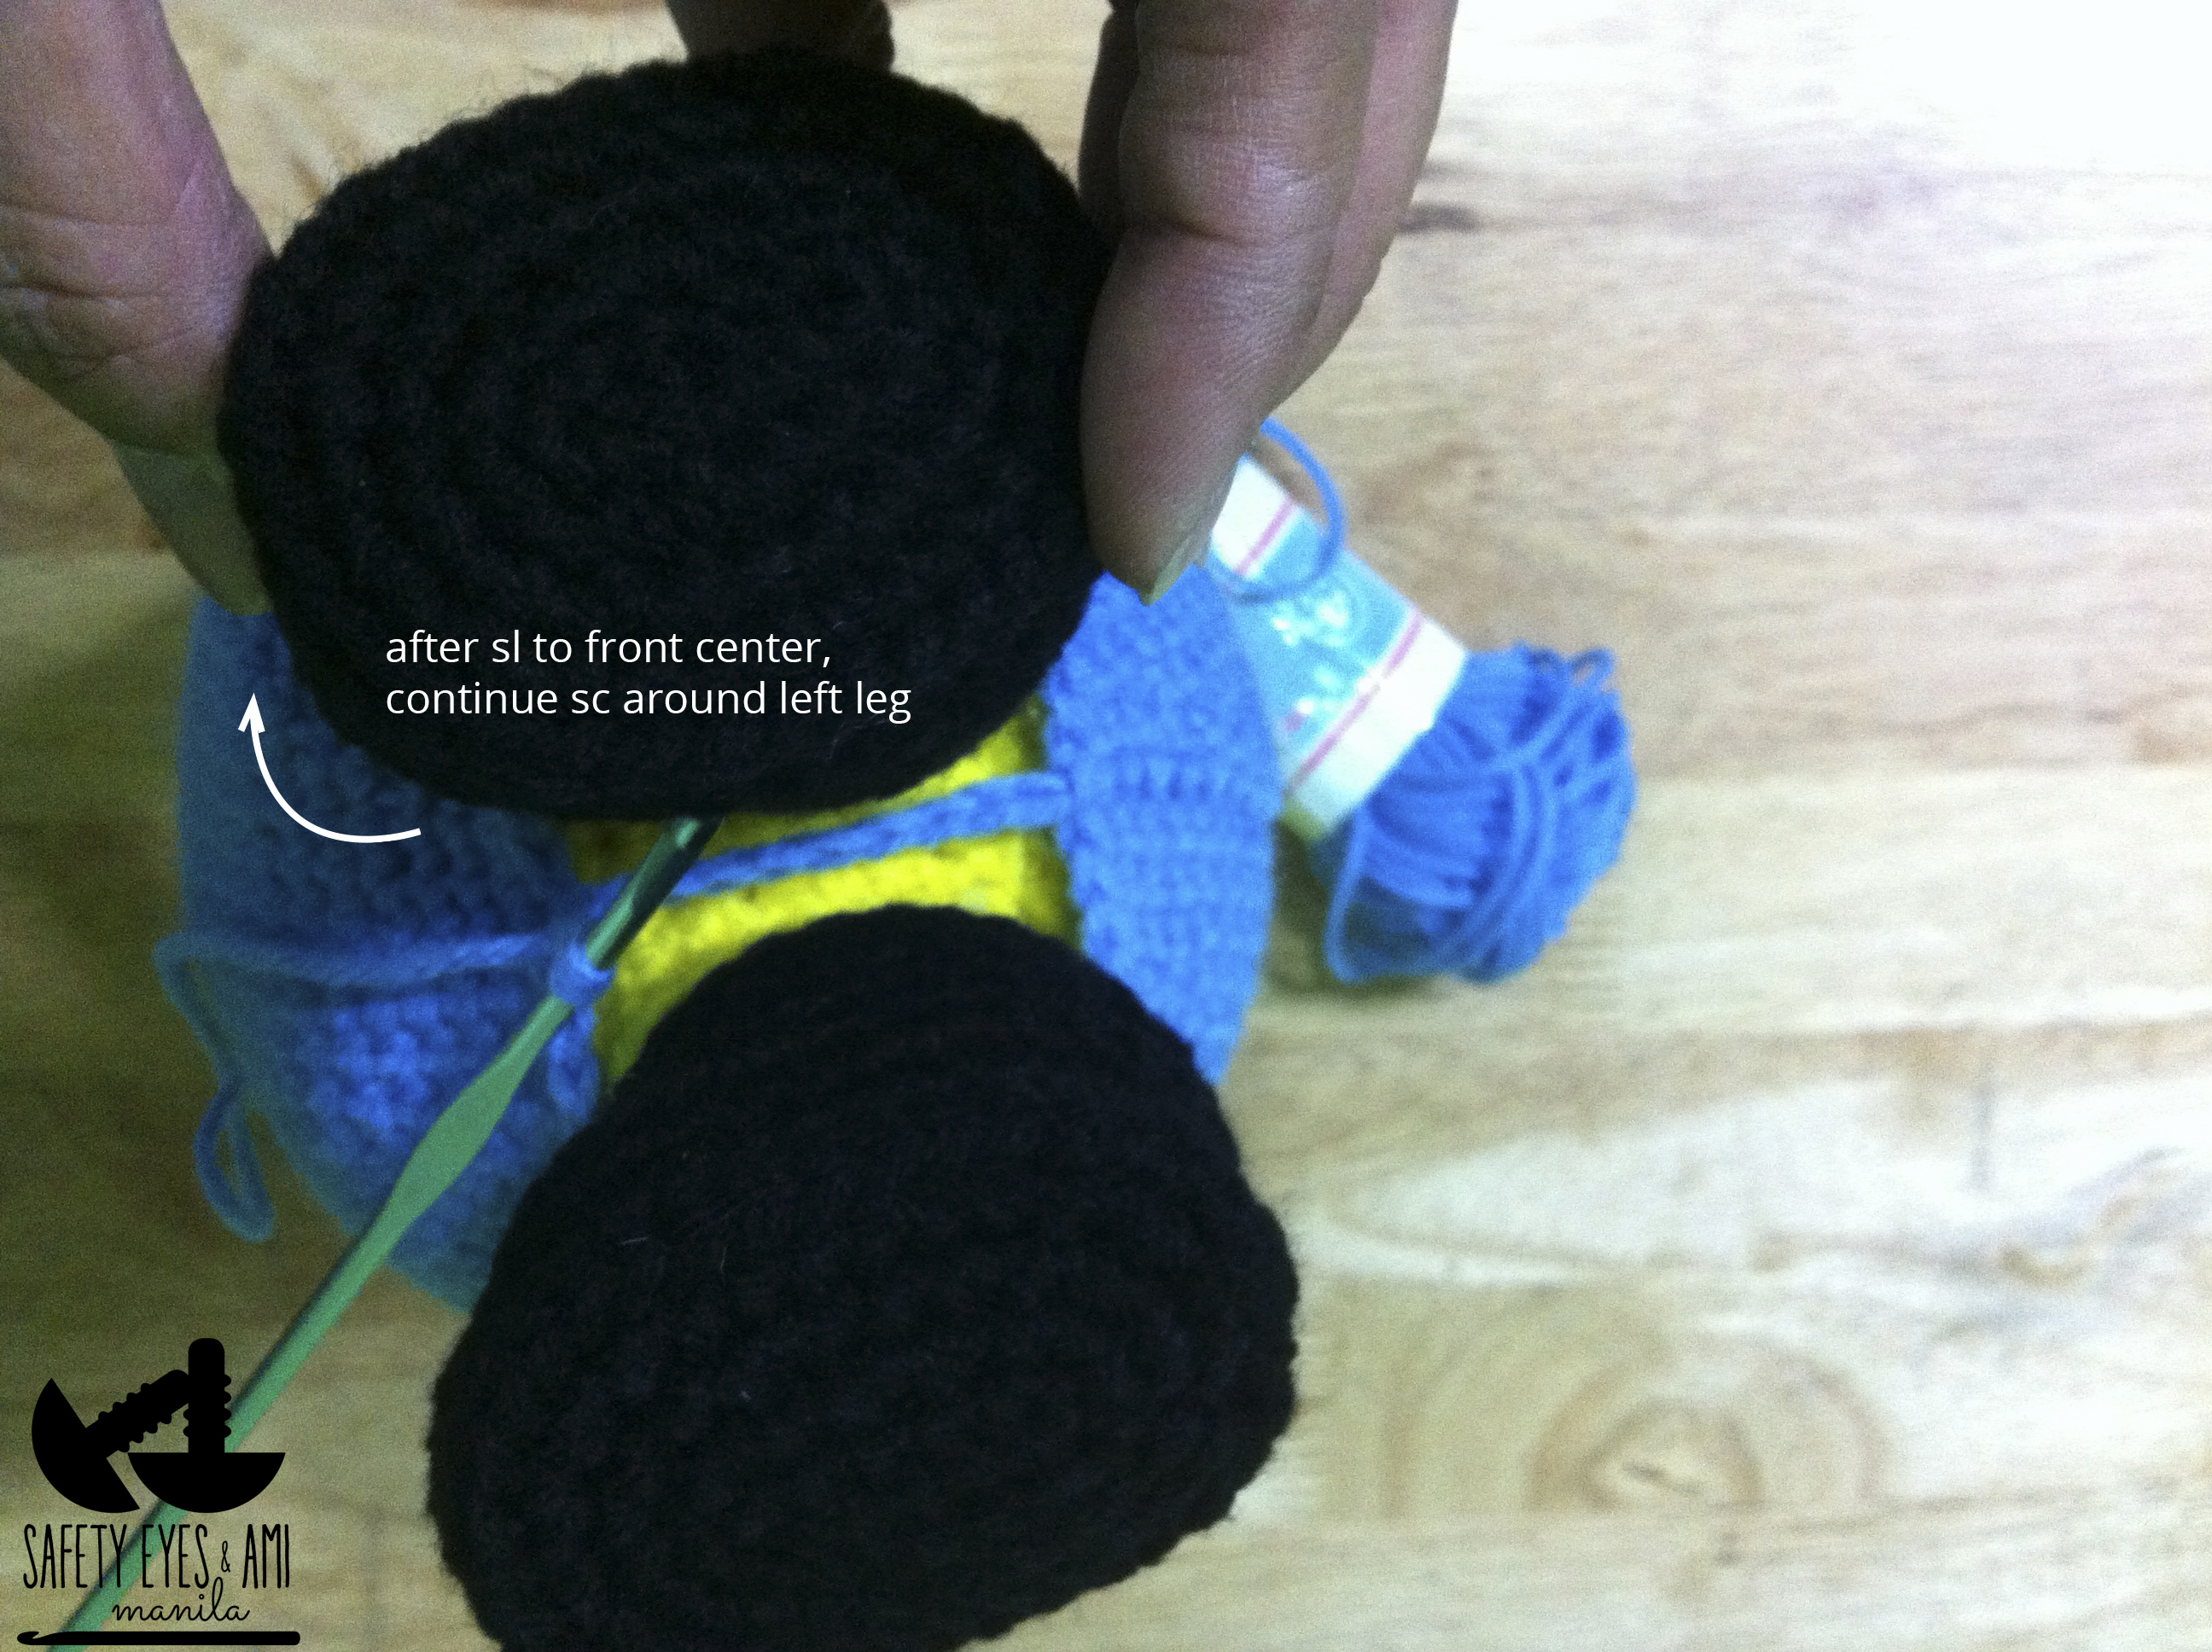
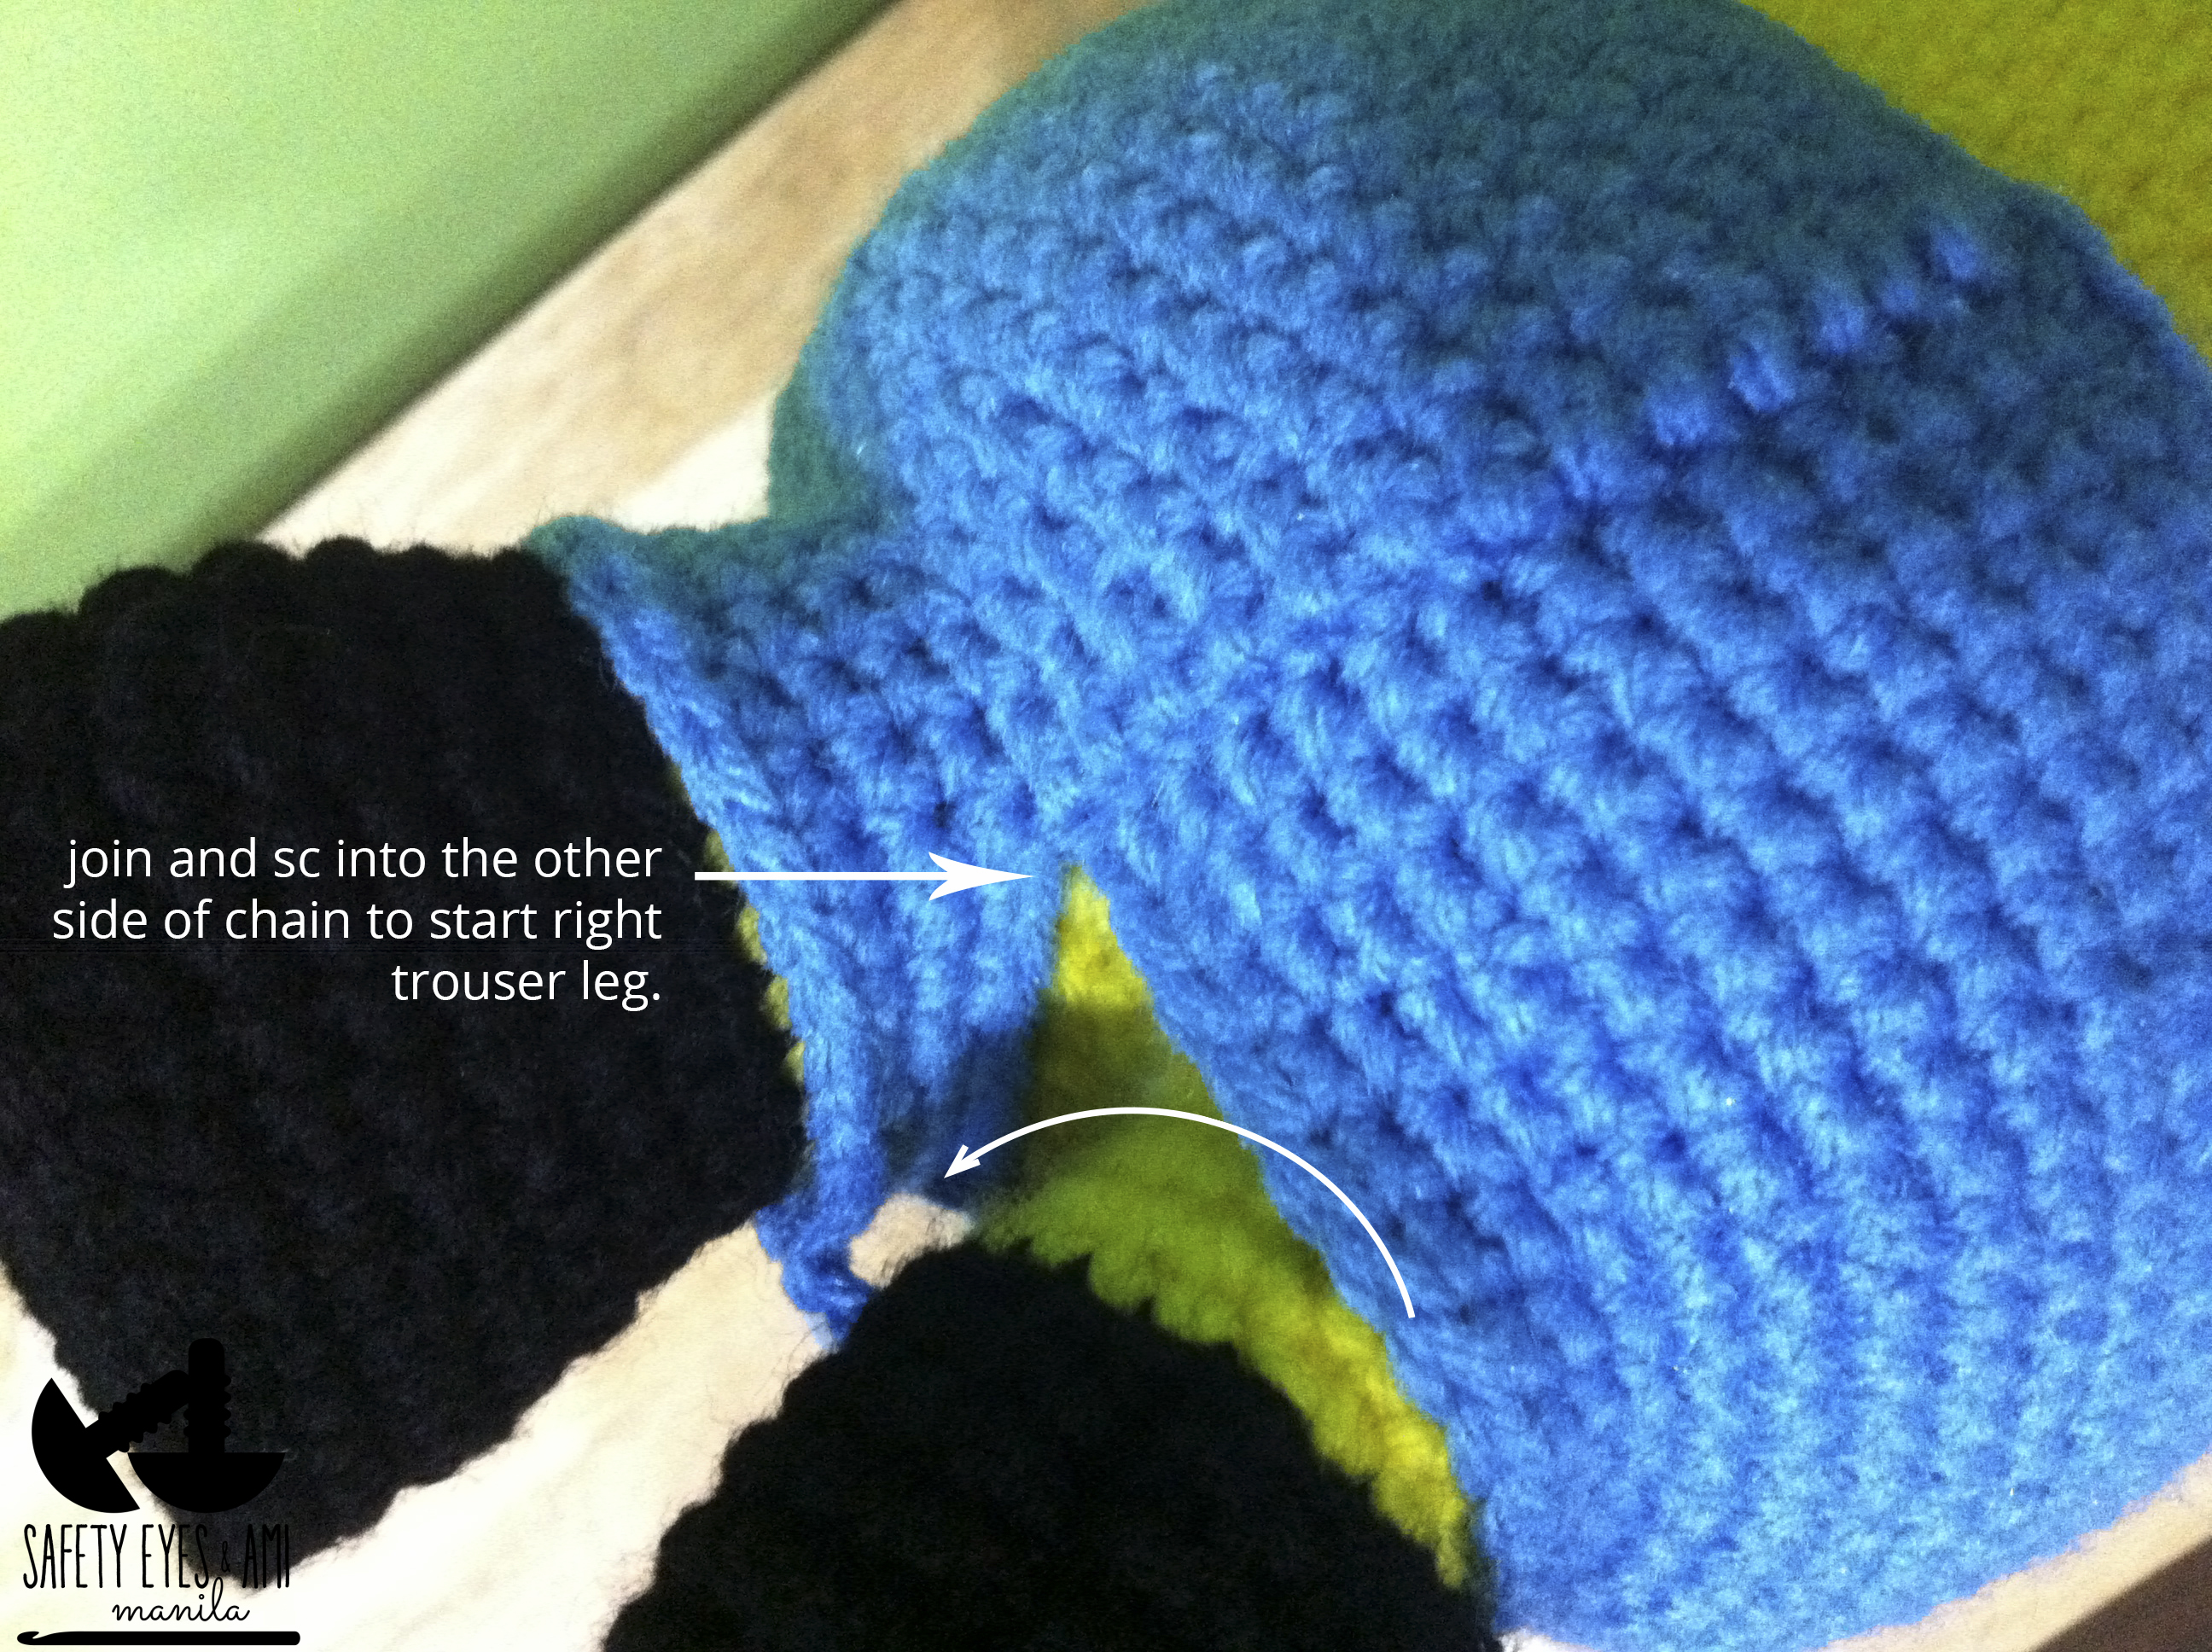
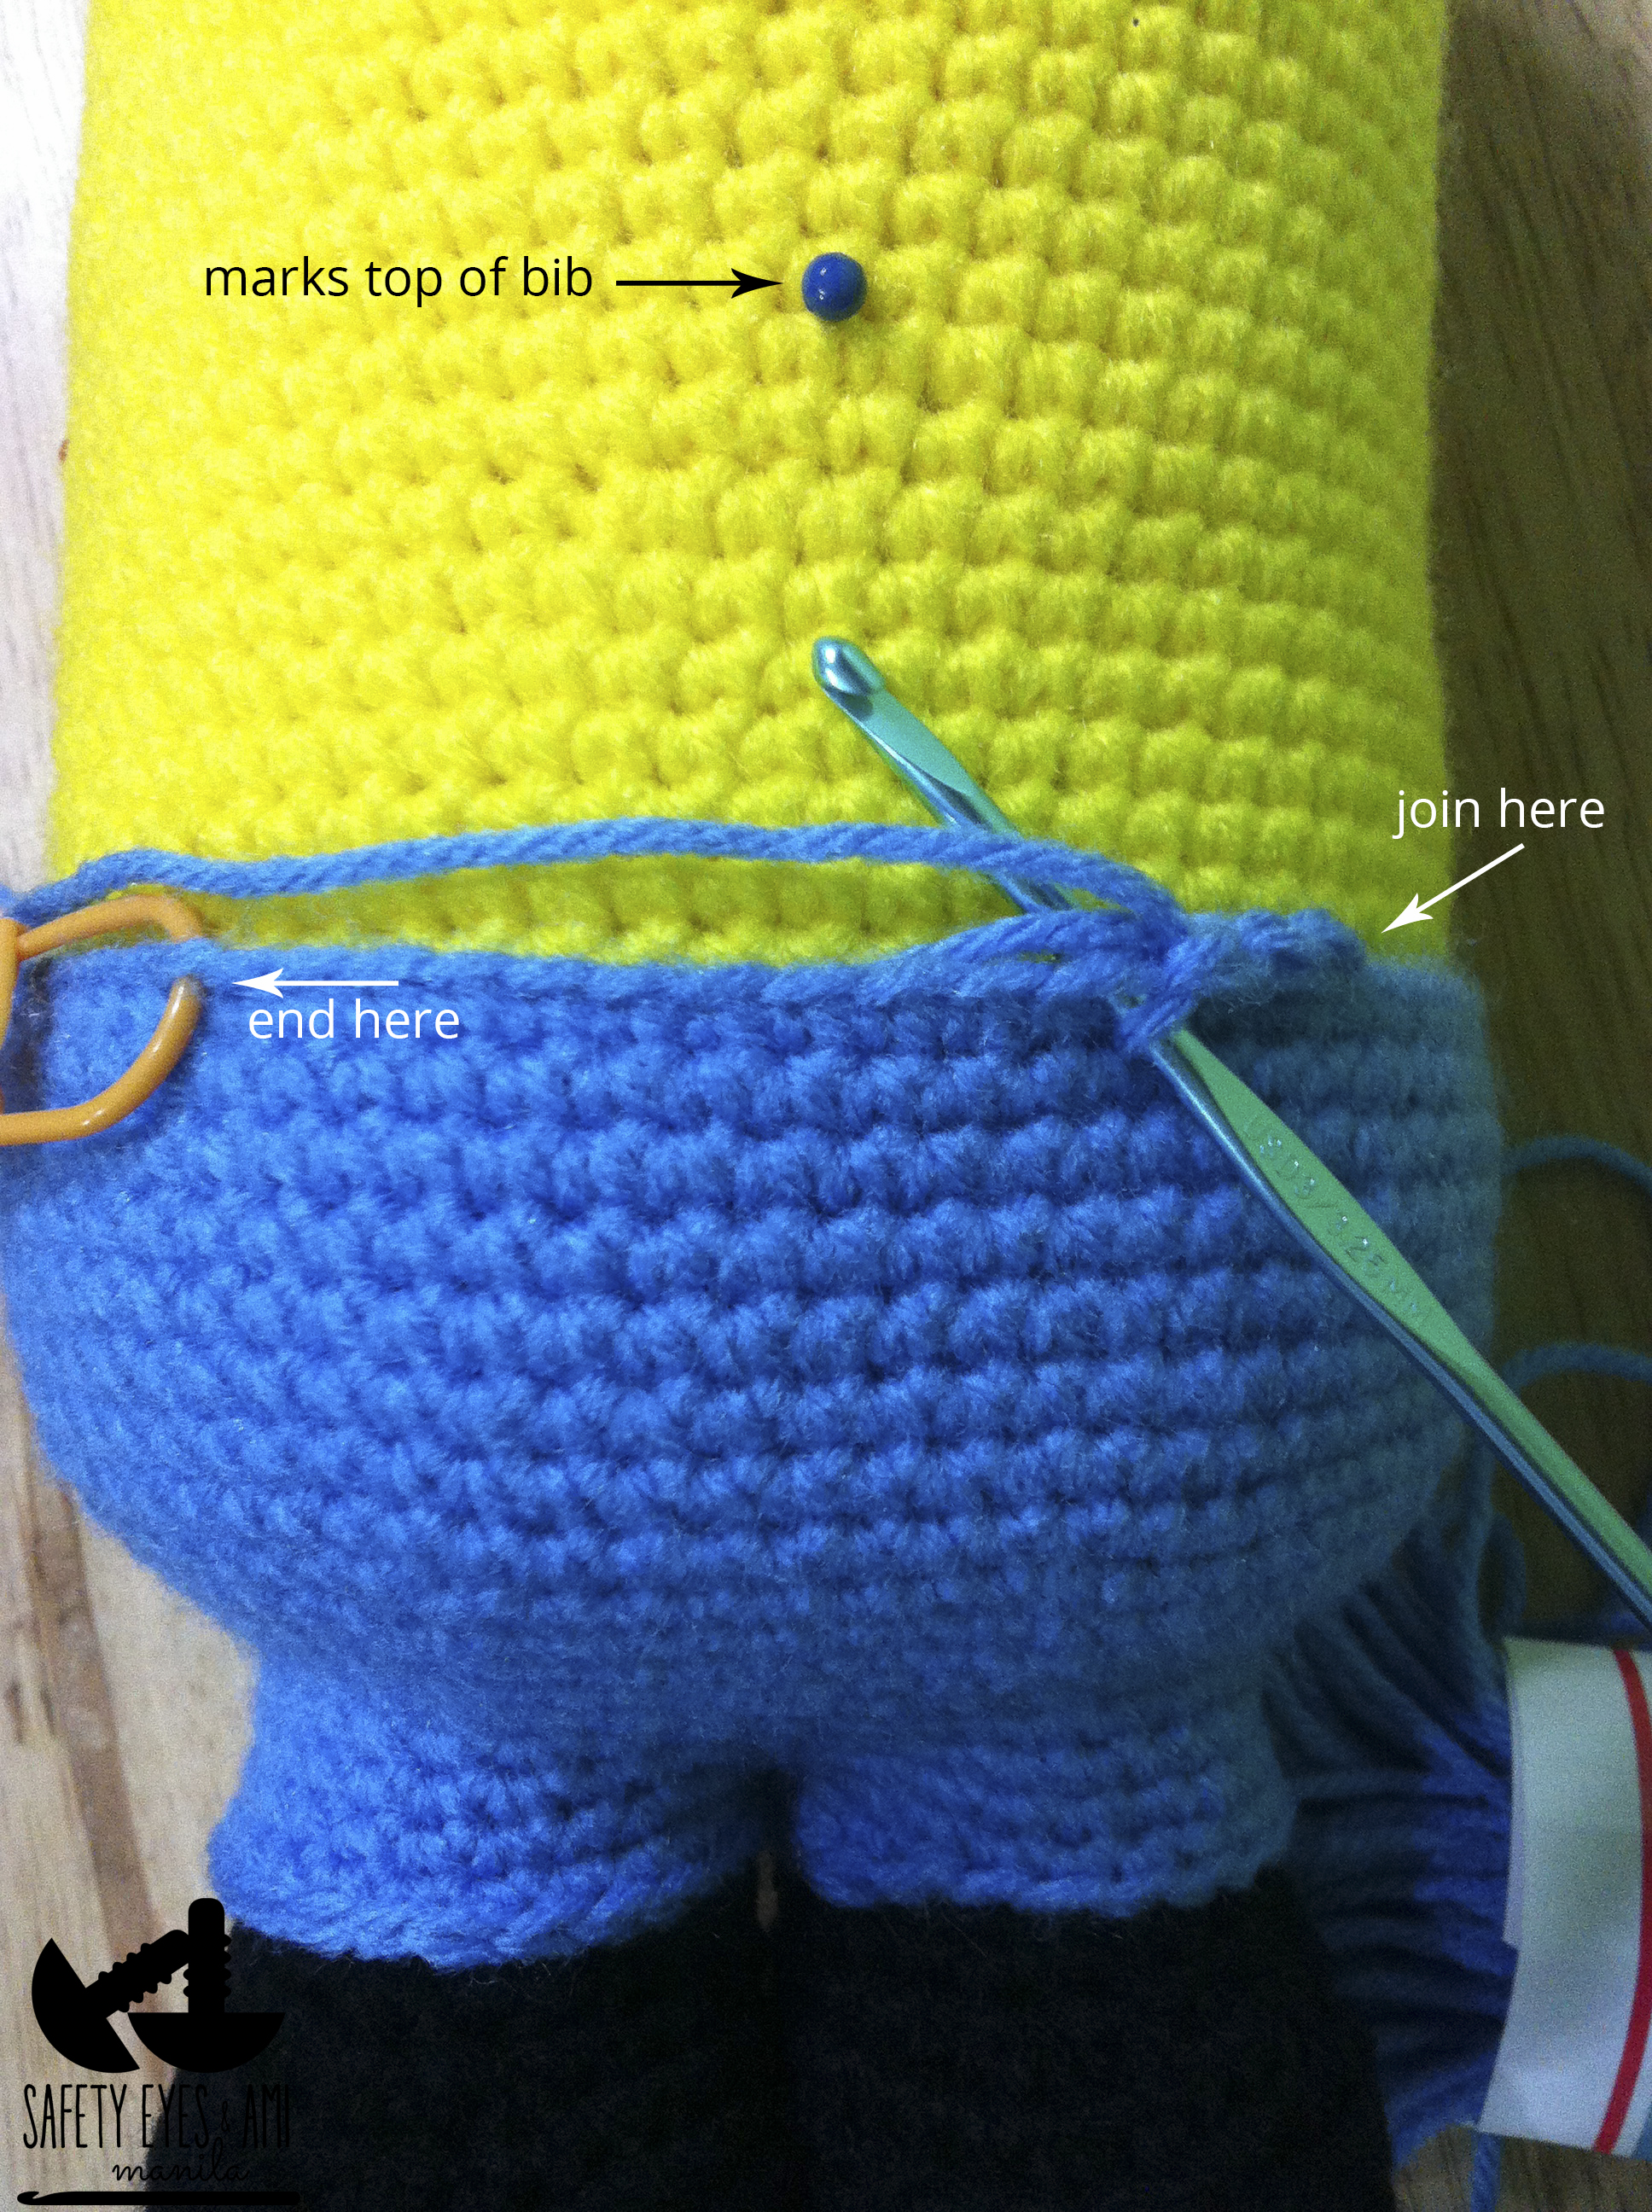
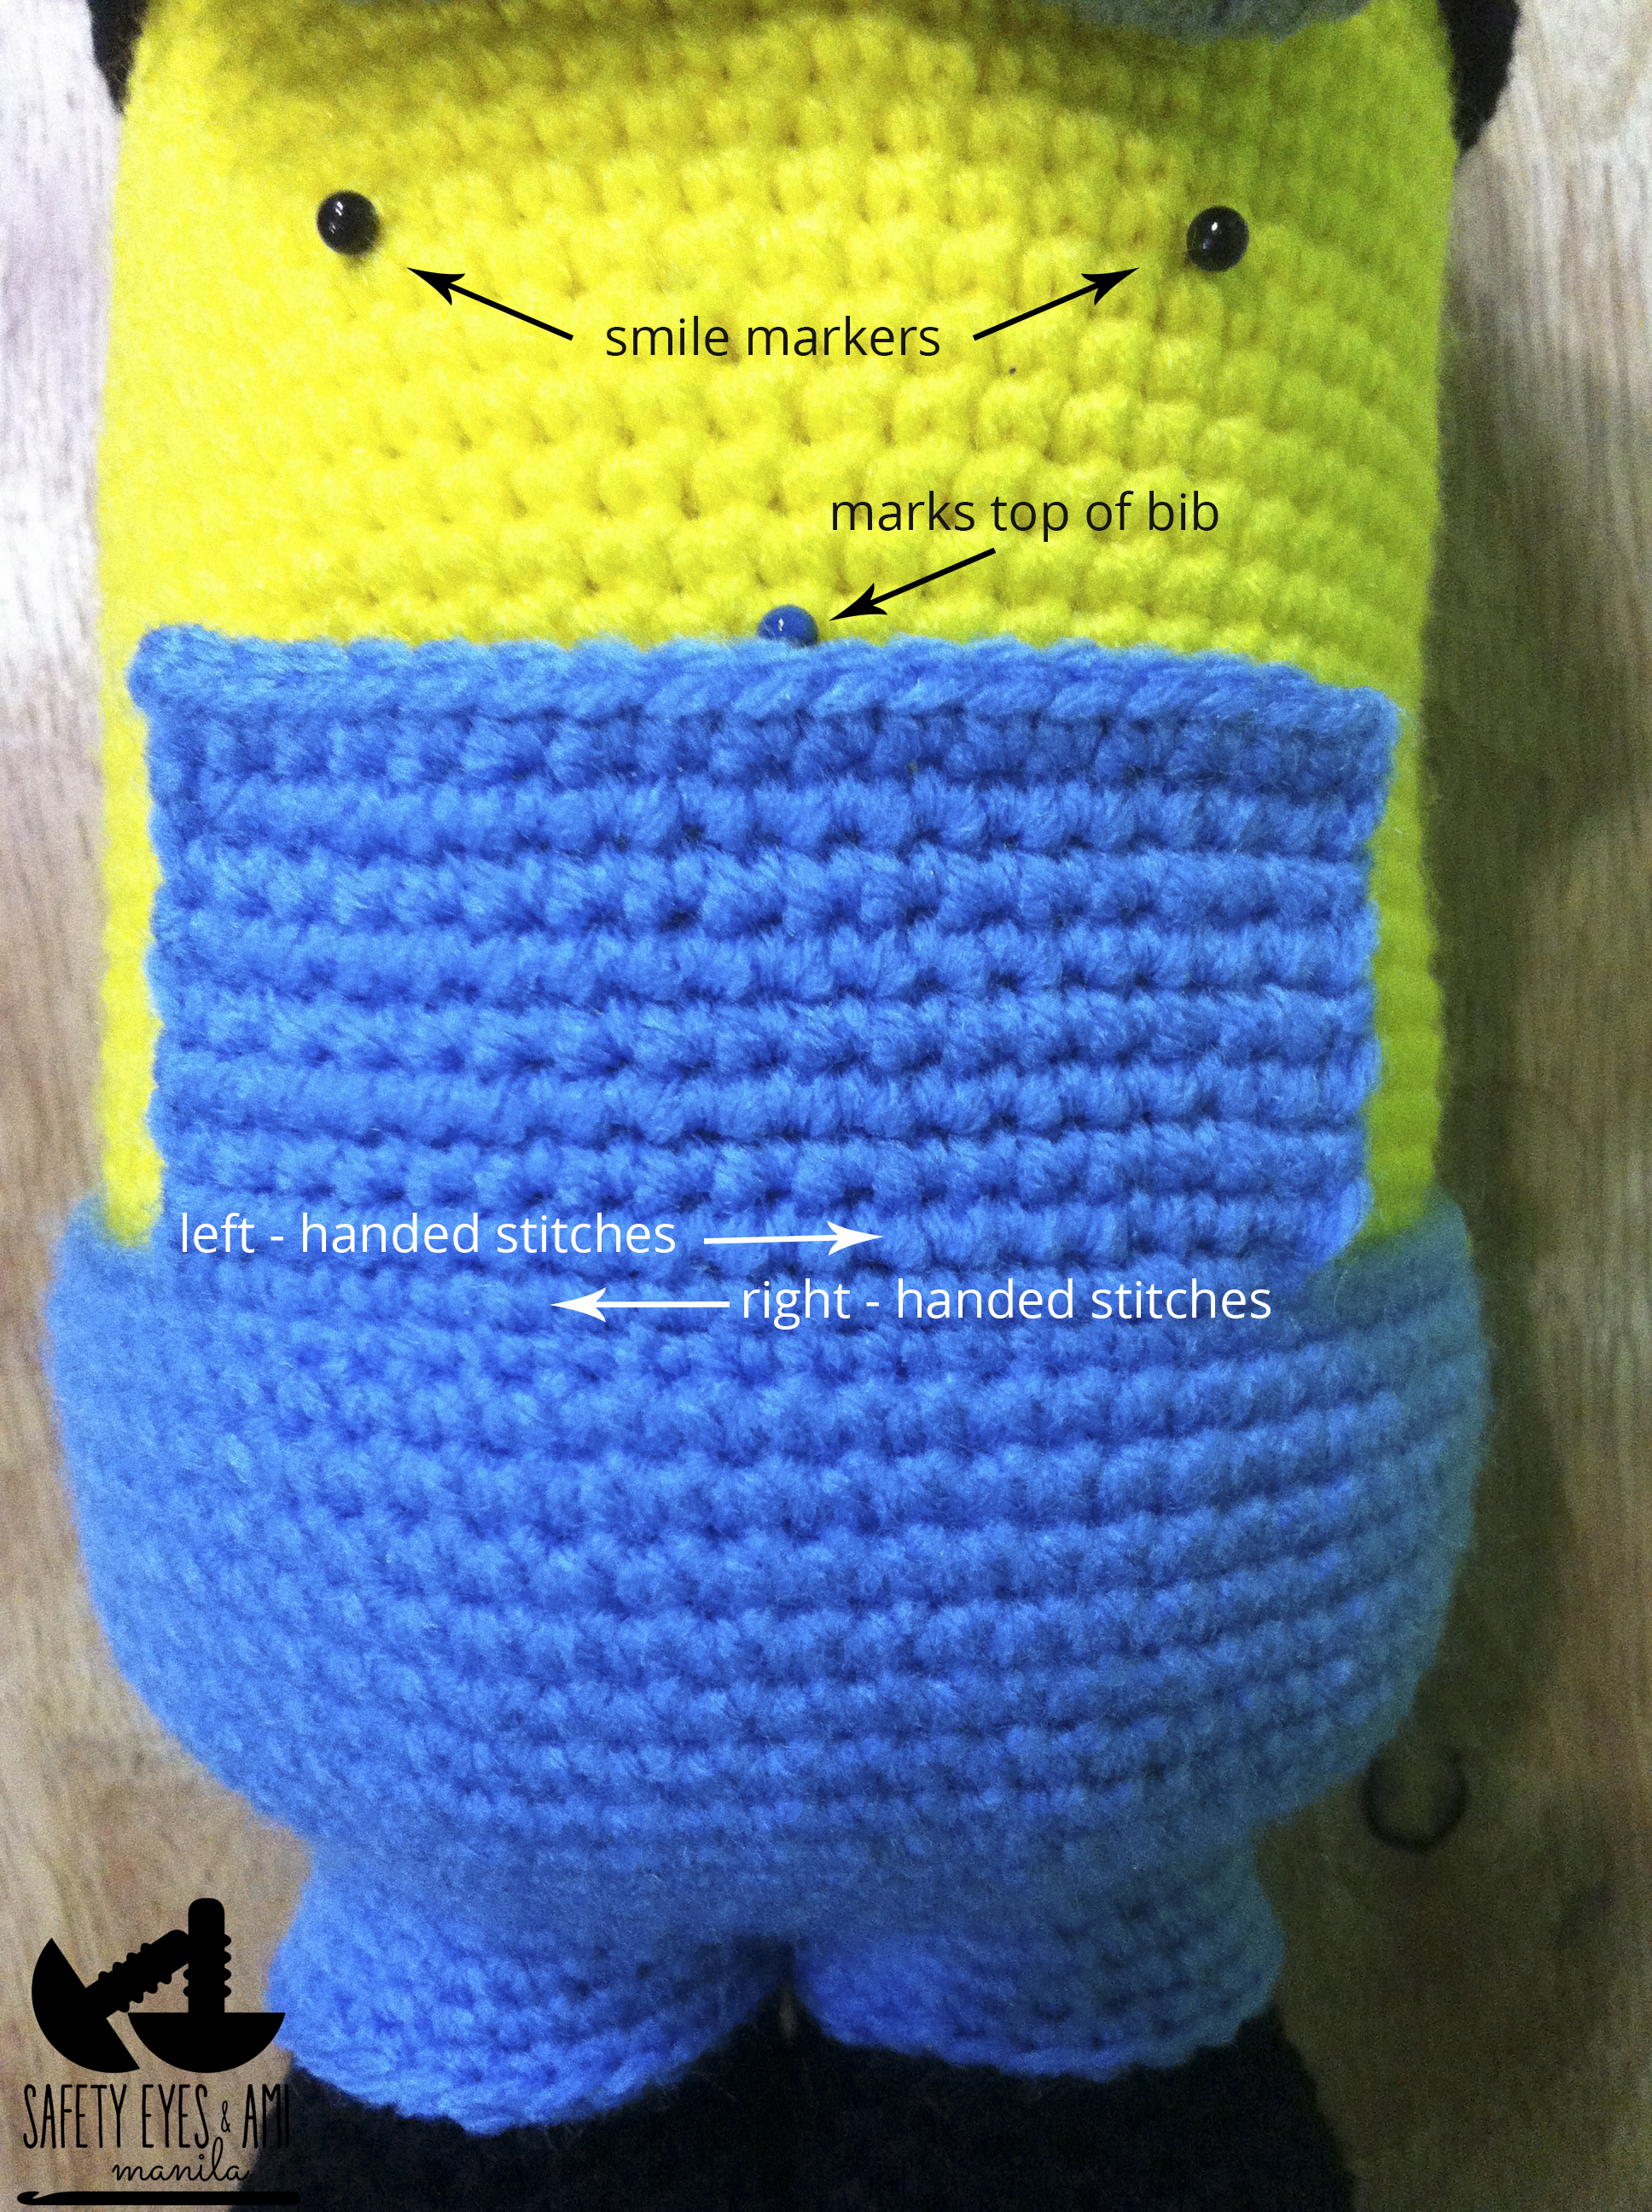
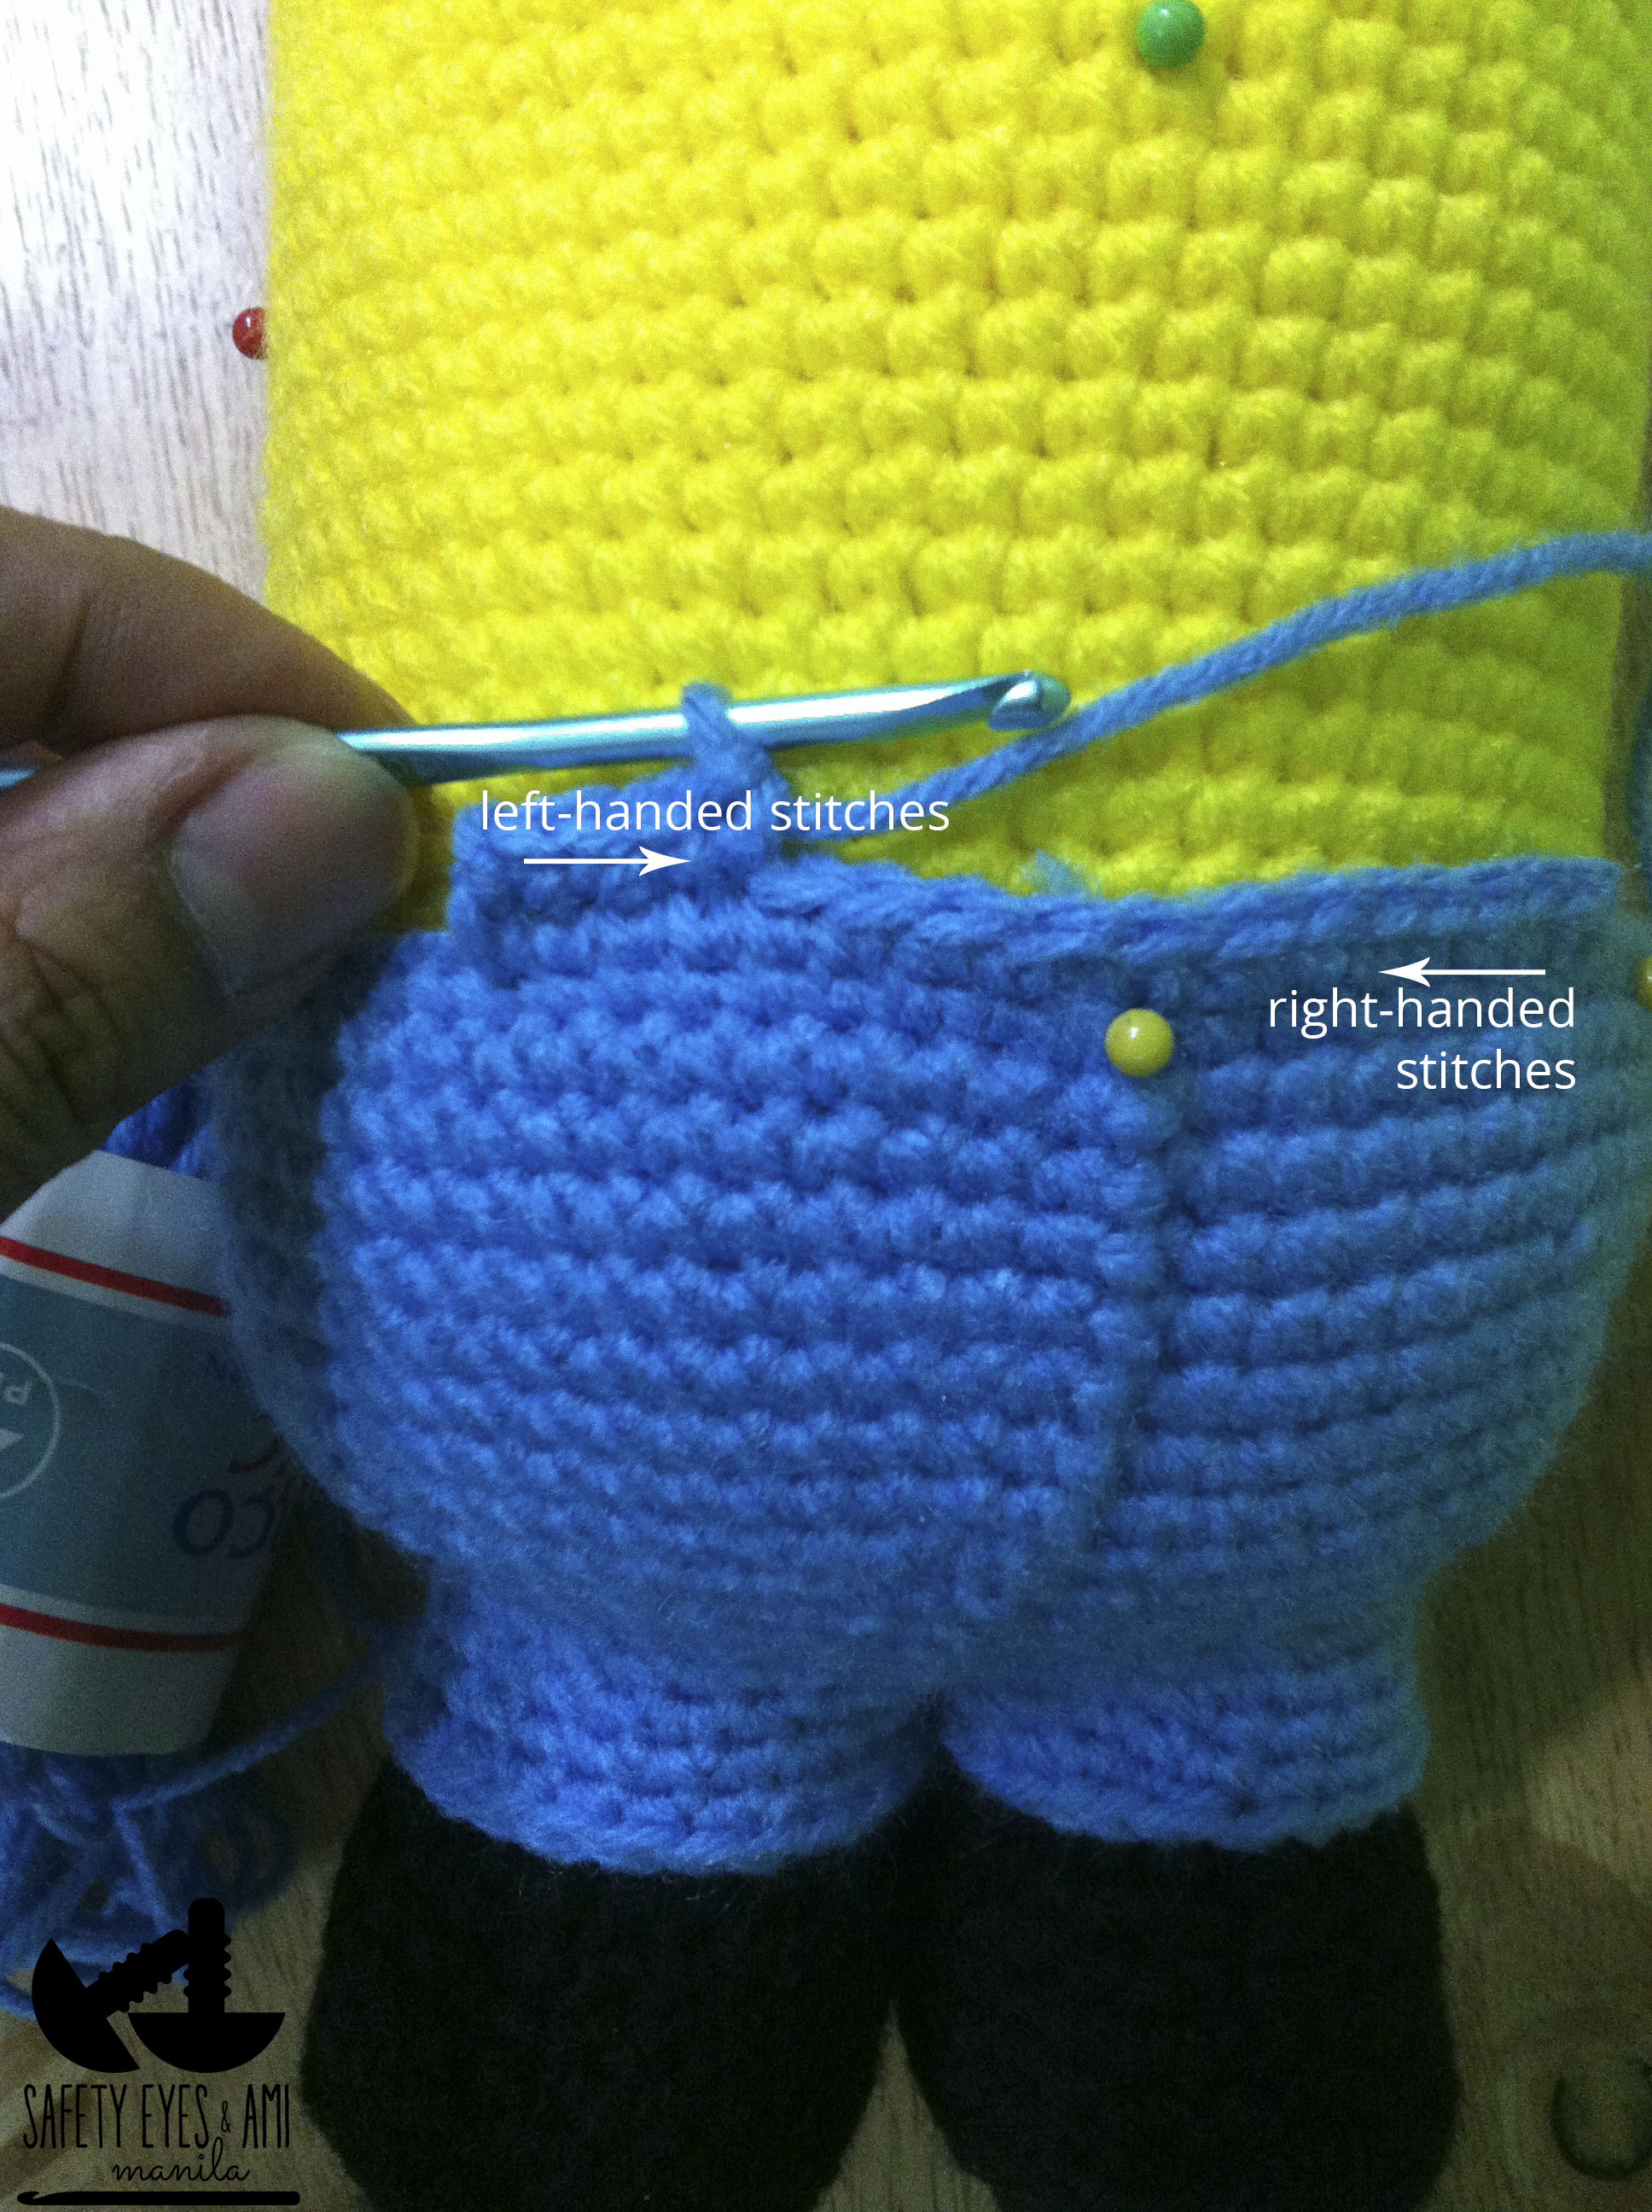
Sc continuously around the left leg until you reach the desired trouser length.  You'll need to sc on one side of the chain making sure you leave the other side of the chain for the right trouser leg.  Count your stitches at the end of the first round and try to make the same for the right leg.  Mine didn't come out even.  I think the right leg had a couple more stitches but in the end it really isn't very noticeable.  Finish and close as usual.
Despicable Me Crochet Minion
BIB
I'm not very fond of the look of turned work.  So instead of turning at the end of each row, I switched to my left hand and crocheted left to right and then switched back to my right hand to make the bib.  I did the same with the back.  It took 9 rows to reach my mark.
Despicable Me Crochet Minion
Make the pocket, straps, arms and gloves following Stephanie's pattern.   Since my Minion is shorter, I made less rounds to make the arms.  I also made more rounds in the gloves to make them longer and come higher up the arms, and the fingers 1 round longer.  I found a Gru logo online, used black and light blue felt and fabric glue.

Add the eyes and mouth as you wish.  I used felt circles in white, brown and black to make my Minion's eyes.  I added little white dots to the eyes because without them, he looked like a zombie staring blankly at me.
Despicable Me Crochet Minion
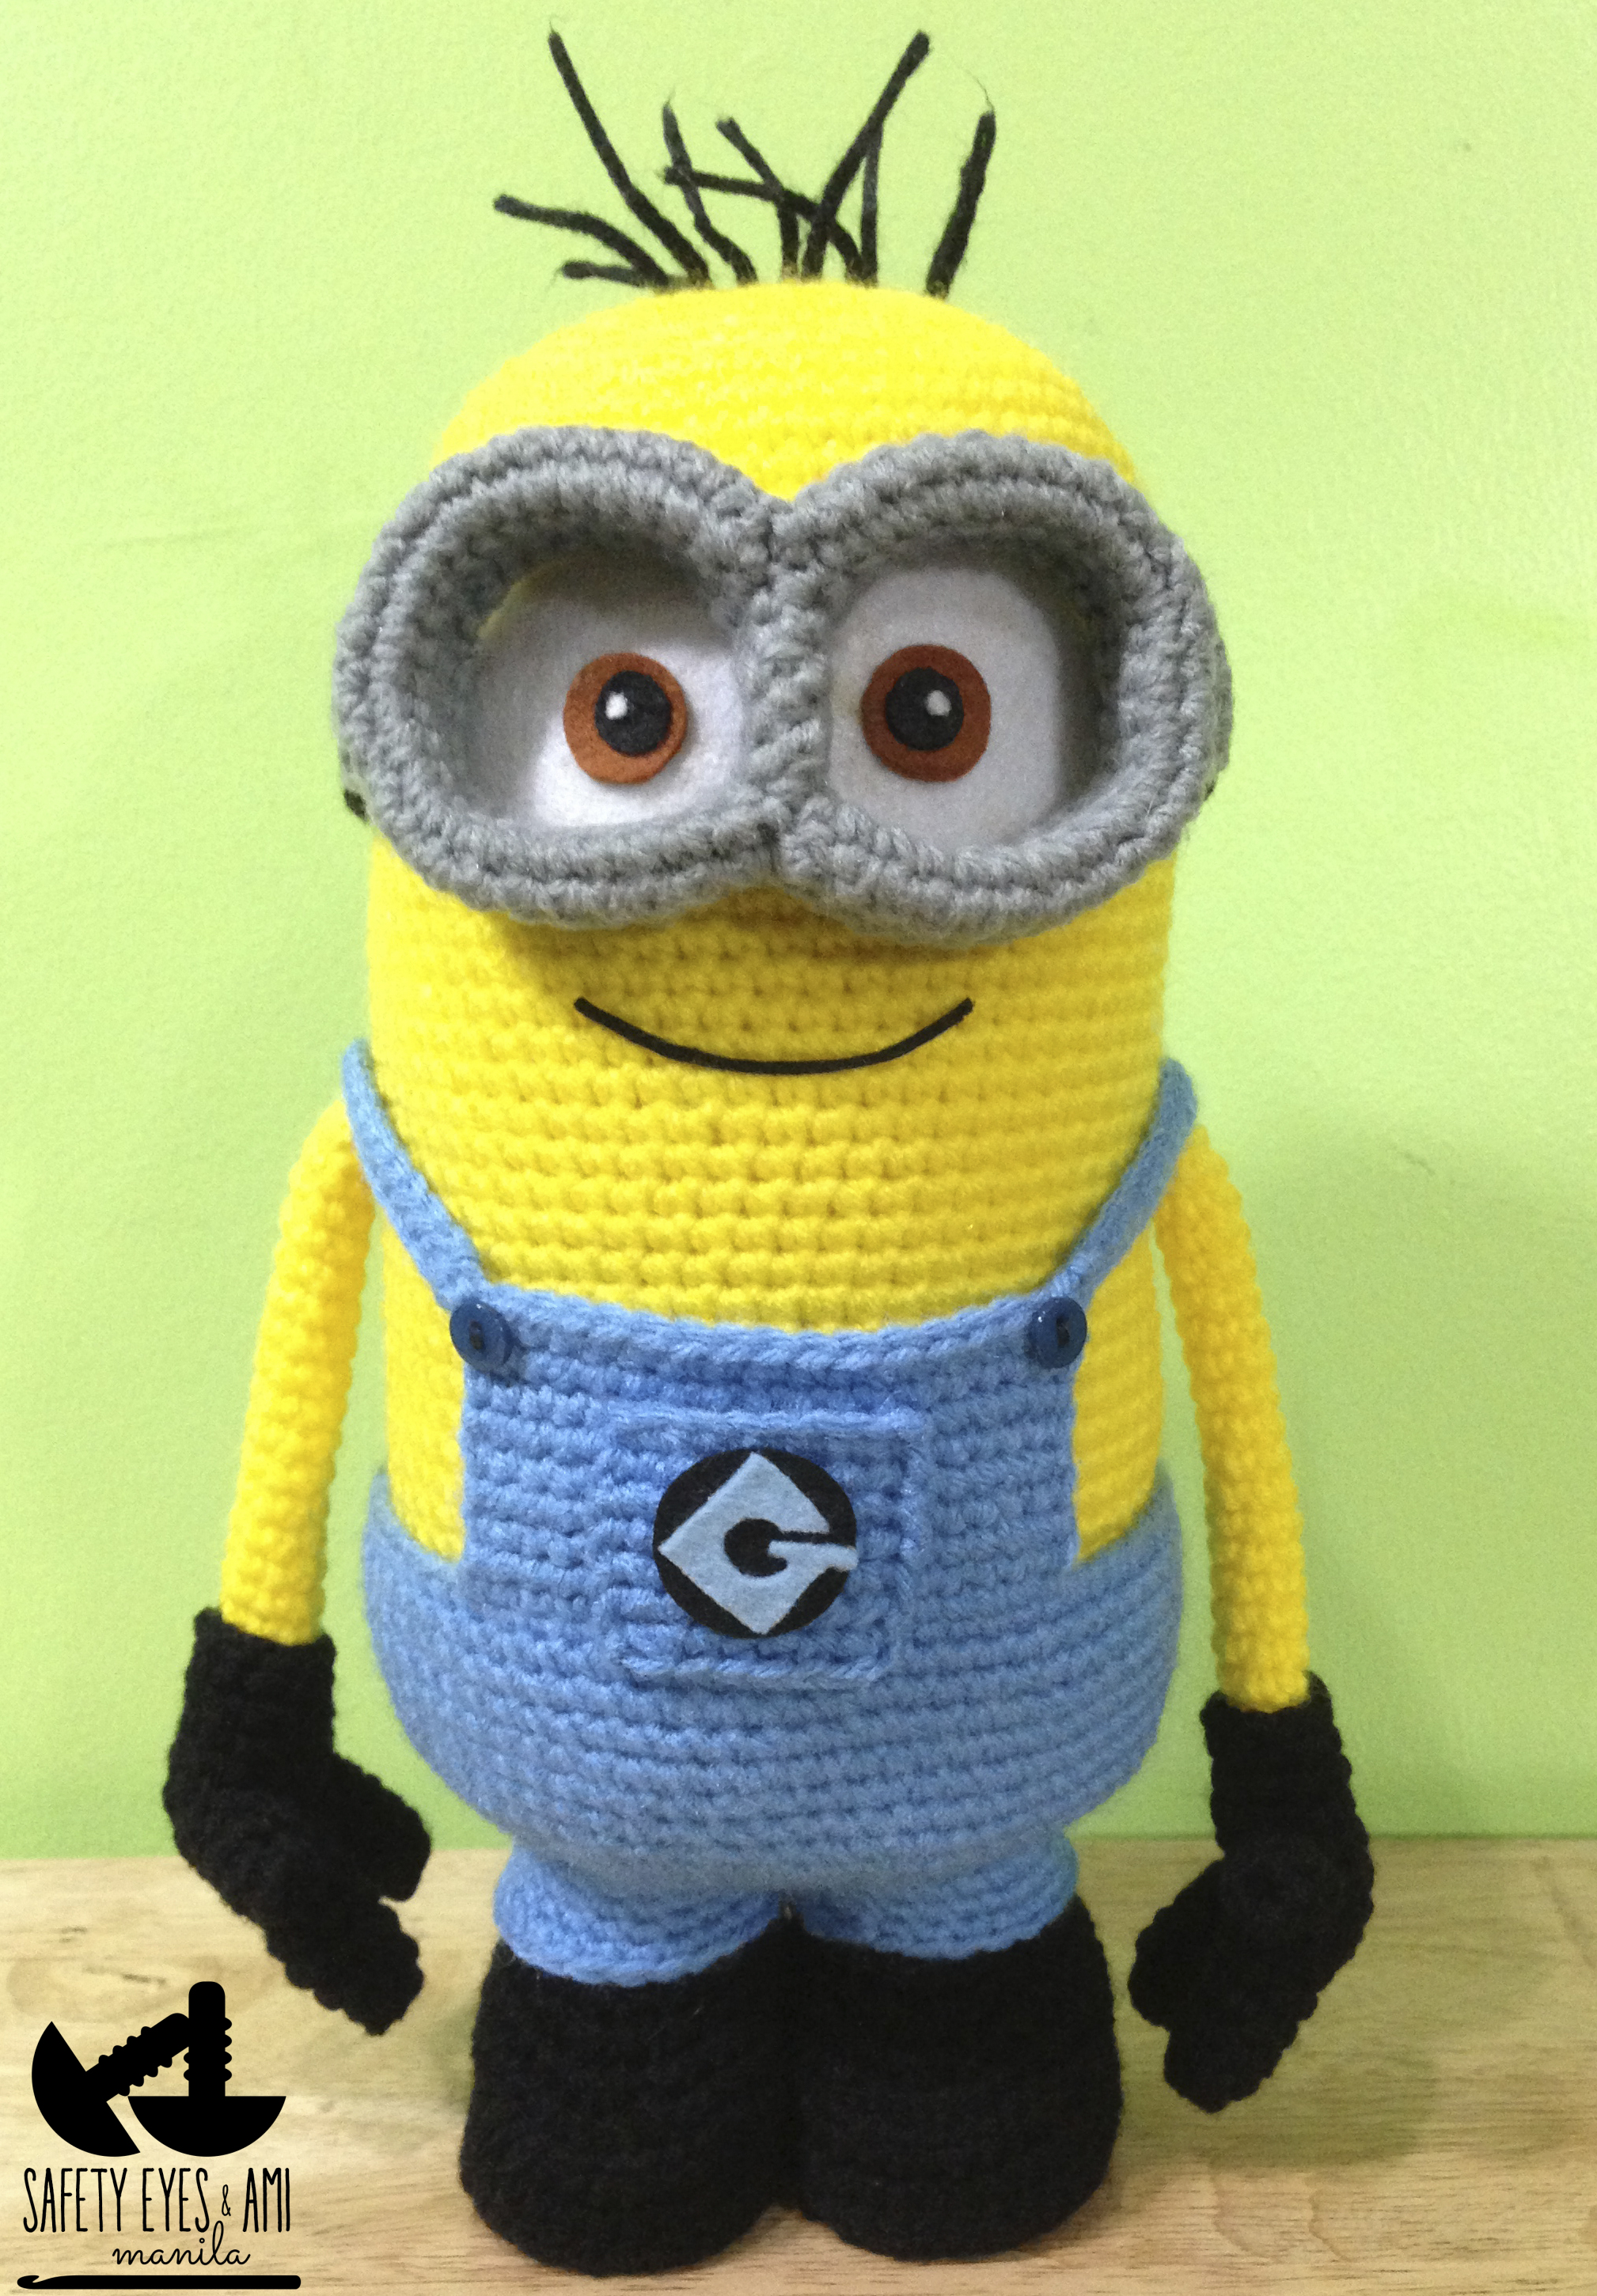
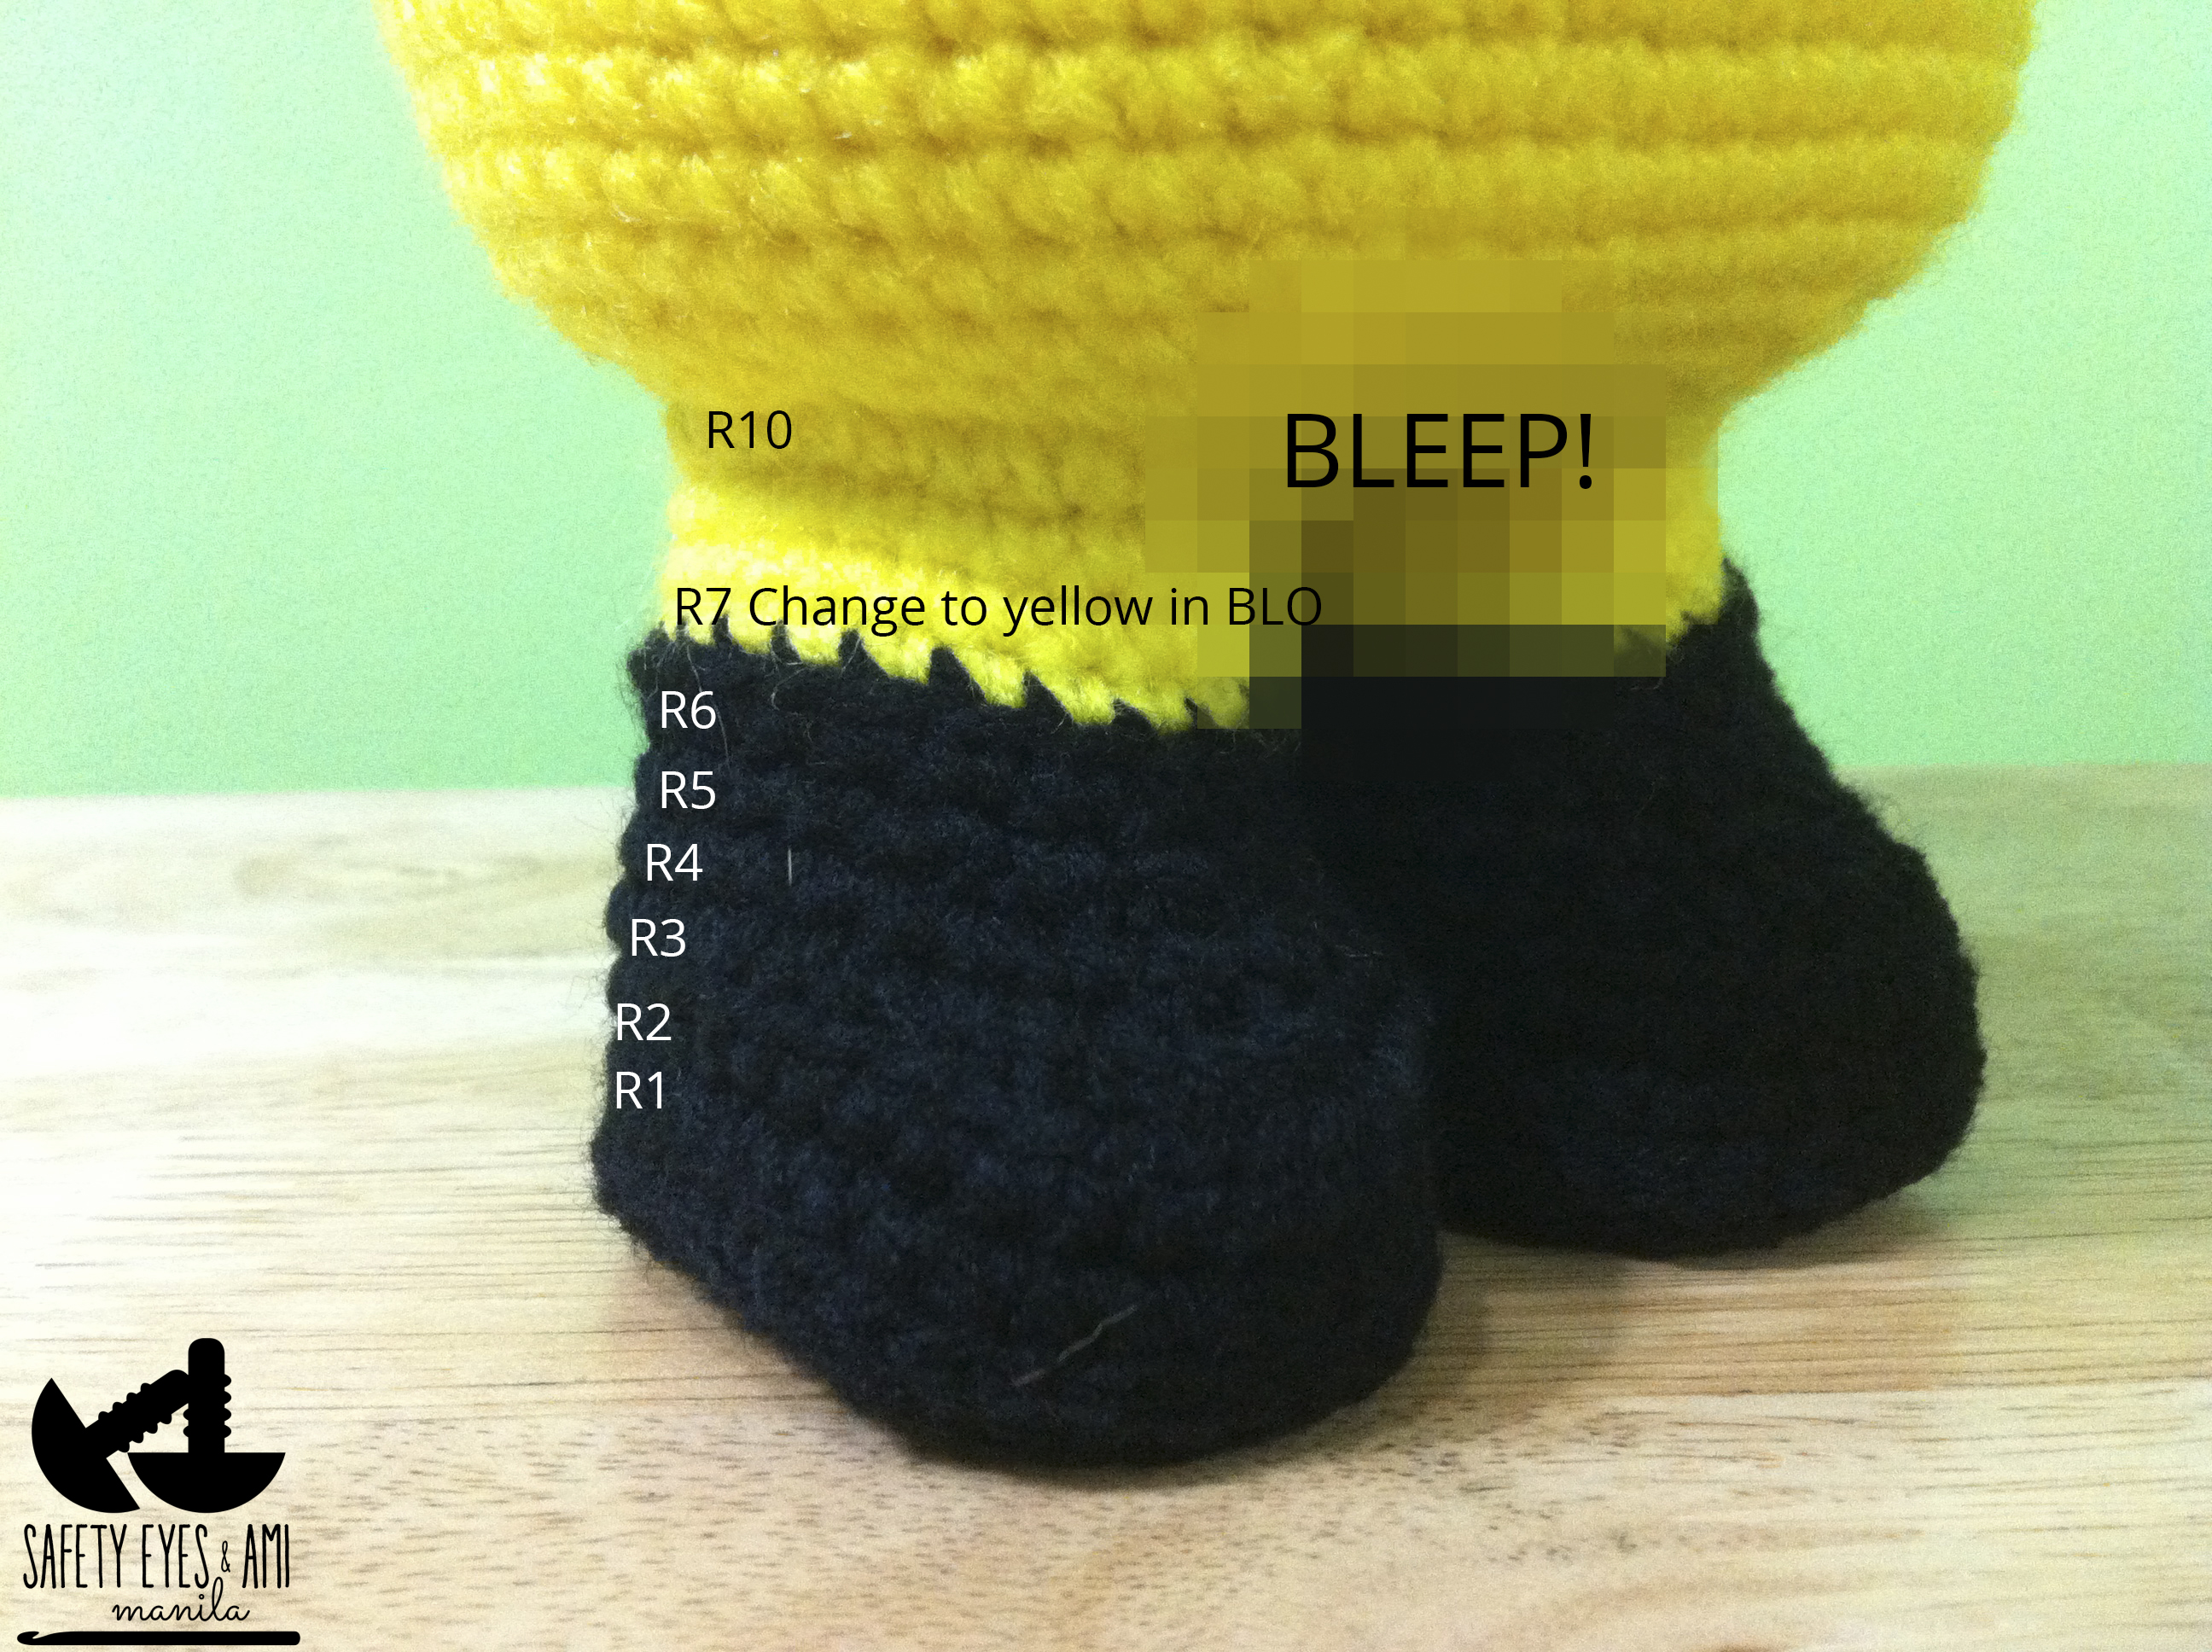
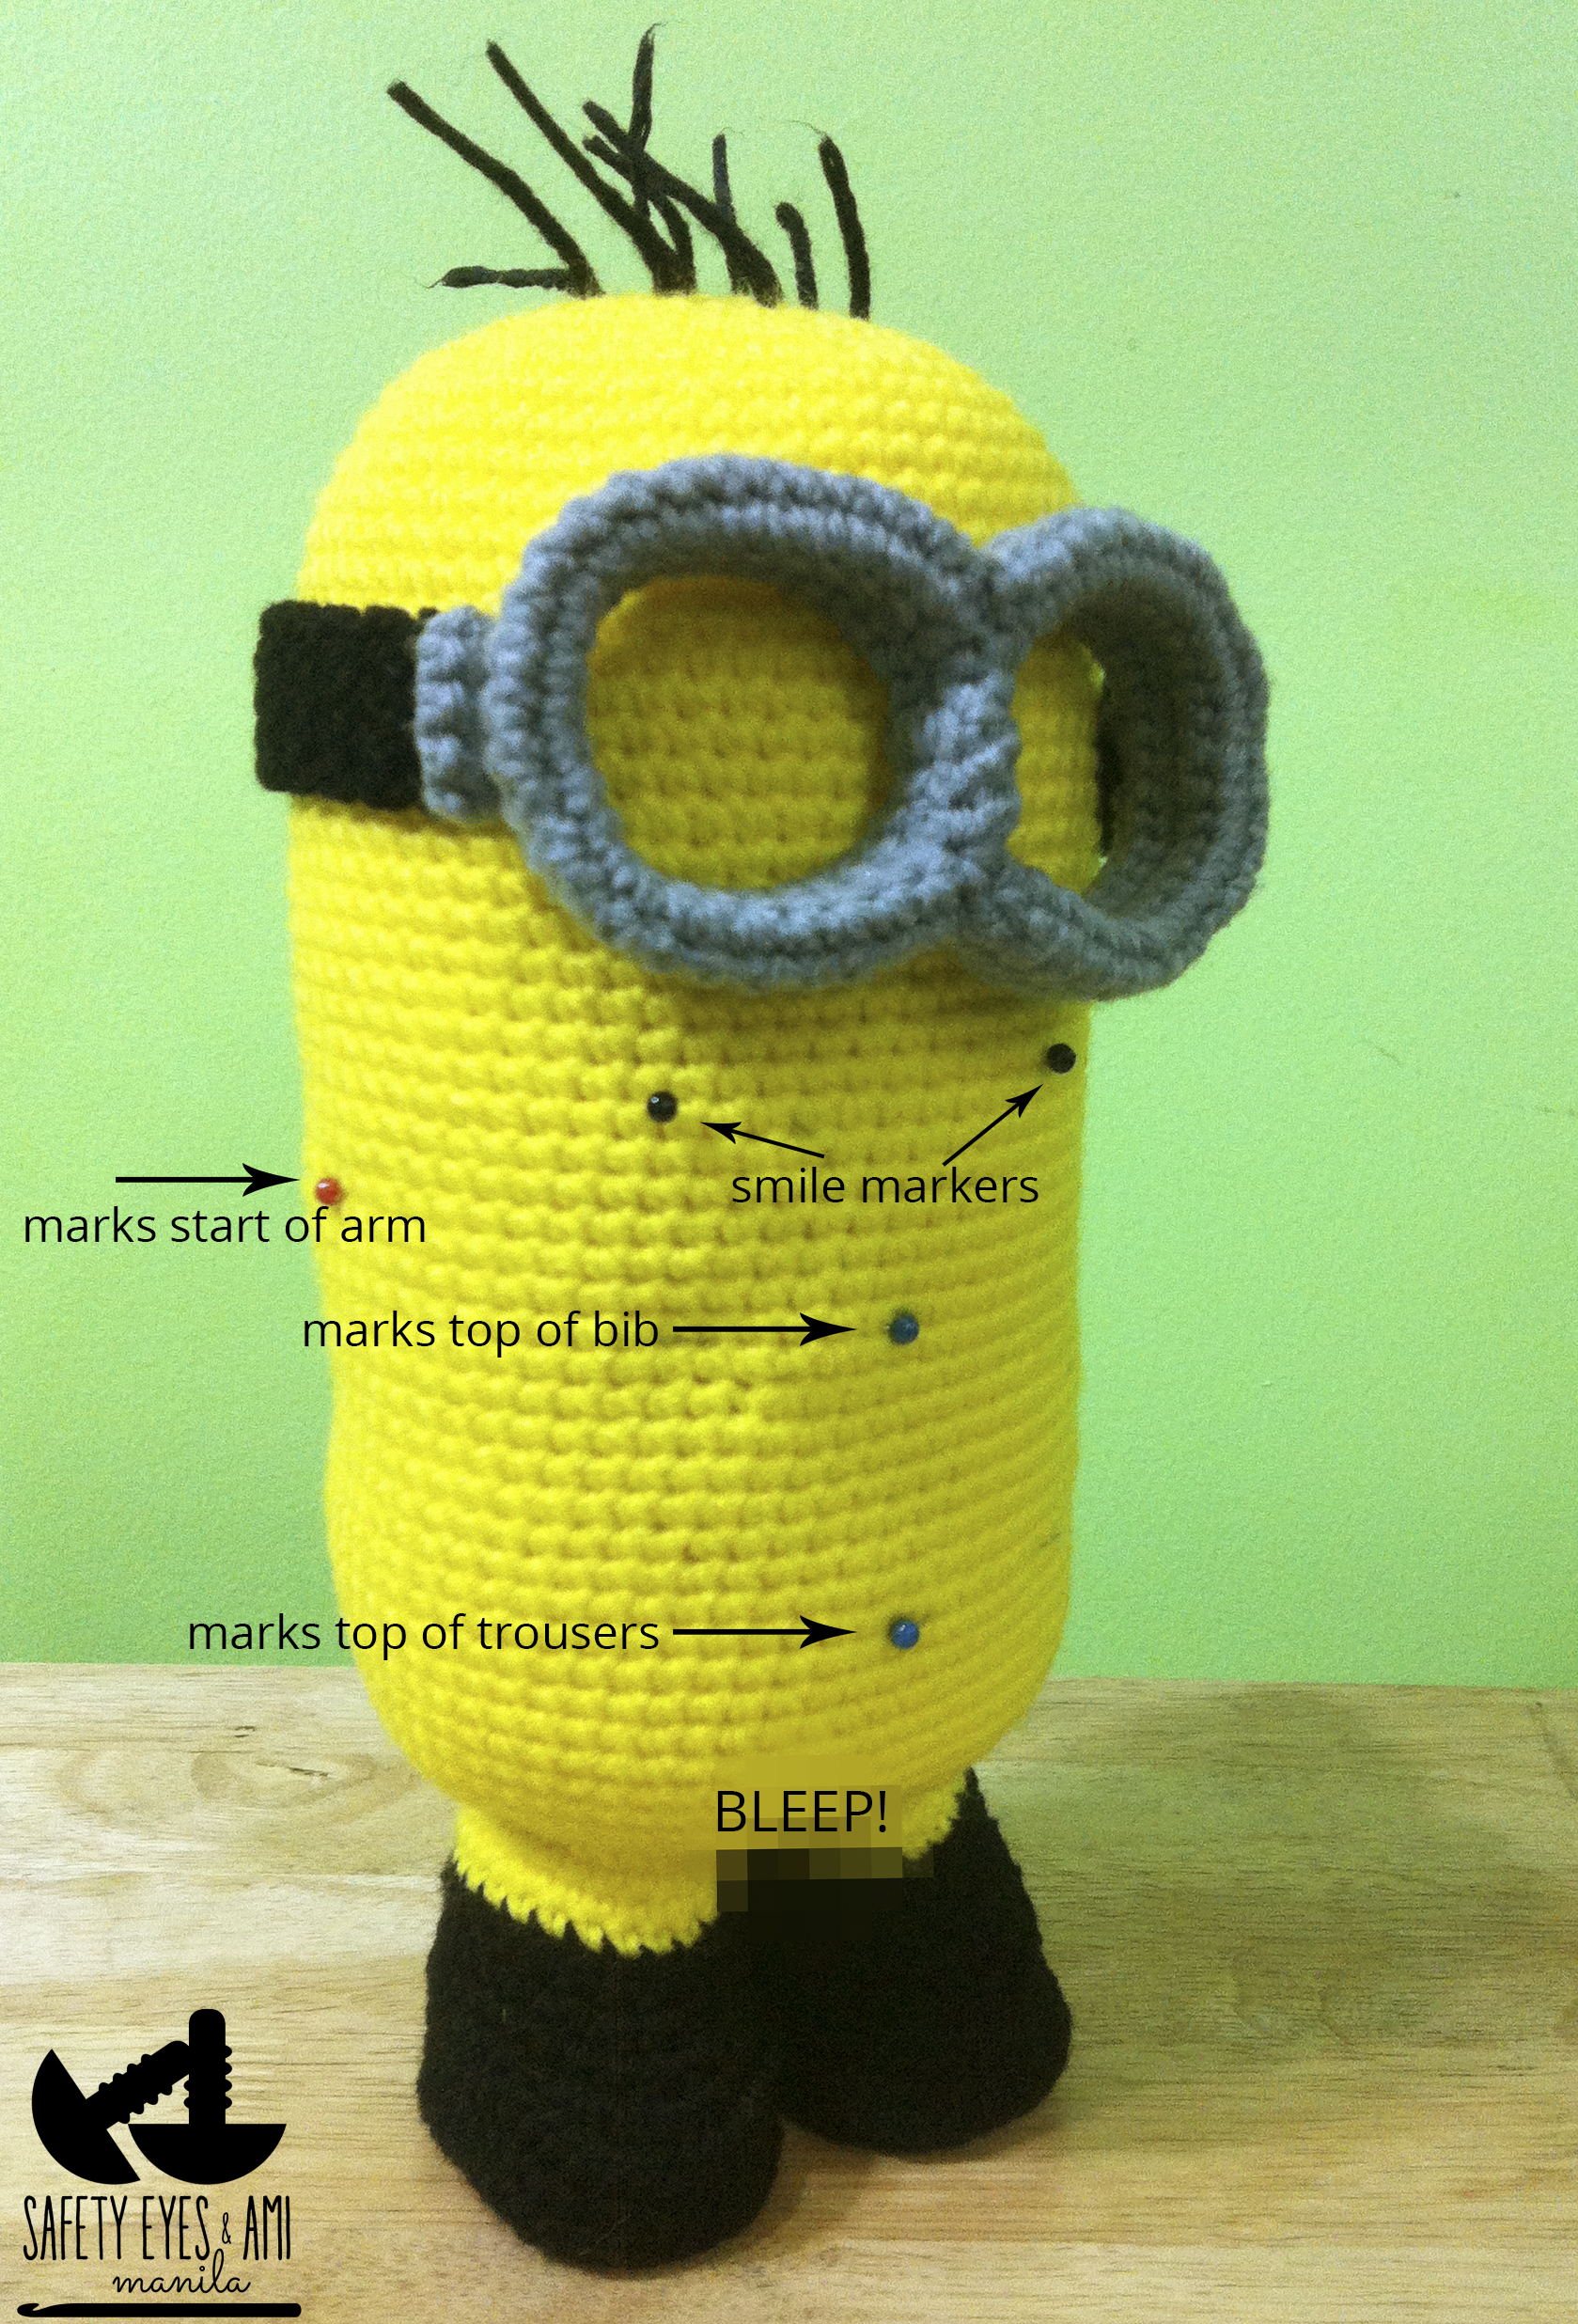
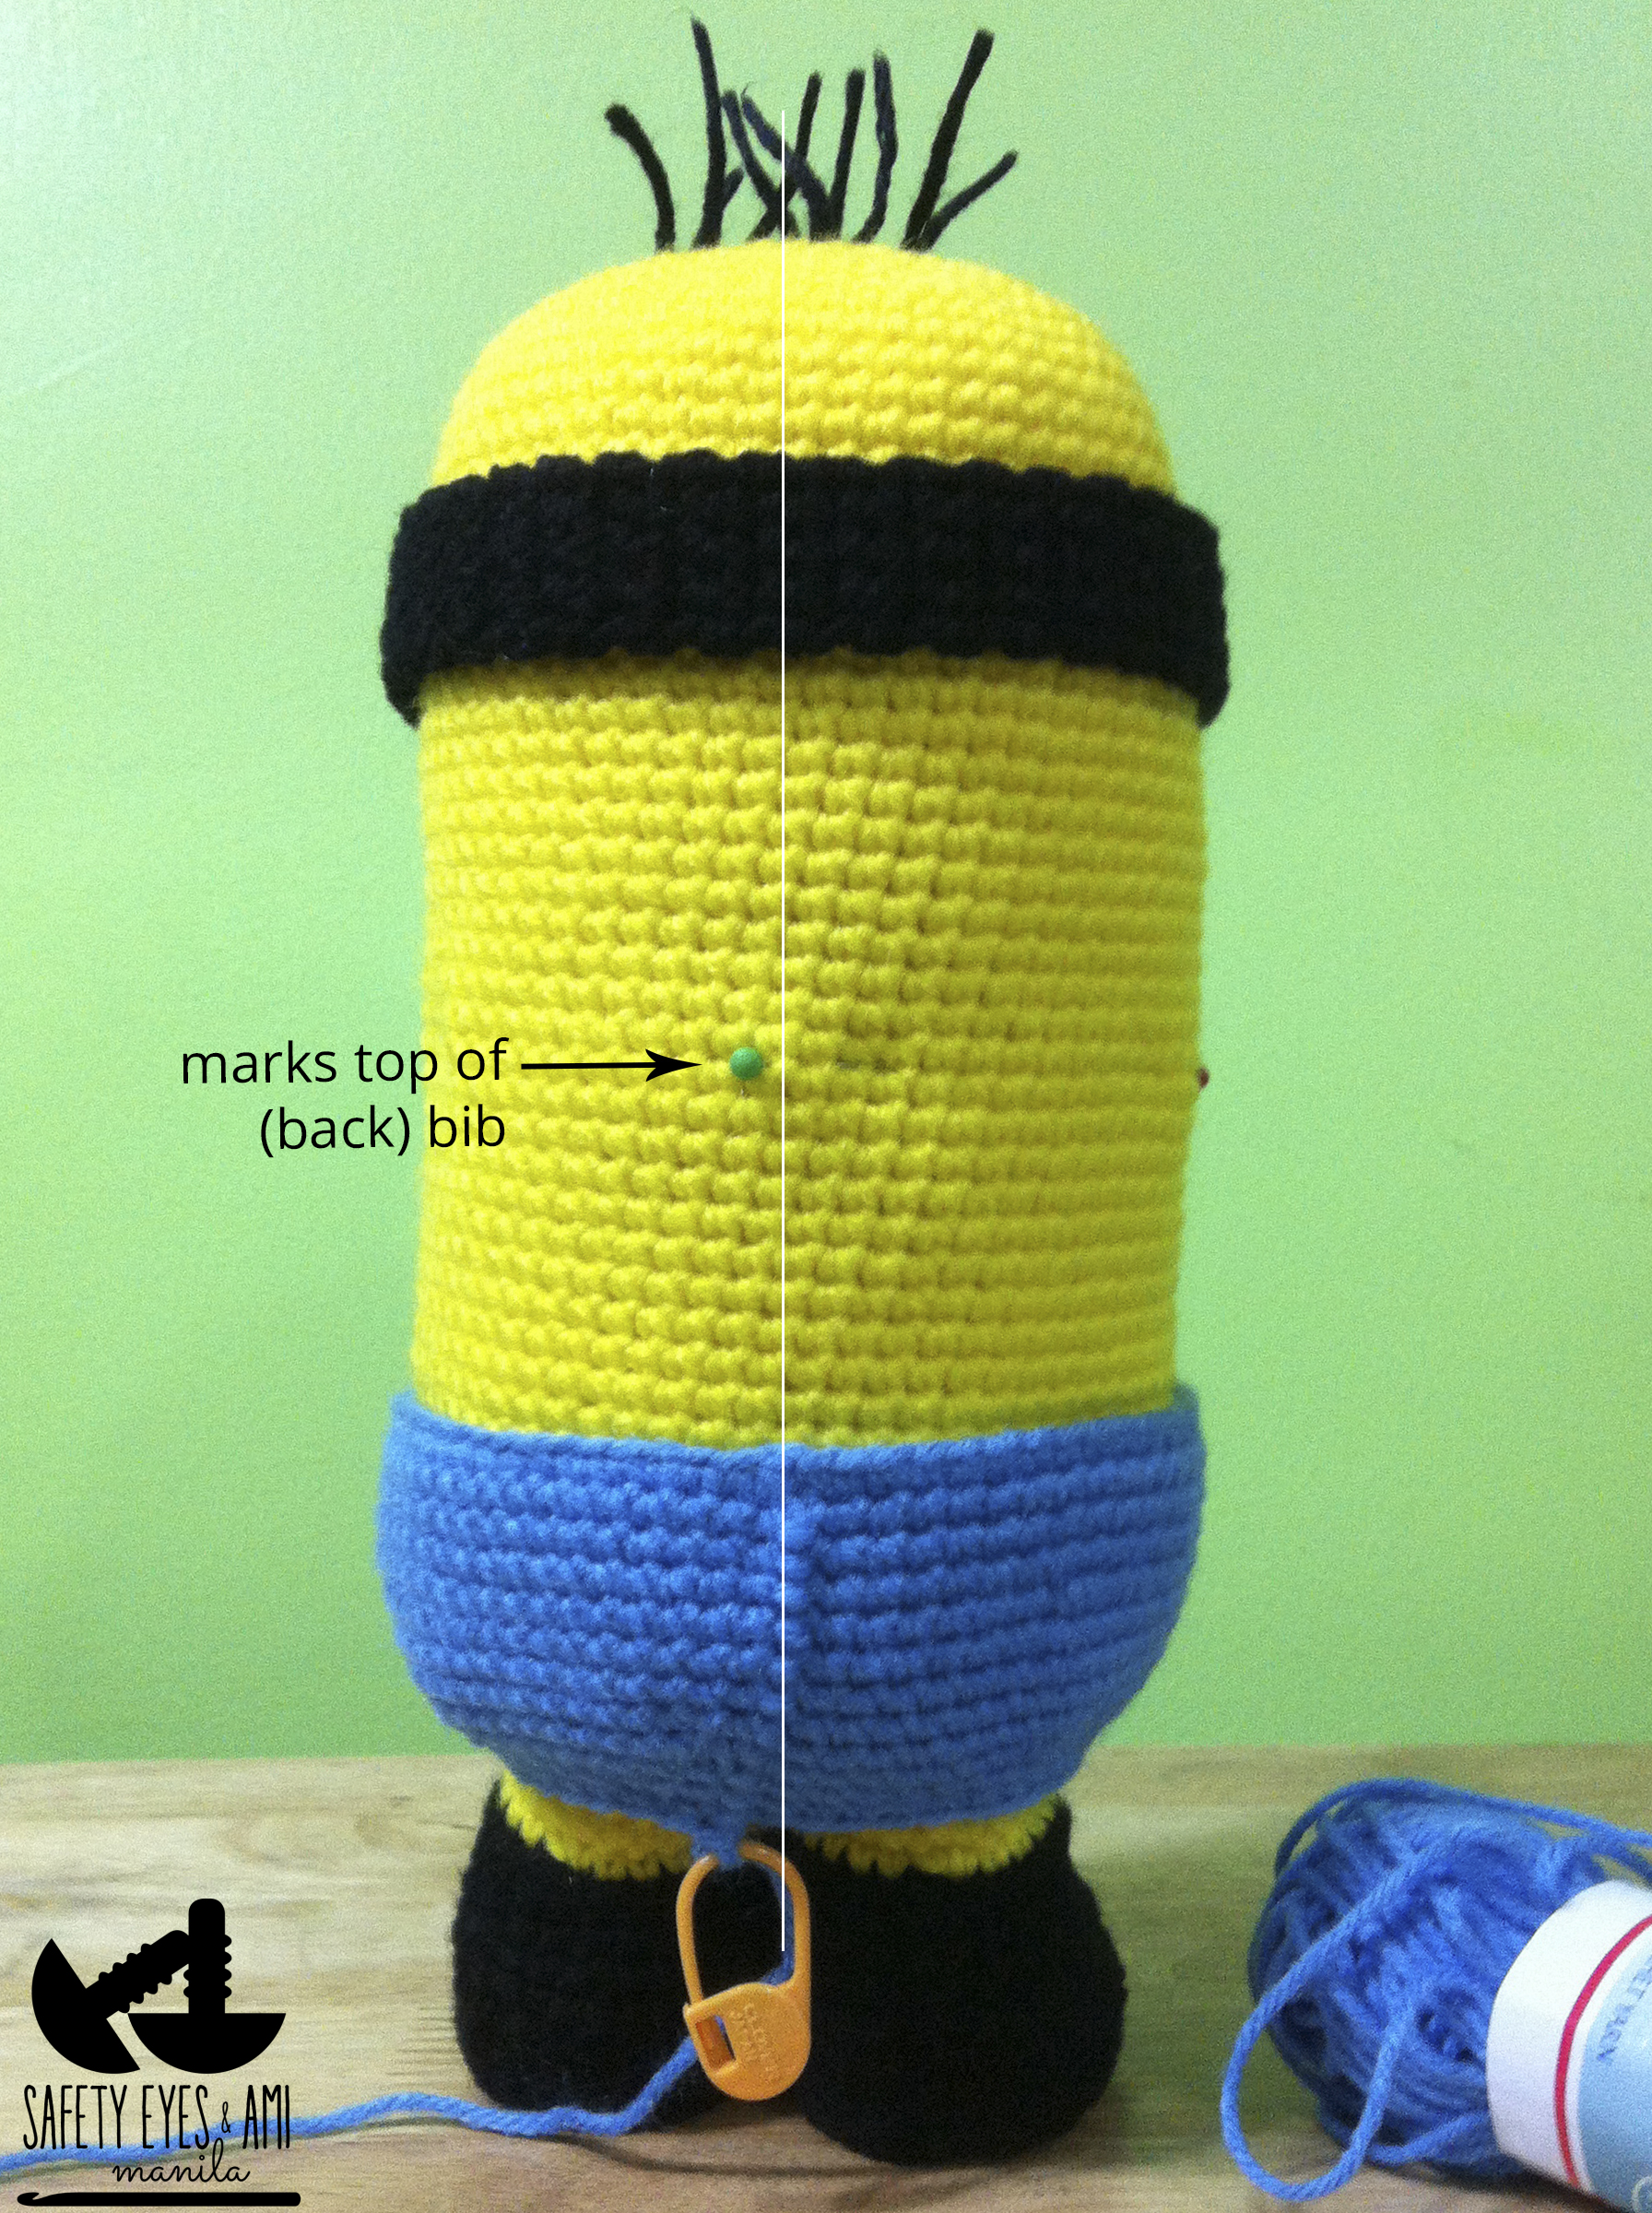
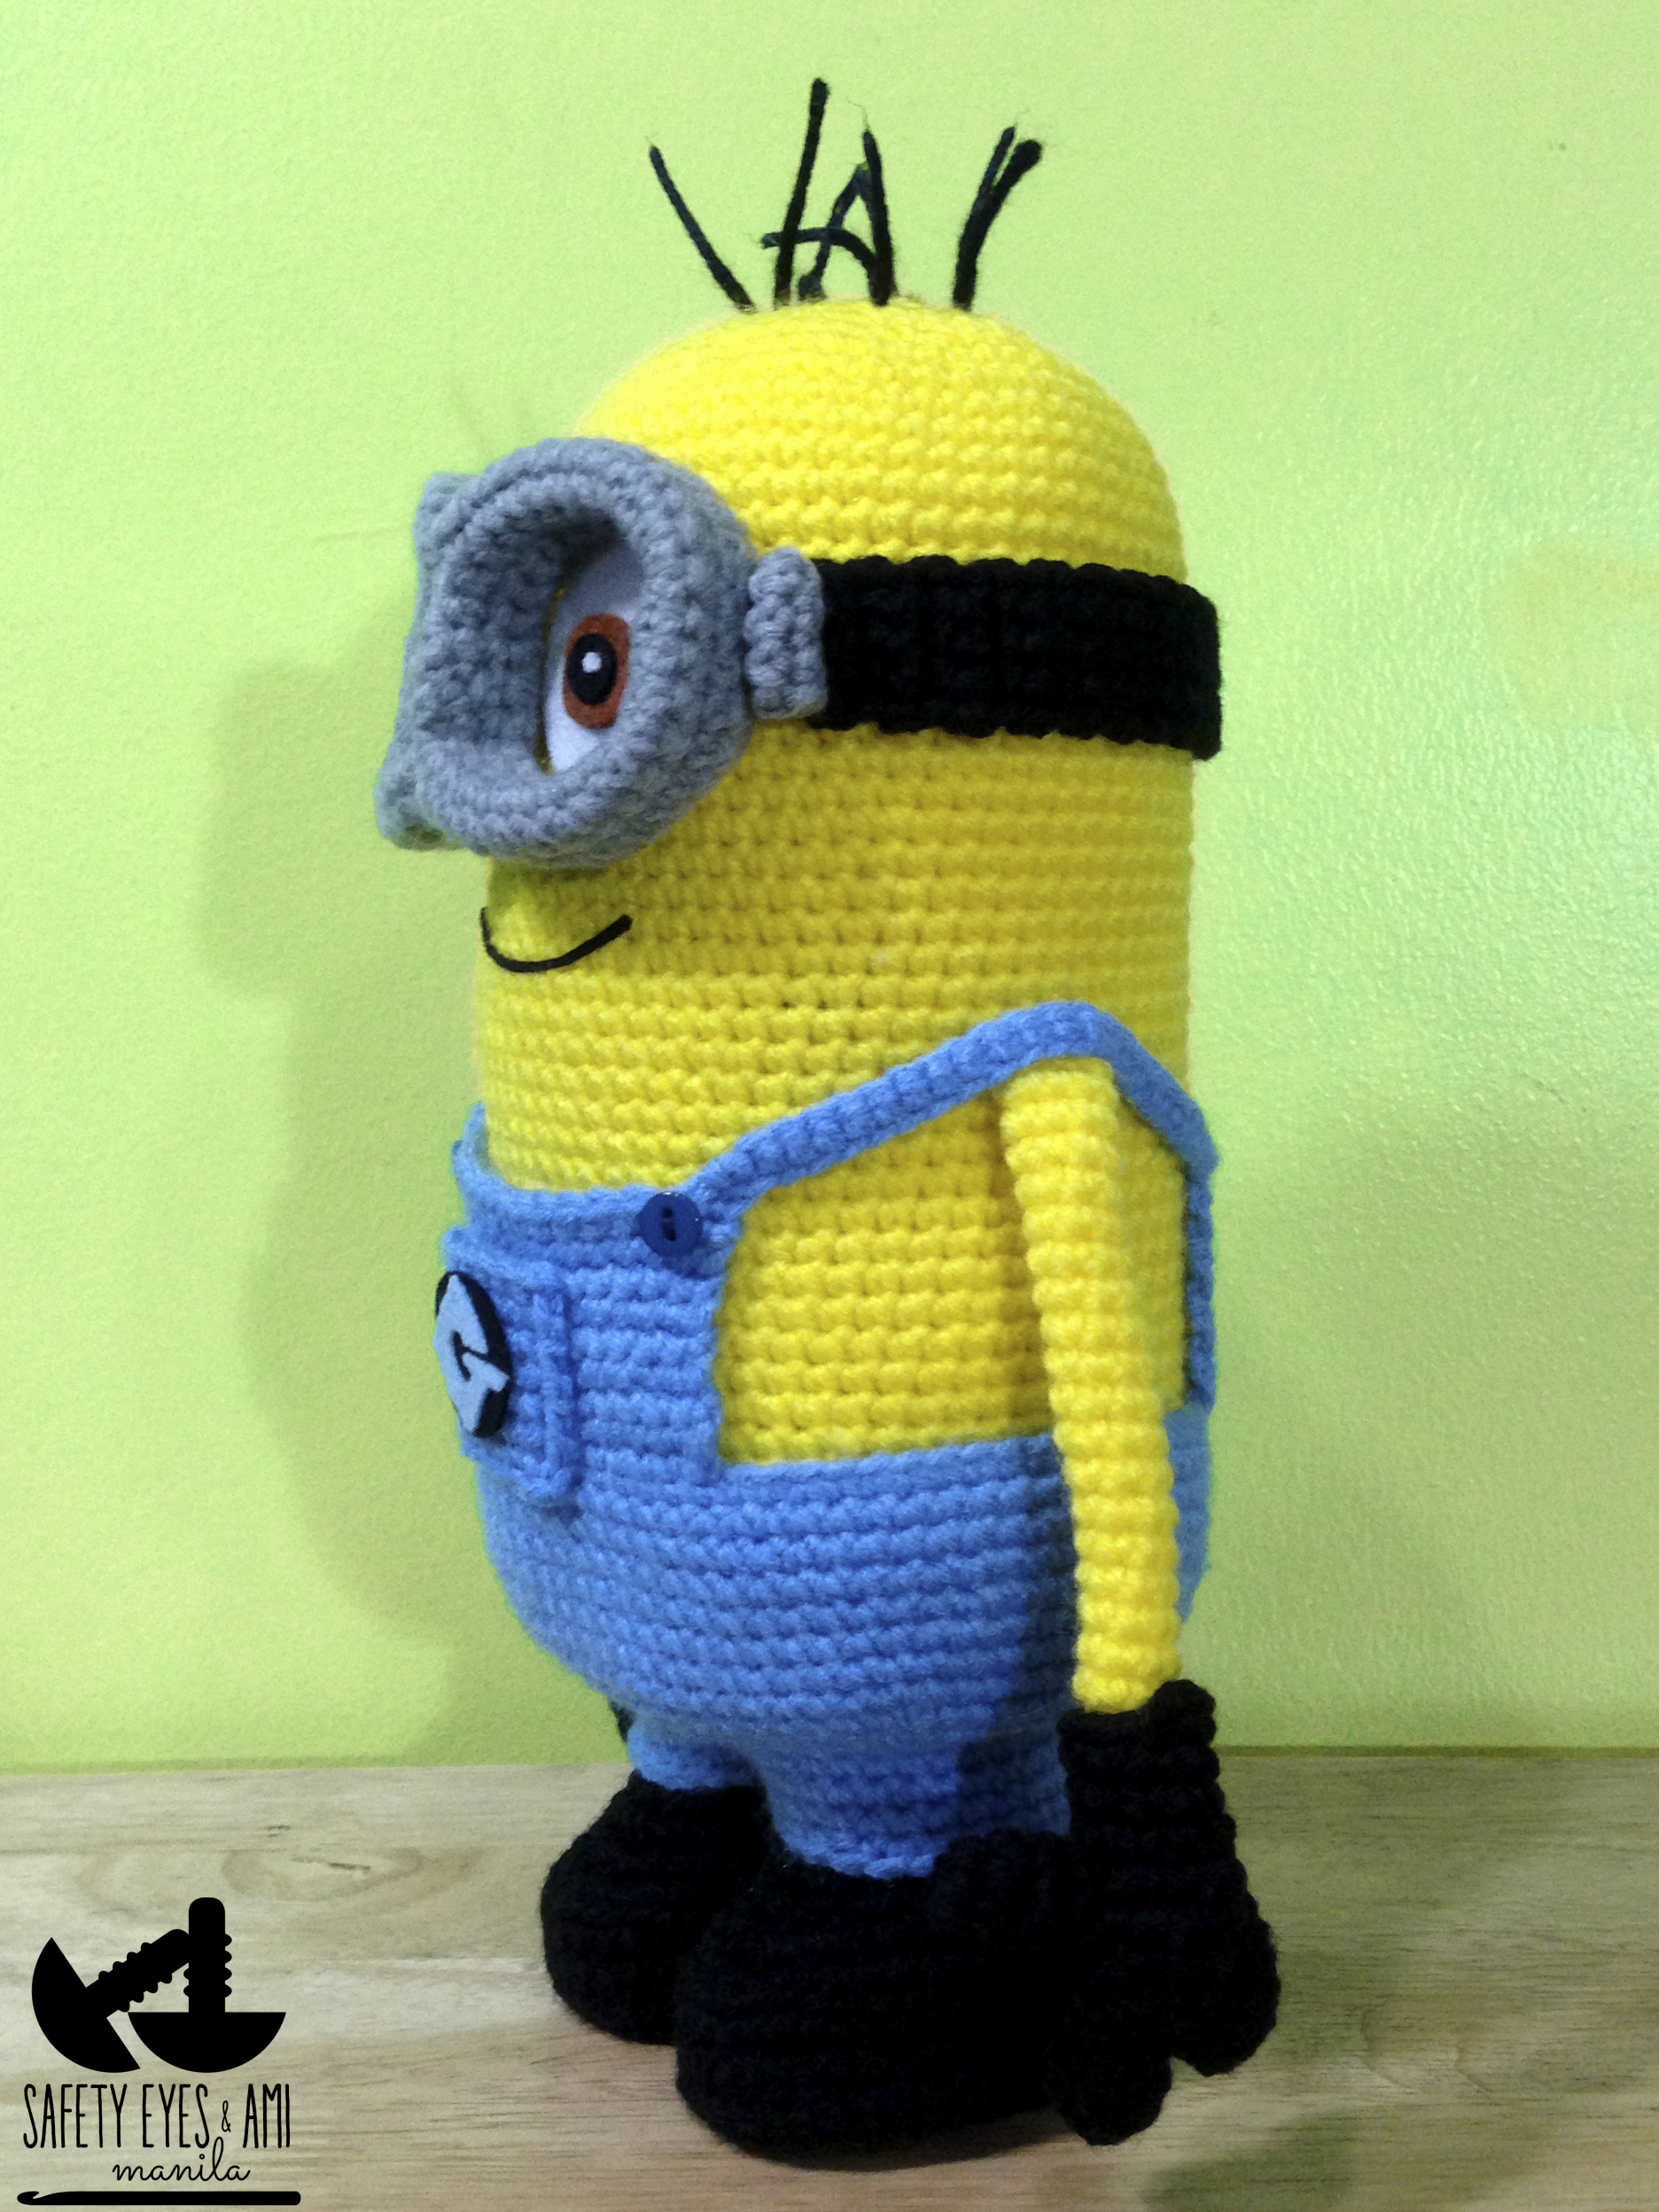
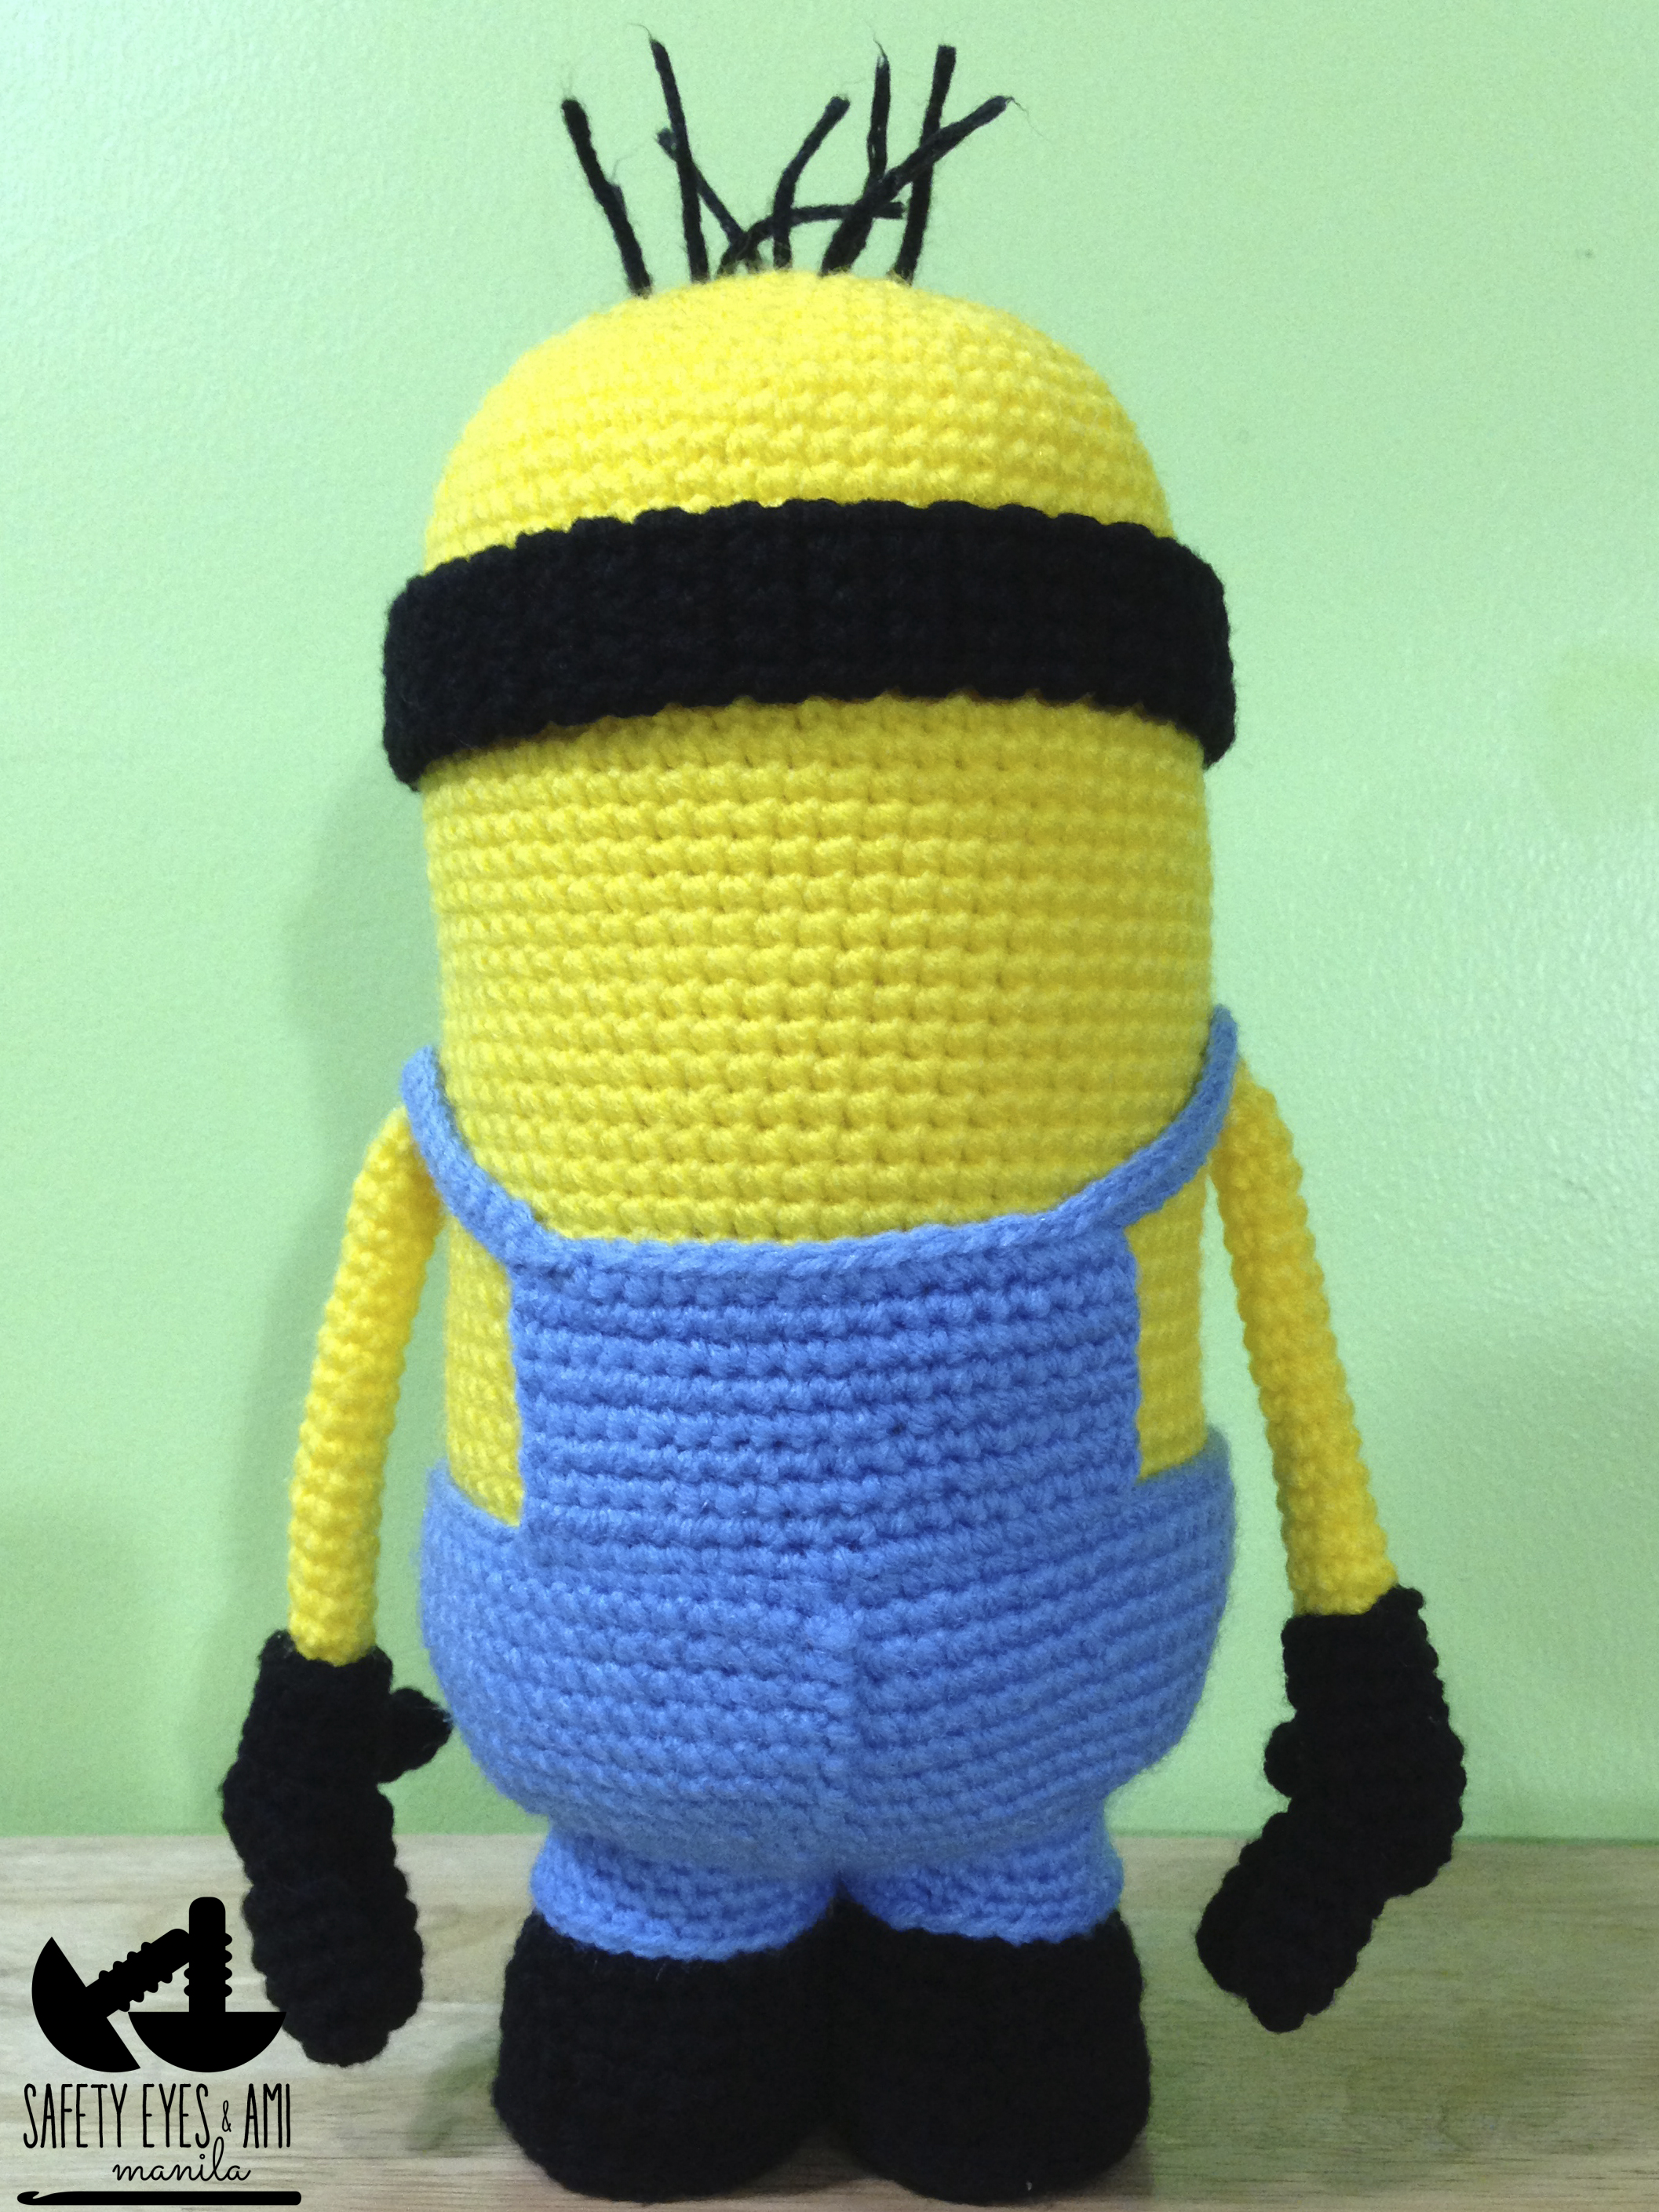
So here is my finished Minion! Because of his double sole boots and big feet, he can easily stand on his own.  If you lift the hem of his trousers, you can see his yellow legs (tee hee hee). Unfortunately because of how the overalls are made, they will never come off like Stephanie's unless you make his trouser legs loose enough for his feet to pass through or make his feet smaller.

I hope you've found my instructions and photos helpful.  You are free to share them but please, link back to this blog should you wish to share any of my photos or instructions. Again, I'd like to thank Stephanie of AllAboutAmi for sharing her pattern and inspiring me to experiment and share :)

50 Comments

    Archives

    April 2016
    April 2015
    May 2014
    January 2014
    October 2013
    September 2013
    August 2013
    July 2013
    March 2013
    October 2012

    Categories

    All
    Crochet
    Crochet Supplies
    Despicable Me
    Diy
    Diy Tips
    Hobbes
    Minion
    Patterns
    Tutorials

    RSS Feed

Follow me! or E-mail me!
Home   Blog     My Supplies    Yarn Travels    Gallery   Safety Eyes   Store   Contact Me
© Safety Eyes & Ami Manila is owned by Rosanna Z. Romero.  All rights reserved.
  • Home
  • Blog
  • My Supplies
  • Yarn Travels
  • Gallery
    • Amigurumi
    • Baby Booties
    • Christmas Decor
    • Star Wars Series
    • Zodiac Kitty Series
  • Safety Eyes
  • Contact Us